DIY Fortnite Double Helix Costume

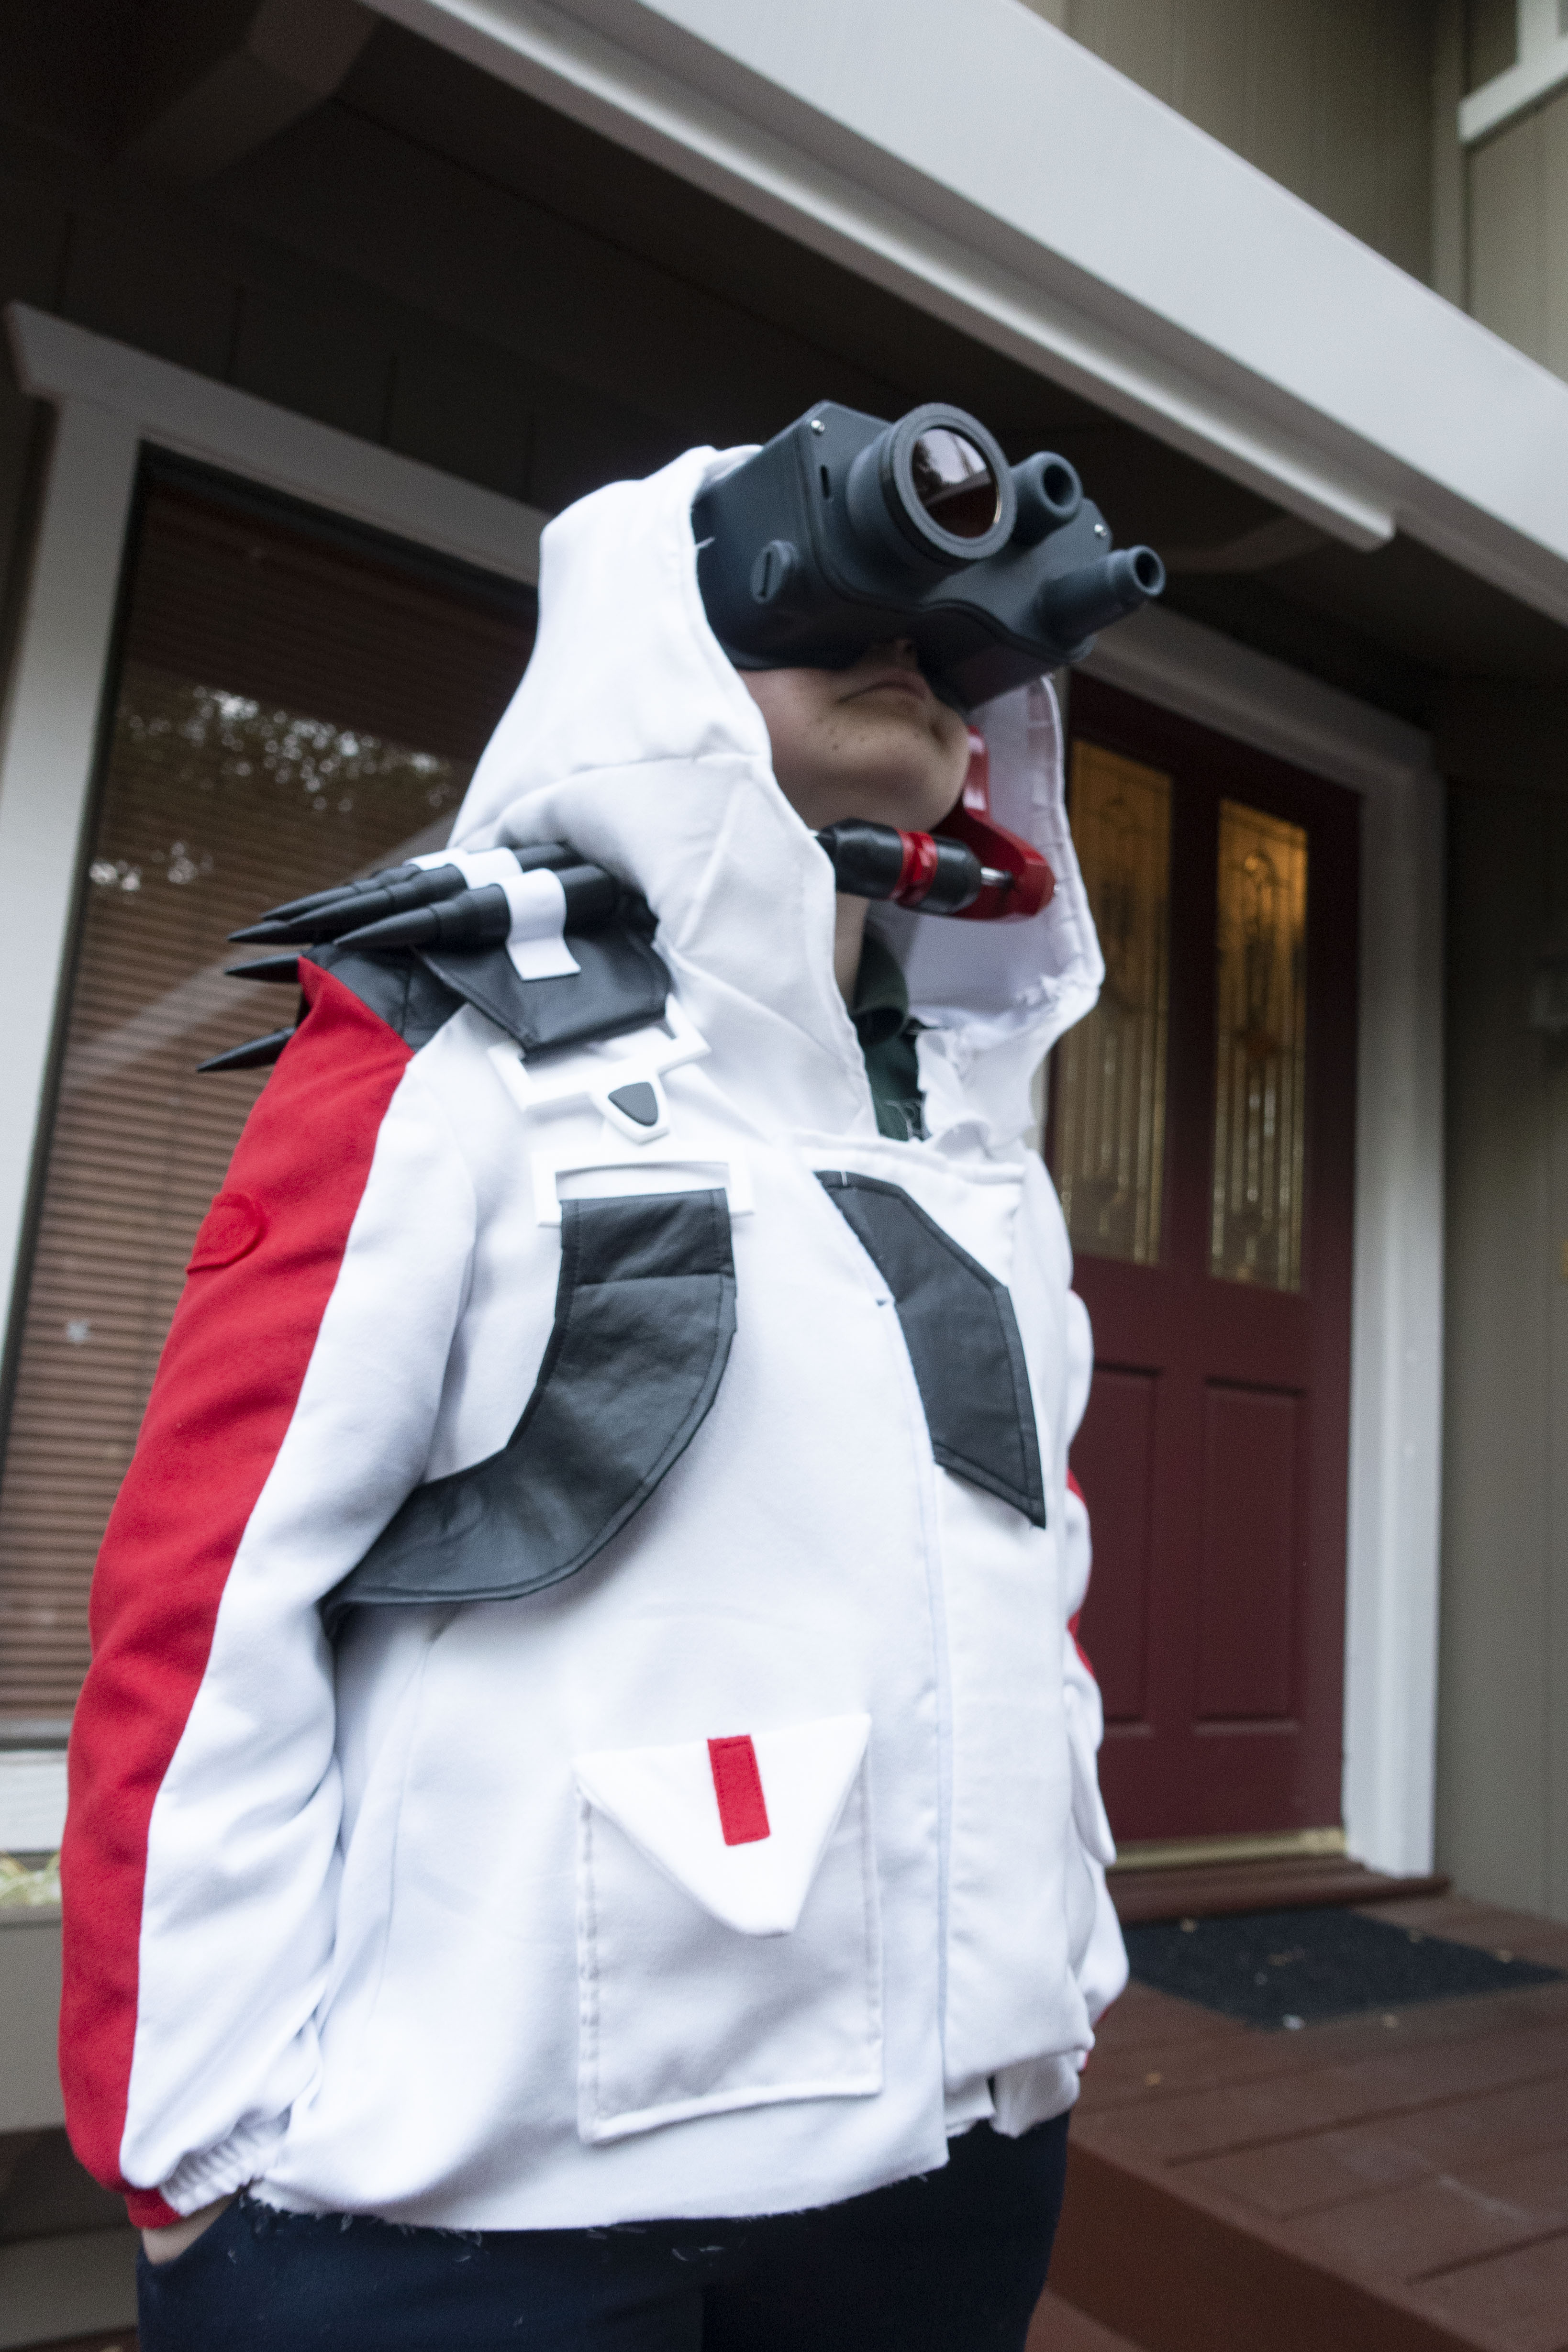
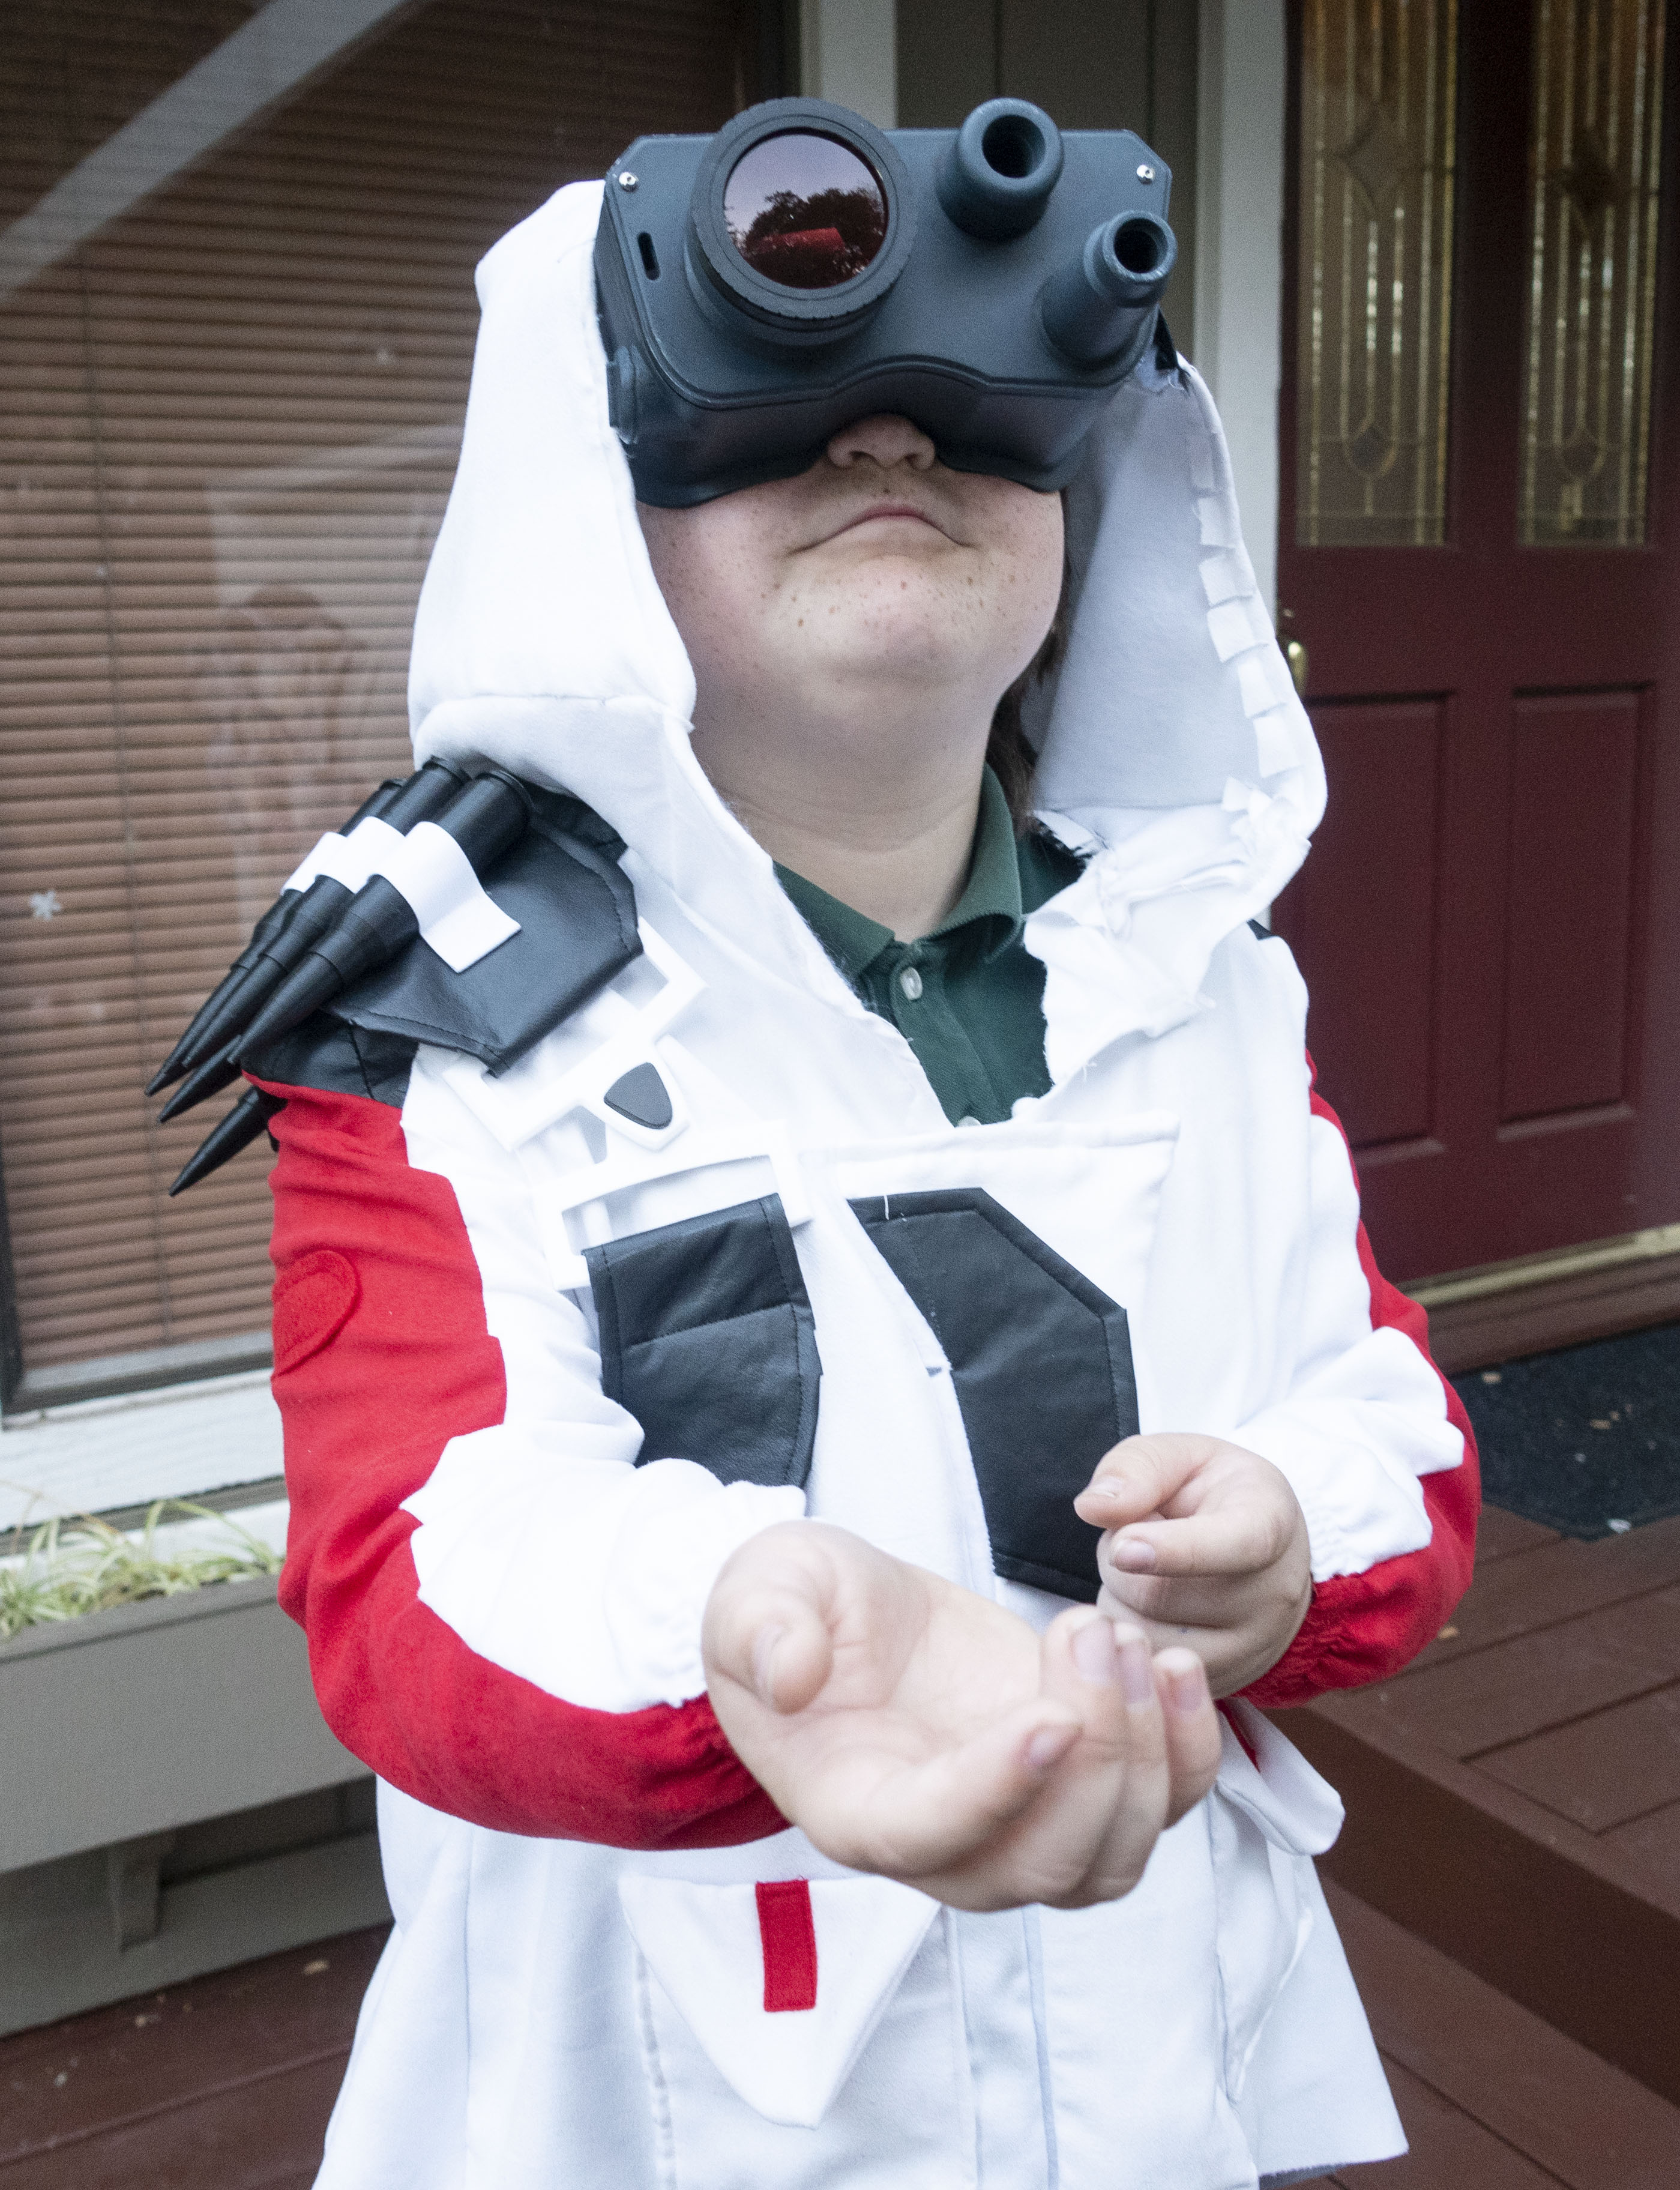
This year I scratch-built a Double Helix costume for my 11-year-old son Simon.  This was a bit tricky because the character was only released on Oct 5th, so reference art was a bit thin on the ground.  I did a combination of an original pattern for sewing the jacket plus 3D printing of the goggles, breathing apparatus, and bullets. With such a new character, I knew Simon was going to spend a lot of time explaining whom he was dressed as, but on the plus side he wasn’t going to run into any other kids with the same costume!

To make the head gear more comfortable to wear, I bought a cheap magnifier that had an adjustable head band and adapted the design to fit that.  That way it could fit different people and be flipped up out of the way so he could actually see out of both eyes.  I knew that he wouldn’t be able to wear it though a long night of trick-or-treating, but it would be reasonable to wear for modest periods of time.

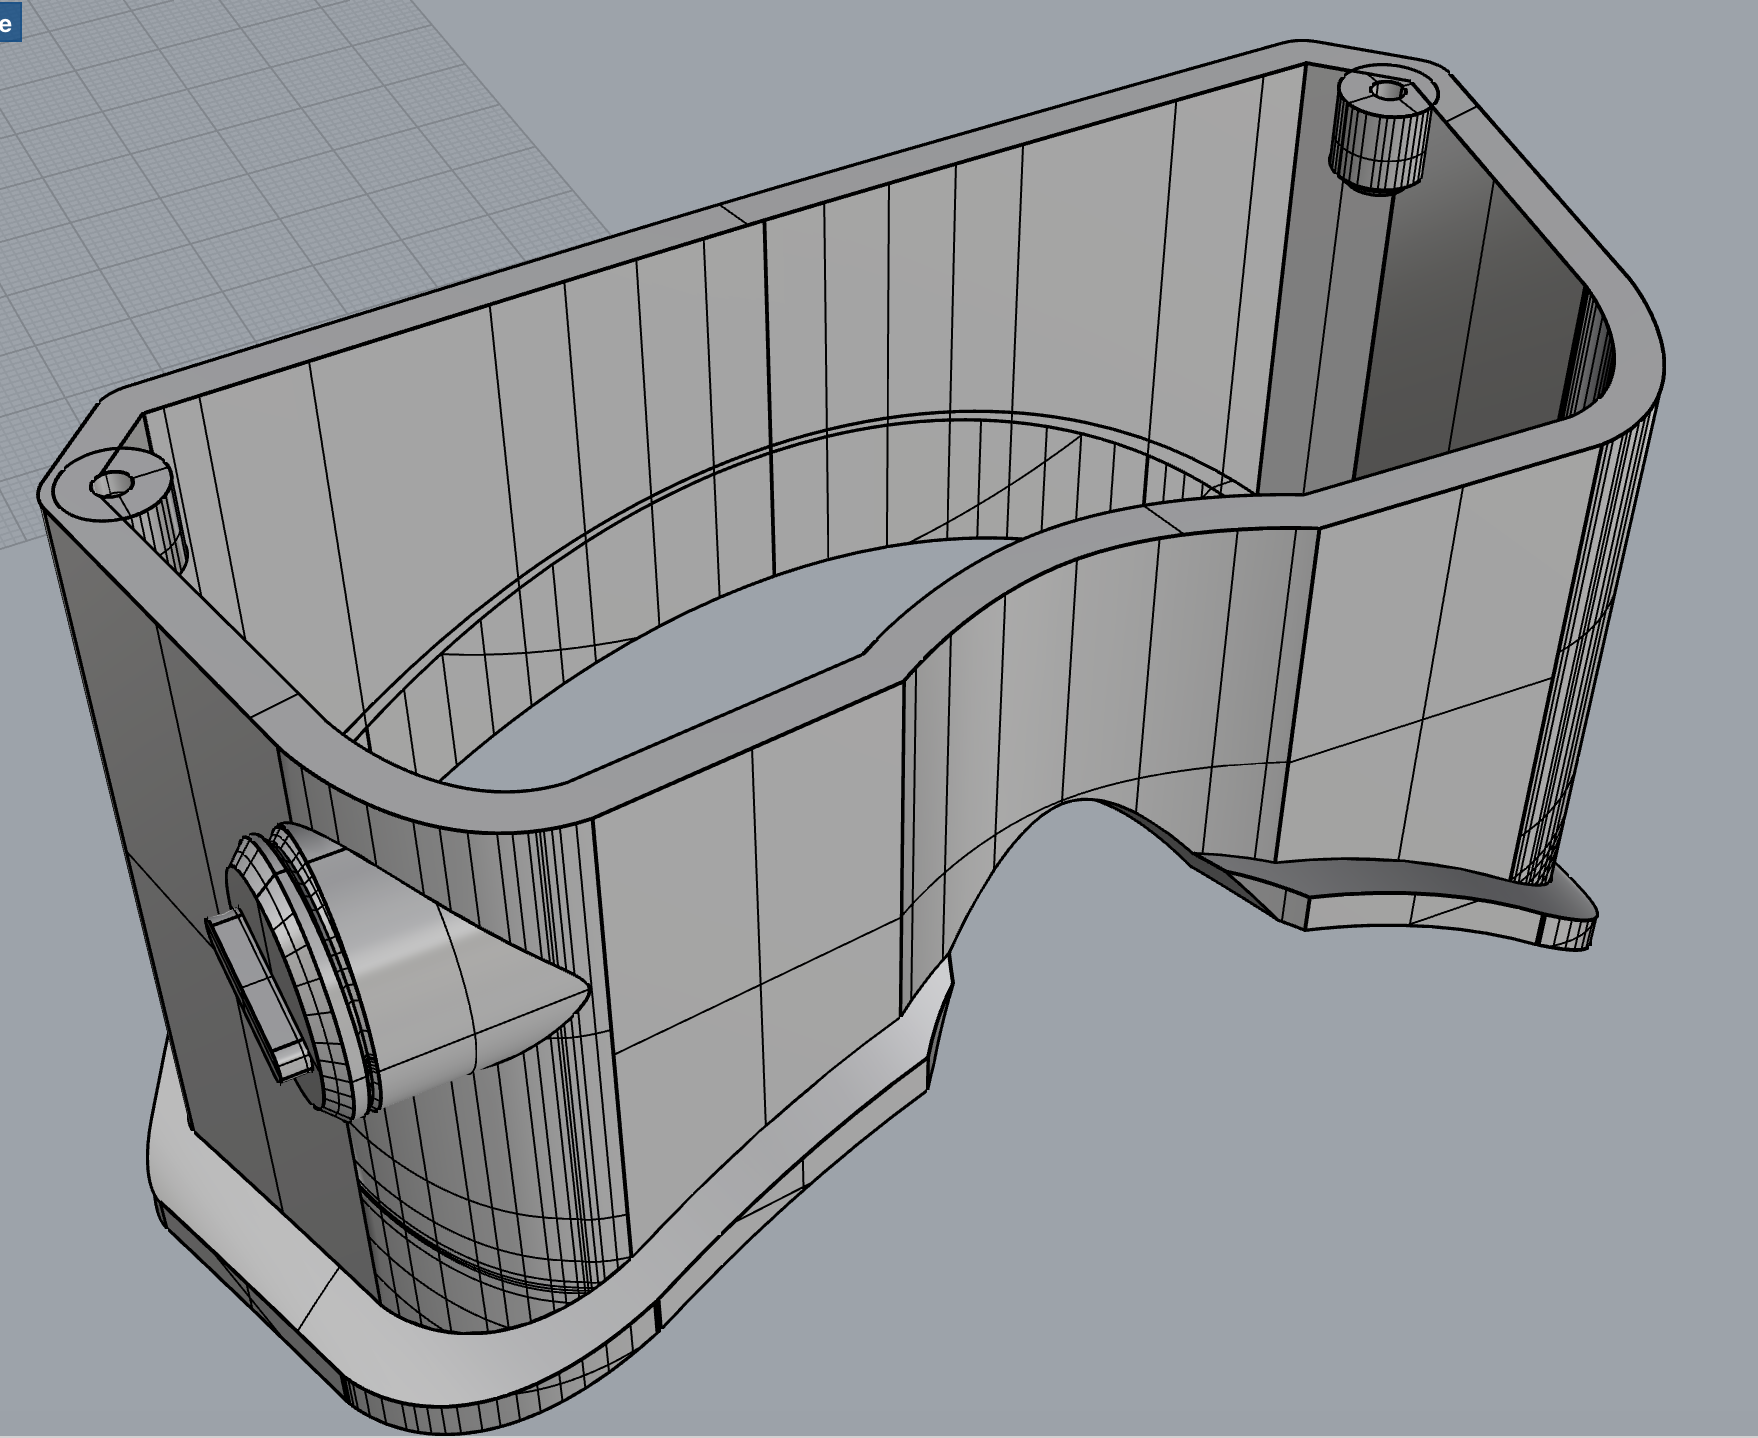
First I sketched curves over the front/side views of the character and used those to model the front plate.


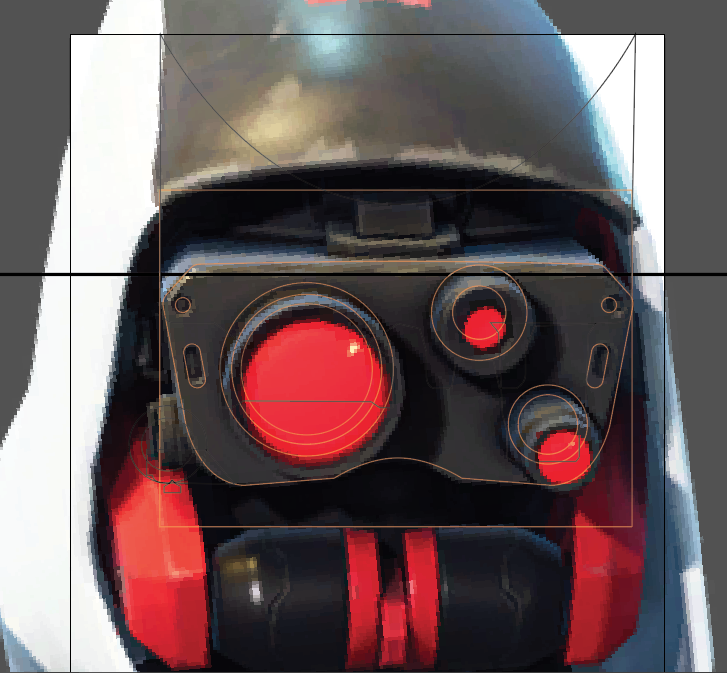
Then I extruded the outer edge and improvised a rim/nose cutout.  I looked at an old pair of ski goggles for basic angles and sizes.

I sanded and spray painted the parts, then did a round of aging/dry brushing to make the whole rig look a bit more worn and used.  Finally I added a lens retaining ring and a single red lens cut from a cheap pair of John-Lennon-style sun glasses.

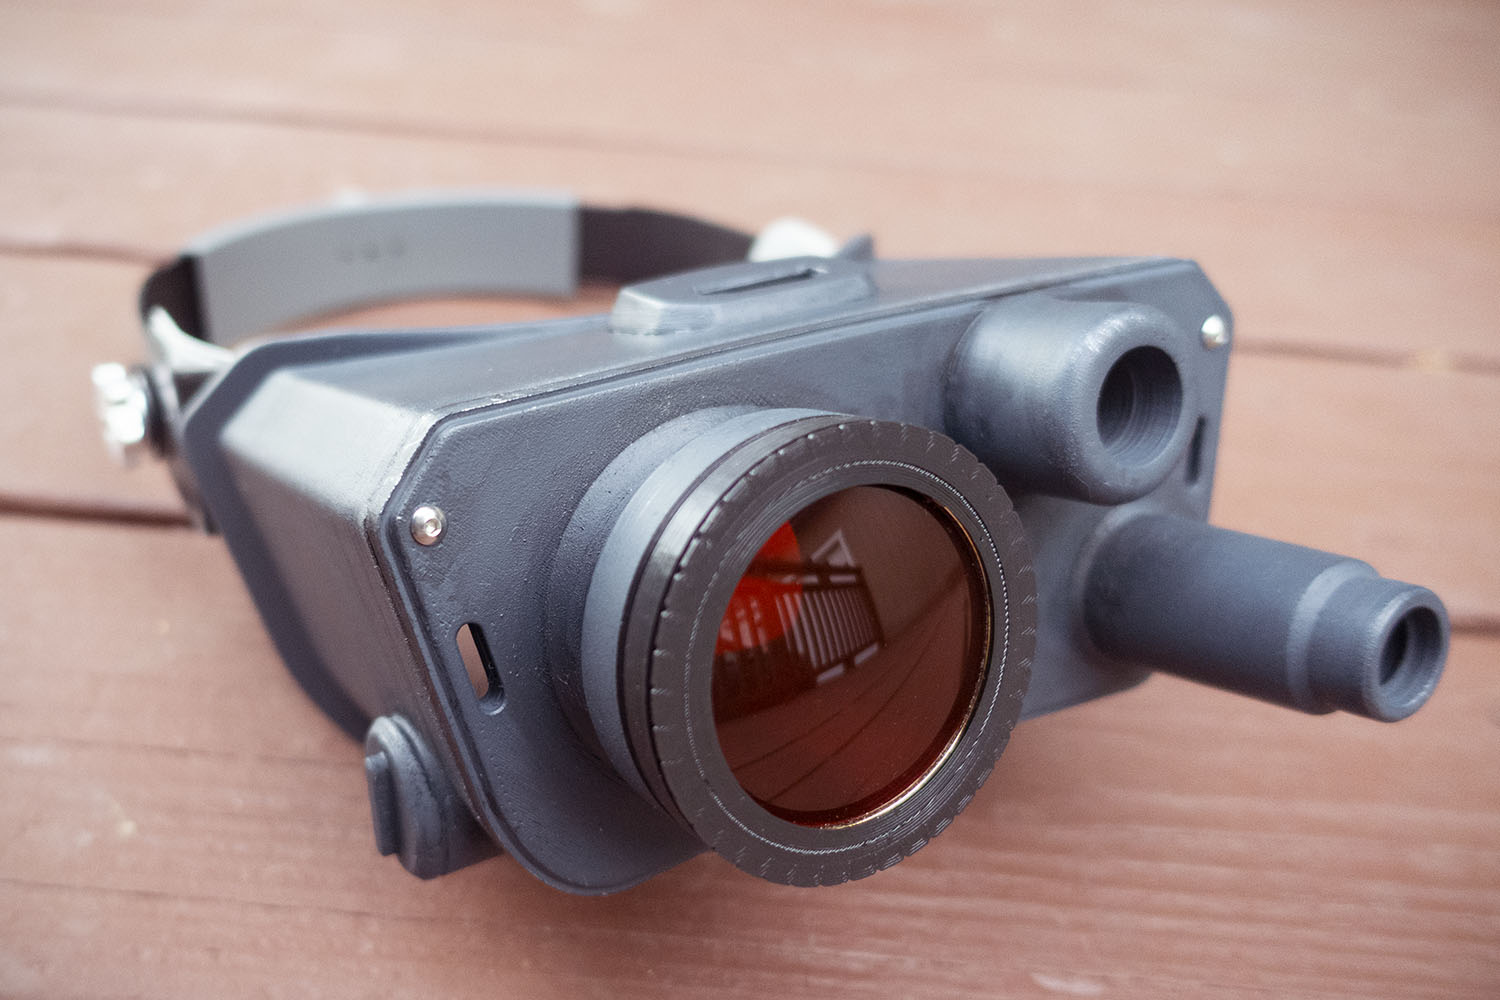
I was going to add two smaller lenses and red LEDs to the smaller face projections, but the jacket ended up being quite complicated to design and it ate up the remaining time.

I also modeled the breathing apparatus and the big black bullets that go on his shoulder strap. The bullets were super easy and I ended up just using them “as printed” since they were already shiny black and the amount of time I’d have to spend sanding/painting them to make them perfect glass shiny black just didn’t fit my time budget.

Getting the proper fit for the mouth parts turned out to be hard. I added some adjustable pieces that mounted the jaw parts to the headband. They were quick to print and made it so I could quickly try out different positions on Simon’s face. No kid wants something directly over his mouth on Halloween! I made the mouth-covering parts quite a bit smaller than in the reference picture, but It still ended up being pretty heavy and uncomfortable. It was a good thing they were easy to remove. I was never really happy with the way it looked, but it was time to move on.

I started working on the patterns for the jacket/shoulder belt on the Saturday 4 days before Halloween.  I’d already gotten the material, and I was ready to crank, crank, crank.  I set up two sewing machines to cut down on thread/foot swaps.  I even took a vacation day on Monday so I could really just focus for three solid days.

First up was the ammo shoulder belt.

I used 1″ white elastic and some faux leather plus a 3D printed buckle. I could have made the elastic a bit tighter, but I was worried the belt would be trying to curl away from the shoulder mount. I made the fit just a bit snug and secured each of the bullets with a drop of hot glue. They never fell out so I guess that was good enough. I did eventually file the points off the bullets. Having such sharp things mounted on your shoulder would be a real hazard.

I put Velcro on the underside to mate with some on the shoulder of the jacket. That way it could be removed easily but wouldn’t keep slipping off his shoulder.

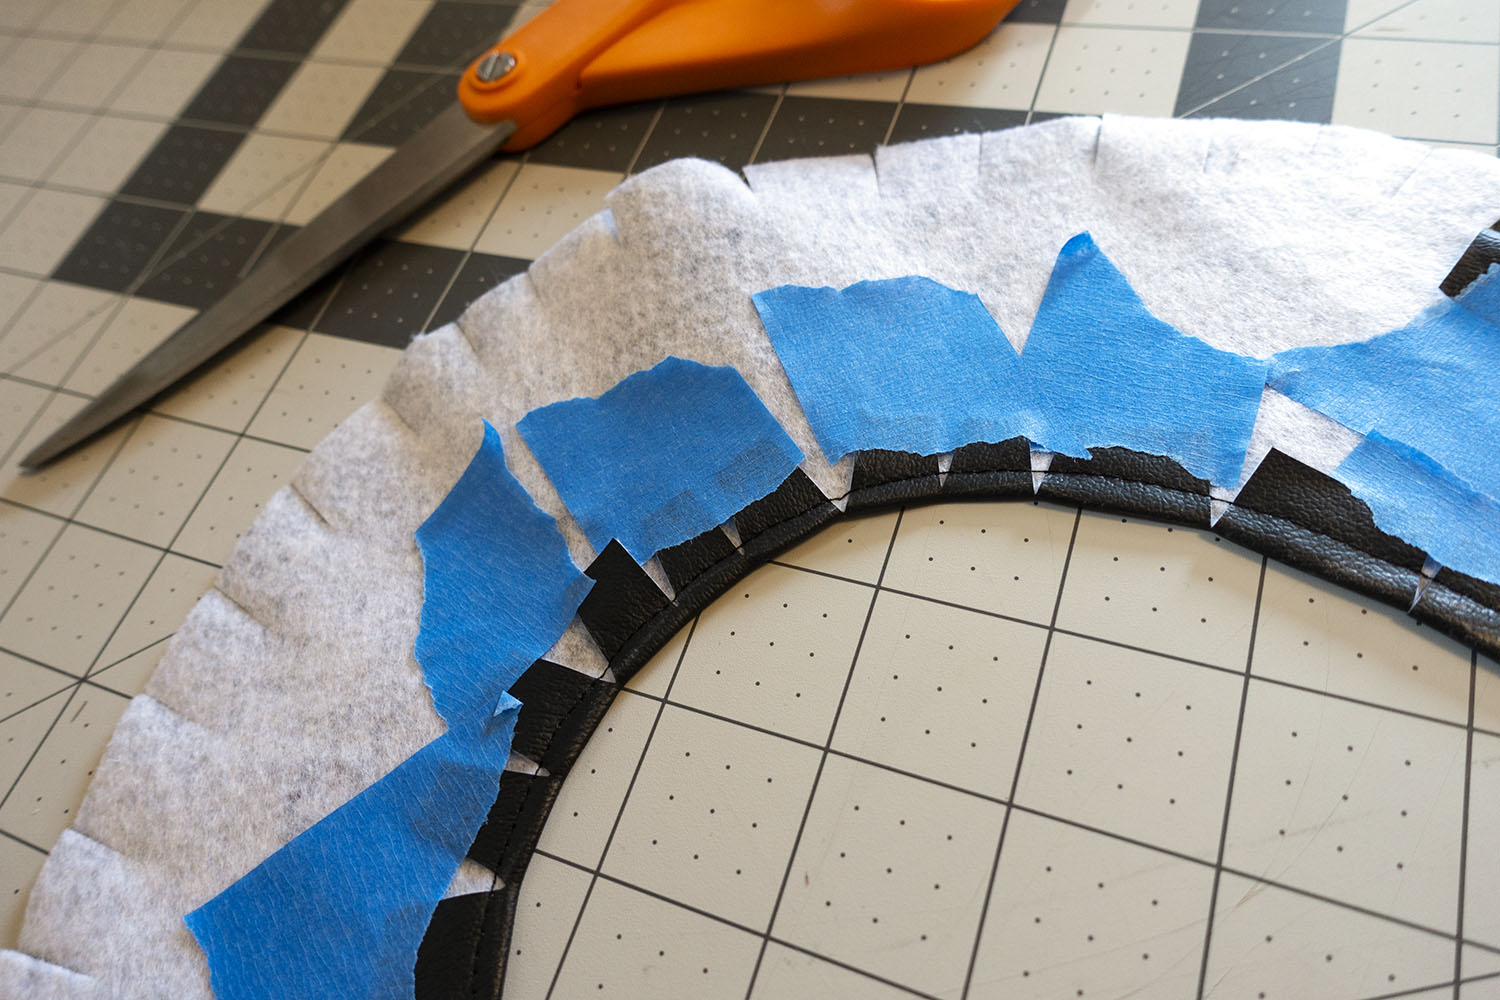
I experimented with using painter’s tape instead of pins for the faux leather.  It worked fine, but it was annoying to remove in areas where I’d accidentally sewn though it, so I decided to revert back to pins. The extra pin holes are pretty invisible in the black grain of the faux leather, and it wasn’t saving me any time.

Next came the jacket pattern design.

I spent a full day with scotch tape and butcher’s paper tweaking the shape and design of the jacket. It was nice to be doing it during the weekend since Simon was available for testing the shape and size of things. He was a trouper putting up with me making pencil marks on paper he was wearing which was pretty tickle-y.

When Simon wasn’t around I didn’t have a dressmaker’s dummy, so  I made due. I stuck a snake’s head on a lamp.  Hey, I’m not proud.

It was at this point that I started to realize how tricky the asymmetrical design of the jacket was. On the original character’s jacket, most of the panels were made up of many sub panels.  I simplified it down some.

Then it was on to cutting out and piecing together. I had never done the kind of elastic cuffs that this jacket required. They almost didn’t fit on my sewing machine and having to switch between white and red thread was a pain, but they came out super nice looking.  I’ll never look at an elastic cuff the same way again.

The faux suede I was using was somewhat annoying to pin. I do everything with pins. I also discovered that it was a bit too thin to hold the hood shape well, so I did a felt backing for all the pieces in the hood. That worked, but kind of killed the time I’d budgeted to put a satin liner in the hood and collar.  So unfortunately the guts of the hood/collar are visible while he’s wearing the costume.

After a day and a half of pinning and piecing, I finally had the jacket mostly done, but did not have the time to build some of the extra sub paneling I’d been hoping to do. I had thought maybe I could just sew some lines on to show the pattern of the panels at least, but the unbacked faux suede was prone to forming small puckers along the sewing lines that made lines not look that clean. I just punted.

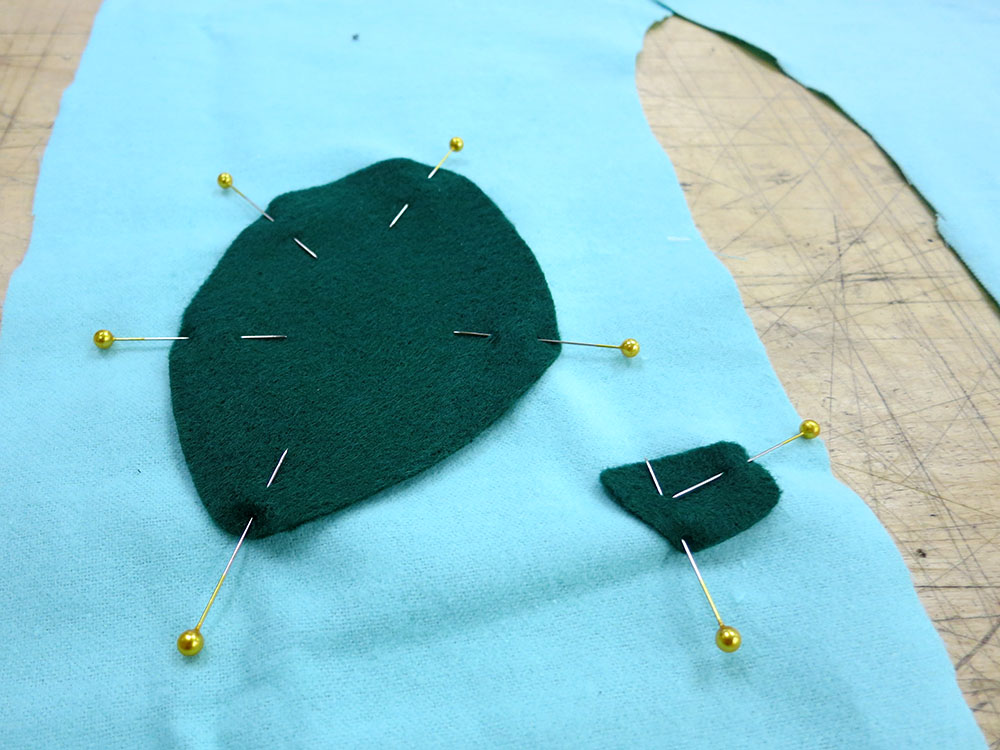
I did sew pattern lines onto the shoulder pads since the reference art showed there was a pattern there.


I’m happy with the way the costume turned out. Simon liked it too. In retrospect, I should probably have 3D printed the elbow pads for the character because they would have been very easy to do, but they wouldn’t have been that comfortable and they would have cluttered up the look. Halloween is SO FUN.  I love having and excuse to do sewing projects.

Making a Bulbasaur Halloween Costume

My Little BulbasaurThis year Simon requested a Pokemon costume, specifically a Bulbasaur. I was glad his costume was going to be made of cloth, since his brother’s costume required no tailoring. I really look forward to Halloween as a time to release my inner seamstress.

I went to the fabric store with a picture of a Bulbasaur, and I got some material to build the costume. I chose a lightweight flannel that seemed to be reversible. That way I wouldn’t get stuck cutting something out the wrong way round. It was the perfect aqua-green color, and Simon could have fuzzy comfort.
Pants With MarkingsI chose fairly accurate colors for the body and spots, but I went for a more organic-looking material for the bulb. Something a little less GREEN. I also got some dark brown corduroy because I was hoping to make the bulb a functional backpack, which required a dark liner.

The costume was going to consist of four main elements: a shirt and pants with the proper color and markings, a hat that would be the Bulbasaur’s head, and a bulb on the back. I also got some armature wire and two small LED flashlights to build some lighted Attack Vines, but I marked that as a stretch goal. I like to incorporate lights into the kids costumes to help with Halloween safety, but I knew that the Attack Vines would stick out awkwardly.

I try to build Simon’s costumes as much like normal clothing as possible. He has to wear that stuff all day, and there have been a few costumes that he’s worn throughout the year. I think kids have to be a bit older to be willing to put up with a bulky uncomfortable costume.

This year I spent most of my time on his brother’s very complex Halo Master Chef costume, so I had to be able to make Simon’s costume fairly quickly. I spent two full days building his costume. On the first day, I built the shirt and pants. I just snagged one of his current shirts and a pair of pants to use as basic patterns. I used felt to add the Bulbasaur markings because that way I didn’t have to deal with hemming the edges.

Bulbasaur ToesWhen I was making the toes for the pants, I realized I hadn’t brought any polyester fiber fill. I wasn’t going to waste an hour going to the fabric store to get some, so I just used my scissors to cut up some shreddies of material to fill the toes. It wasn’t as even as fiber fill, but the toes are small enough that it didn’t really matter.

When I got home, I had Simon try on the pants and shirt. To my horror, the pants were somewhat tight. I ended up adding a small panel at the side to make them a bit bigger. He loved the feel of the fuzzy flannel and really snuggled into the new outfit.

Head Pattern PieceshatPartsCuthatPartsComingTogether

On the second day, I had to build the hat and bulb. I had gotten a black baseball cap and some kid’s backpacks from the Goodwill. I always use an actual hat as the base for these kinds of head-hats because they already have a nice adjustment mechanism built in. I spent a few hours fine tuning the pattern for the head. I went through several yards of butcher paper and a bunch of tape testing various shapes. Finally, I got something that wasn’t too complicated but seemed to capture the shape of a Bulbasaur head. I was pleased with the results.
Ear Insert Close upActual Bulbasaurs don’t have a different inner ear color, but I added a cream triangle inside the ear to make the ears stand out and be a bit cuter. I used a very tight zig zag stitch to sort of embroider a wide line around the ear inserts, which was necessary because I didn’t have felt for that and I needed something to hem the cut edges of the cloth. I also thought it looked more cartoon-like than folding under the edges.

Upper Bulbasaur FaceI used the same system to put the dark green lines around the eyes. That was a bit hair-raising because at those slow feeds it’s easy to have the boarder bog down and drift away from the edge. I only had one shot. The second eye border came out better than the first.

I also used that same stitch to do the nostrils. Bulbasaurs have dark lines for eyebrows as well, but I decided there was much too high a chance of screwing up his expression free-handing on some eyebrows with no good way to undo them. I did not want to end up with an angry-looking Bulbasaur.

Bulbasaur Hat All DoneI put the pieces together and sewed it onto the hat. Then I stuffed and shaped it with fiber fill. I was really pleased with the way the hat came out. One of the TechShop employees even recognized it as a Bulbasaur, so I knew I was in the zone. Much better than “that frog thing.”

It was getting late, and I still needed to build the bulb. I made a paper “petal” and figured out what sort of tucks would give it the shape I wanted. I decided a 5-sided design would look nice and wouldn’t drive me completely crazy sewing up. I also thought 4 sides could form a bottom and 1 side to be sort of act as the top flap for the “functional backpack” goal.

Bulb Pieces Cut OutI cut out all 10 pieces and sewed them together. Weirdly the petals made wonderful looking ears. If I’d been working on some other costume that needed big donkey ears, I’d have been all set! Then I stitched the 5 petals together in an overlapping 5-sided ring, with the dark brown liner parts visible at each seam to add detail. Then I started looking at attaching this to one of the backpacks I’d purchased. I decided that I really didn’t want to do that. It was just too ugly to have those straps over his shoulders. So I instead sewed on a pentagonal base using my dark liner material.

Bulb Petals Lined UpBulb Pentagon Bottom

I figured I could add a zipper and use that to attach and remove the bulb from the shirt. Much nicer looking than straps, but he wouldn’t be able to cary much of a load in his bulb. I’d have to add the zipper later because it was late and all the sewing stores were closed. I ended up adding the zipper on the night before Halloween. I also put a beach ball inside the bulb to keep it fluffed up with minimum extra weight. I oriented the ball so the green part was the only part visible through the opening in the petals. It actually looked pretty good.

I made a mistake deciding to use a dab of hot glue at the end of the cut zipper to act as a stop to prevent the slider from coming off. This seemed like a better idea than just a big glob of stitches or something, but it was a fail. For one thing, the slider sometimes stuck against the glob, and at some point during his day at school, the bulb zipper slide fell off and got lost. Oops. I’ll have to go get another donor zipper, and Simon had to go without his bulb for actual trick or treating. Oh well. Slight fail, but I doubt he would have kept that thing on all night anyway.

Simon Bulbasaur On All FoursDuring his day at school, Simon ripped the crotch out of his pants, but I was able to sew them back together for trick or treating. A seven year old can really do a number on slightly tight pants. I guess I should have used some sort of stronger double seam for the crotch, but I don’t really know what kind is best, and I hadn’t had problems there in previous years. That lightweight flannel just wasn’t super strong.

noFaceBulbasaurstandingBulbasaurbulbasaurFromAbove

Simon really liked the costume. Fuzzy, Comfortable, and Cute. So apart from the zipper and crotch failures, this one was a success. Here is a video of Simon taking the costume for a spin.  I’m really proud that the face was recognizable as a Bulbasaur. The real question is, “Can a Bulbasaur take on a Halo Master Chef?”

“Bulbasaur, I choose YOU!”

bulbasaurVSHaloMasterChef


How to Build a Halo Master Chef Costume

No, that’s not a typo. This year I built my son a Halo Master Chef costume for Halloween. I love making Halloween costumes. They’re usually a wonderful excuse to do some sewing and pattern design. When my son asked to be “A Halo Spartan,” I knew I was in for a different kind of build. People who build Halo armor (There are more than you think!) often use a program called Pepakura to decompose 3-D models into paper cutouts. There’s a free viewer, and the full program is only $40. A few years ago, I built my son a Boba Fett helmet using Pepakura, and I’d already developed a system for outputting the designs and cutting them out of card stock using a laser cutter. There was still a lot of tedious gluing, but I could cut all the pieces out and perforate the fold lines, which makes it quite a bit quicker to assemble. I started building this set of armor mostly because the author had done a good job of providing the files and a spreadsheet to help you scale the costume parts.

Pioneer Ready for Night PatrolOne of the big issues with Pepakura builds is that you really want the scale to be correct. After gluing 200 pieces together is not the best time to figure out that your scale is off. I think if I were doing a Pepakura deconstruction, I’d provide two versions of the model. A super simple rough draft with only about 10 pieces that would have the basic shape and let you adjust the size, and then a fully detailed version for the complete build. I didn’t really have time to do that. Lots of folks spend a year building their armor, and I was only going to have a couple of weeks. So I downloaded the files, fiddled with the scales, laid out the parts for 24″x14″ card stock that could fit in the laser, and exported the vectors into Illustrator. The vectors already have styles to show mountain VS valley folds, but you have to adjust the spacing to work better on the laser. You don’t want the card stock to get too weak at the fold lines, so no long dashes. I used .4pt dots and 2.5pt spaces for valley folds and 1/2.83/.25/2.83 pt for mountain folds. You can use Select -> Same -> Appearance to select all the mountain/valley/cut lines and adjust them all at once.

Card stock in the laserWhen I laser cut the parts, I used 2′ x 2′ card stock purchased from Michael’s for $.75 a sheet. I cut each big sheet in half to make two. Because I’m not printing on the paper, I can’t include any of the edge alignment numbers. I had to keep all the parts organized in some way, so I used blue masking tape to hold the parts in their original cut positions, and just kept all the pages in a folder made from one of the card stock sheets. Then I had to use Pepakura to look up where each piece was in the cut sheets. It was a bit like doing a puzzle.  The torso has 200 parts on 6 sheets, and it was important that none of them went wandering off. Blue masking tape is very forgiving and can be pulled off without damaging the card stock. Don’t use normal masking tape, or you’ll be tearing your parts and then your hair out along with some gnashing of teeth.

Glueing SetupI used Elmer’s white glue for the gluing. It’s great for this task because it has a long enough working time to let you get things into position and holds well. The one down side is you sometimes have to hold things in position for 30 seconds or so in order to have it start to hold. I modified a few clothes pins by sawing off the tips, making them into more nimble paper-pinching helpers.


Modified Cloaths PinsThe clothes pins were super useful for holding paper edges together long enough for the glue to set. Because I was using pre-perforated folds, I mostly didn’t have to crease the fold lines, and the few that I did crease I could do freehand with a bone folder following the connect-the-dots style along the fold lines. I only did this on a handful of folds. All the others could just be done freehand thanks to the perforations.


bicep Back LitBicep On White CounterArm On White Counter
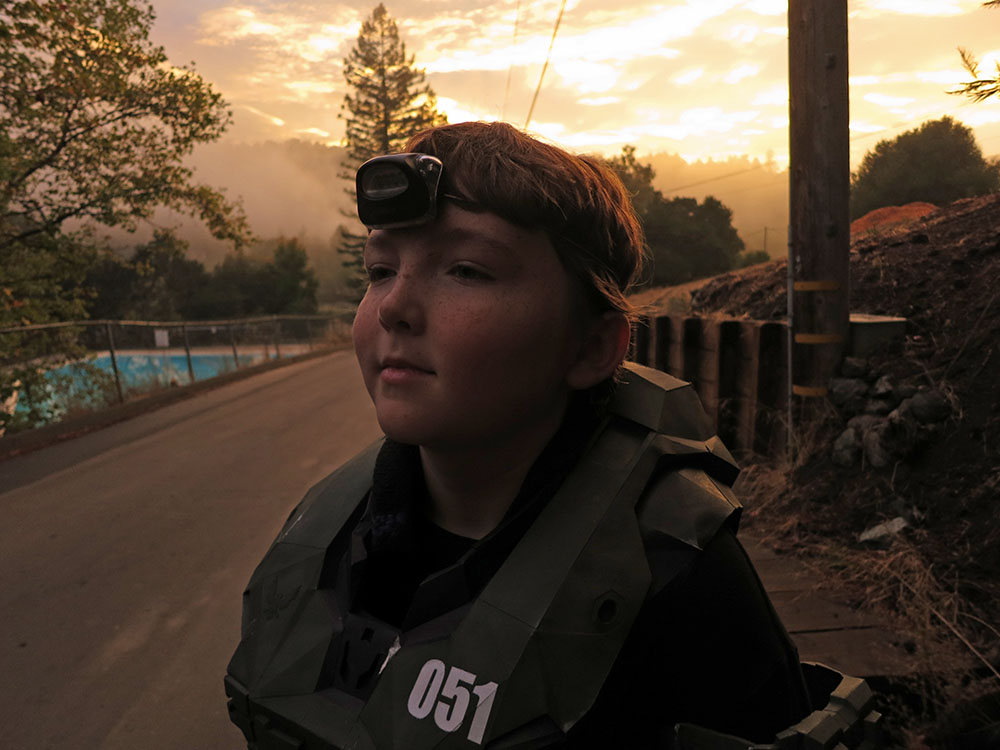
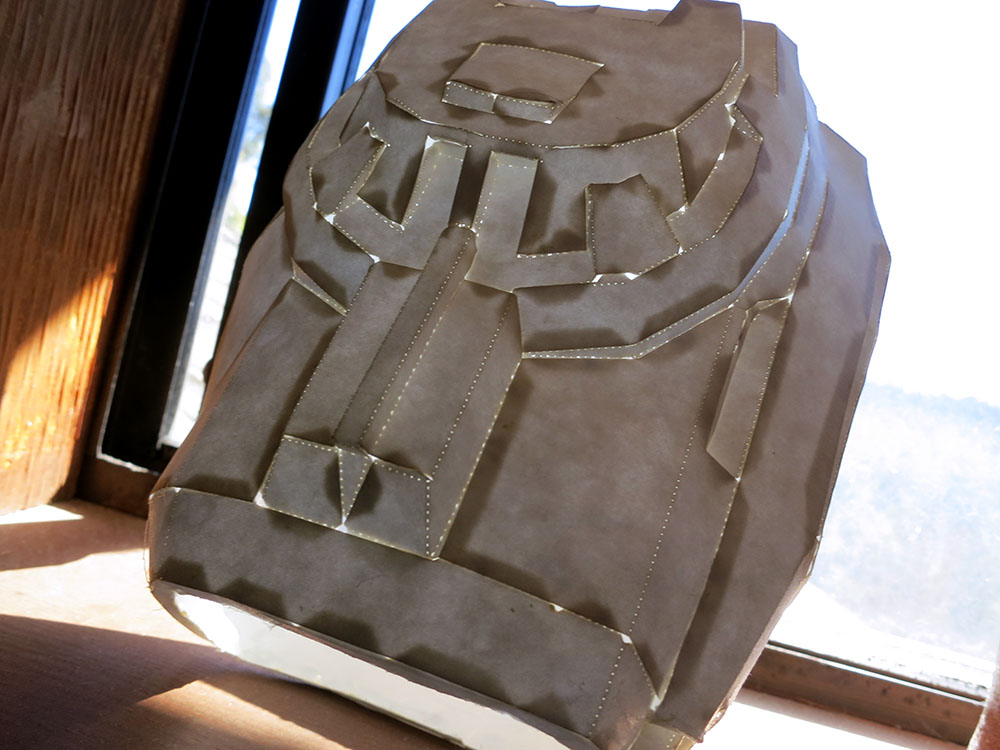
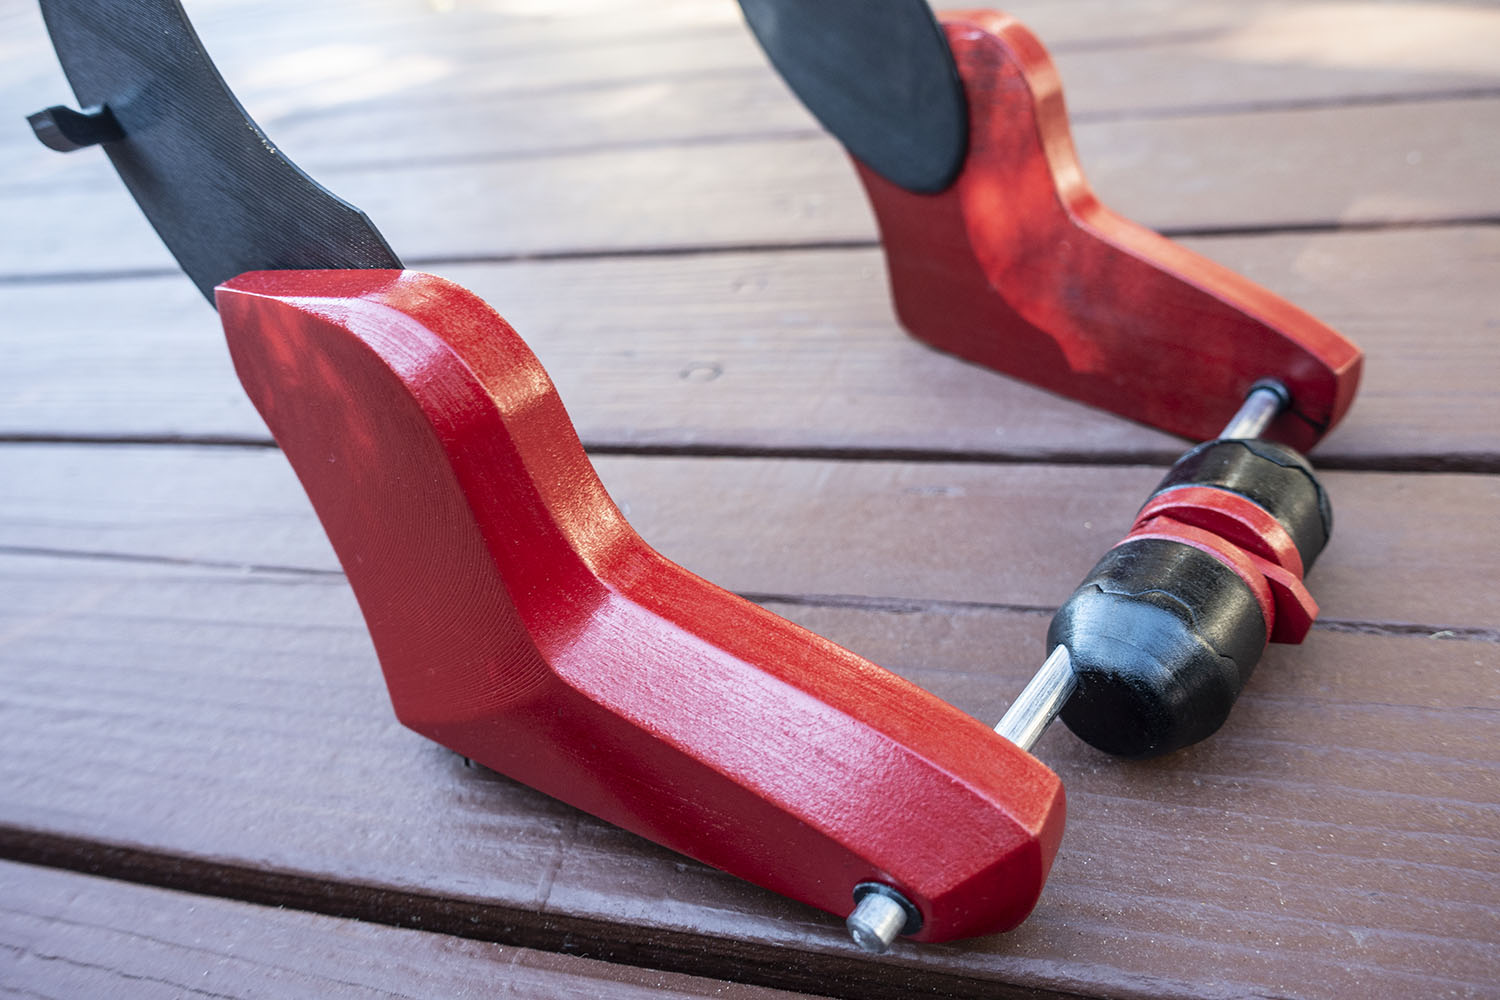
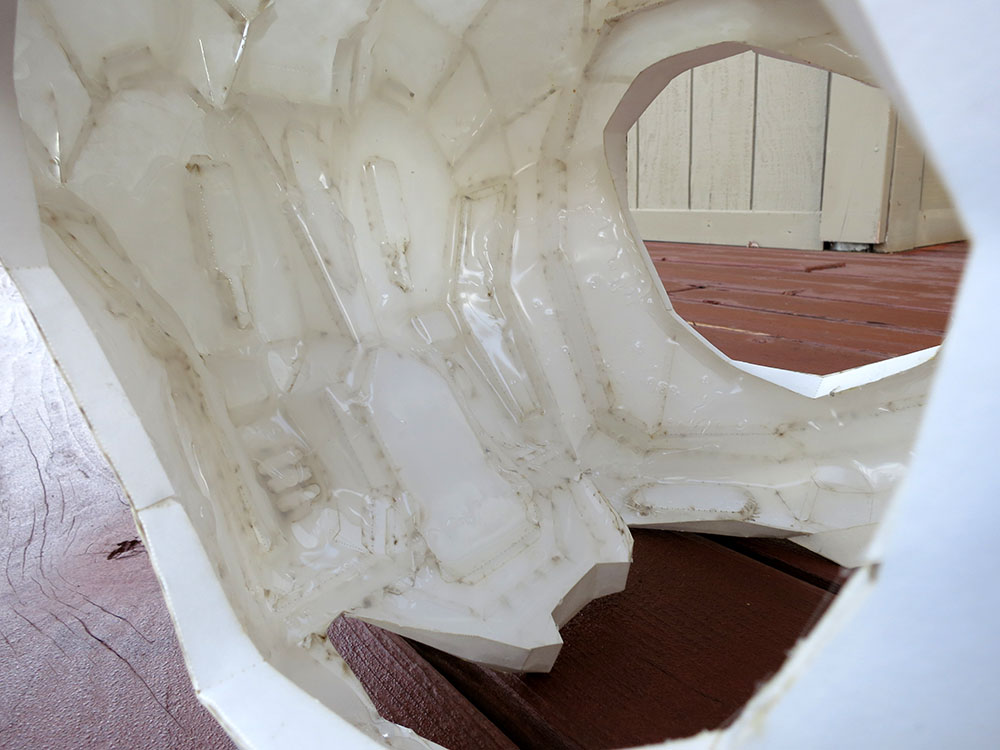
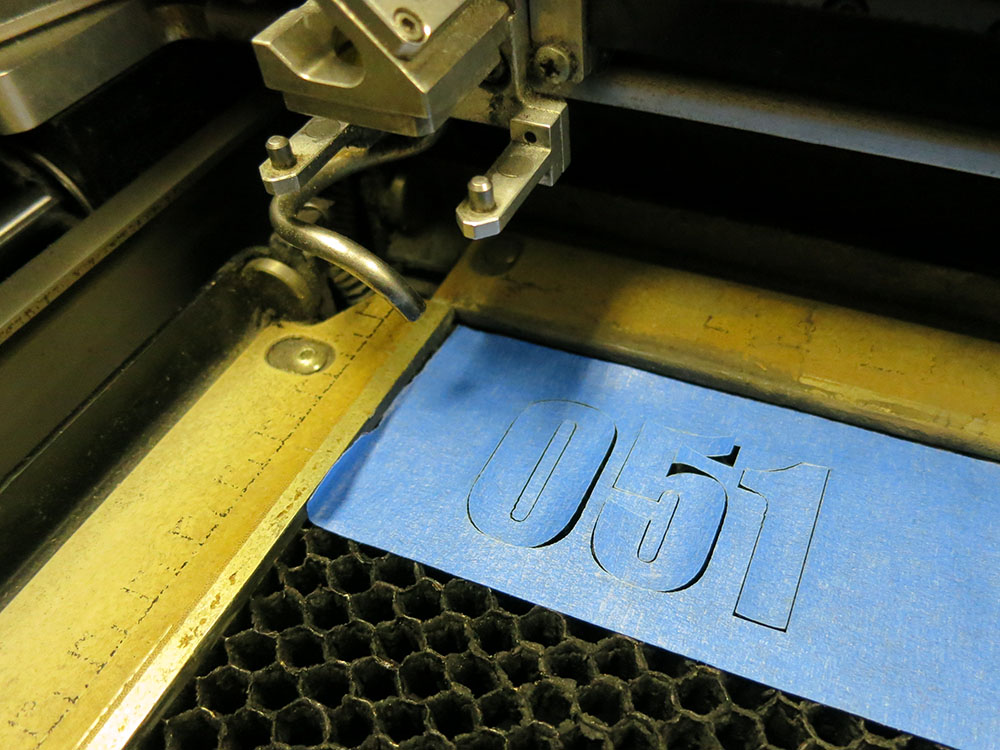
The laser cutting took about 2 minutes for cut lines and 6 minutes for the dotted lines. The cutter is stupid about the short segments in those perforated lines, so it actually cuts them significantly more slowly than the normal cut lines. Laser time was maybe 10 mins per page, including setup and taping after cutting. The torso was 6 sheets, so it took almost a full hour to cut, but I can only imagine the amount of time saved. How long did the gluing take? I spent a weekend gluing up two biceps and a forearm. I had started a new audio book and listened to it while I was working, so I unintentionally timed my gluing. It took 13 hours 45 minutes for those three pieces. They have about 45 segments each.

Bicep Fully Painted
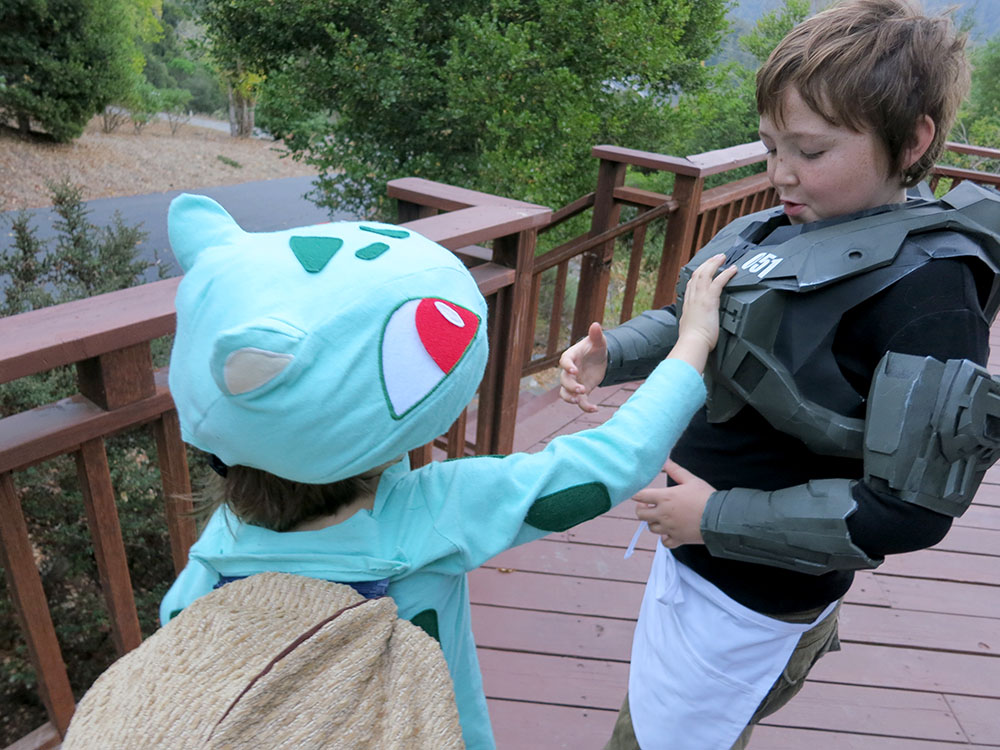
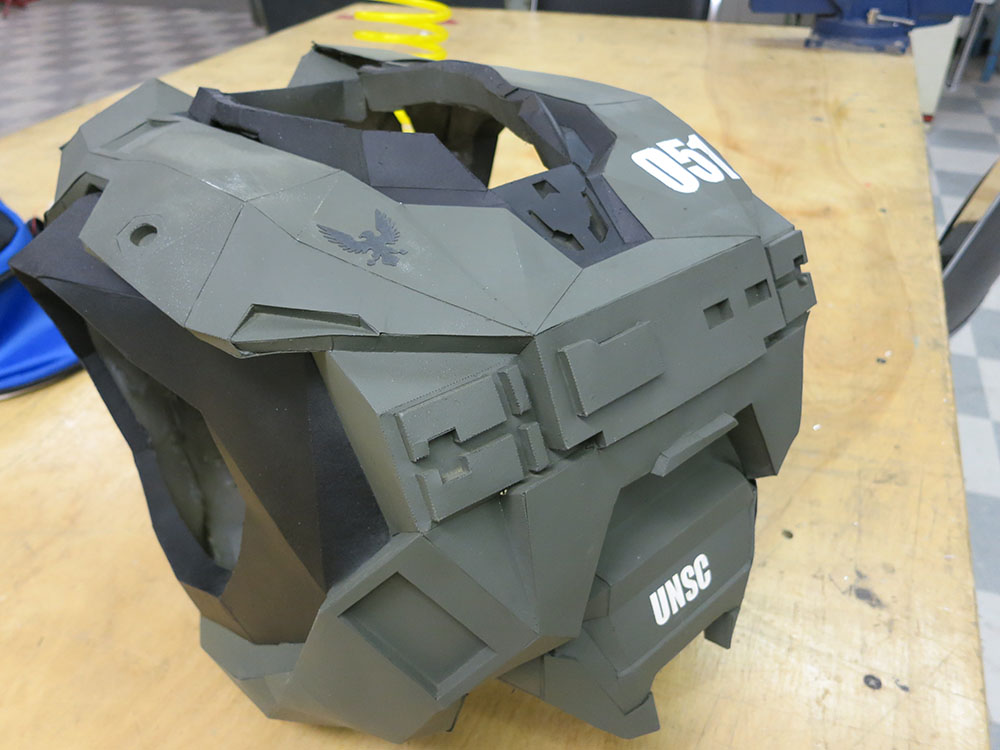
When I started, I told my son I wasn’t making any leg pieces or the helmet. I didn’t have enough time to build a full suit and the helmet and legs seemed like the pieces he wouldn’t be able to wear for trick-or-treating anyway. Partway though the build, he told me he actually wanted to be not just any Halo Spartan, but the Master Chief. I told him I couldn’t swap armor types at that late date, but I could paint it in the Master Chief color scheme. We were joking that maybe instead of a Master Chief he could go as a Halo Master Chef, and he could have a chef’s hat and apron instead of a helmet and leggings. Pioneer loved the idea, and that’s how the Halo Master Chef project was born. After rejecting ideas like the “Gravity Ladle,” we finally decided that the rolling pin was the funniest of the weapon options.

Torso All Glued Just PaperOnce the paper shell was done, I decided to back the paper with hot glue. Many people use fiberglass for strength, but that seemed way too slow, messy, and toxic for something he was going to outgrow in a few months. Hot glue is deeply wonderful for doing this sort of thing. Just squirt it in with the gun and let gravity pull it into an even coating. Keep drizzling more hot glue at the front of the downward sliding wave of glue, and it just works.

Torso Inside

Torso Filled With Hot GlueWhen you have thick glue, it can take several minutes to fully cool and set. This long setting time along with the need to re-enforce all sides of various openings forces you to glue it in stages. You need to let each stage cool before working on the next side. Tilt things so the glue moves the right way and dams up in the places you want. You can also use things like a straight piece of wood to position edges so they cool flat instead of bulging, etc. It’s very quick, especially compared to fiberglass. I was able to hot glue all the arm pieces in a single evening. After that, the parts are quite tough. There was one casualty of this process. After pushing several pounds of glue though my trusty (but cheap) hot glue gun, my impatient squeezing finally drove the heating element right out of the front of the gun. I guess it’s time to try a slightly more upscale gun.

Customized Neck OpeningThe torso is kind of a strange shape, and it was really hard to tell if it was going to be the right scale. I knew I’d have to modify the neck hole because it simply was too narrow for my son’s neck. I did some freehand paper design with card stock to make the neck hole bigger. After that had been re-enforced with hot glue, I had to hold my breath and cut open the entire torso with a hobby knife. I still didn’t know if my son would really be able to get into the torso. I even bought a longer chef’s apron in case he couldn’t get the torso piece on. I was worried I’d have to hack some bigger arm holes or perform other violence to make it work. Thankfully, we were able to get it on him. *phew*

Getting the torso armor off and on was a bit of a squeeze, but it worked. The only down side was that part of the front panel has to flex a bit to be able to open the back, which puts some wrinkle marks on the most visible part of the suit. I hot glued a magnet in the upper corner of the suit to hold that in alignment, and I also added two Velcro straps. I think it would have been nicer to have pairs of rare earth magnets all along the seam, so it all would get held in perfect alignment, but those magnets would need to have some sort of holding ring to give them enough surface area for the glue. I didn’t have time to figure that out or order special magnets, so Velcro was an easy on-hand solution.

I painted all the parts with primer then applied coats of army green. I masked the neck and arm areas of the torso and painted them black. After that, it was time to hand paint a bunch of dirt and grunge and a dry brush silver paint on various high points and projections to make it look as if the original paint had scraped off to show the metal underneath.

laserCutBlueMaskingTapeTorso Masked For NumberstorsoDoneExceptForDetailPaint

I laser cut some blue masking tape so I could spray paint the identifying numbers on the torso. I used 051 which is a nod to my namesake Kurt (Ambrose). I also put a black laser cut UNSC Eagle on. I finished Pioneer’s torso detailing the night before Halloween, and it was all ready to wear to school. I was surprised how well the suit held up. Paint was scraped off all the way down to the paper on some of the joints where the arm pieces rubbed against the torso, but in general it still looked good after a day and a night of candy-fueled revelry. We added a black sock as padding around the neck, but that was pretty much the only game-day alteration. Thankfully, the whole rig is still pretty light. I thought he would be less mobile with that rig on, but it wasn’t that bad. He could even ride in the car and use the seat belt without any problem.

masterChef1masterChef3

masterChef2

masterChef4

masterChefInCockpit

I’m going to mark this one down as a success.  I have a video of the Master Chef looking tough on Halloween Morning.


Making the Gandalf Costume


Pioneer wanted to be Gandalf The White for Halloween.  I had made Gandalf’s sword, but I still needed to make his cloak and hat. In the run-up to Halloween, I’d spent most of my time working on Simon’s King Cobra costume, and then I got sick. In the end, I had to design and sew together Pioneer’s Gandalf hat and cloak in 4 hours on Halloween Eve. I couldn’t even work late into the night because I was still recovering. Thankfully, I’d already purchased the fabric to make the costume. So it was strictly an evening of Design & Build. I set up a folding table in the guest bedroom to act as my sewing room so I wouldn’t have to commute over the hill to TechShop. TechShop is awesome for sewing projects because I can spread out on three tables and there’s good lighting and an ironing board and iron. I still use my own sewing machine because that’s what I’m used to. So working upstairs wouldn’t be that much of a step down, and hopefully I wouldn’t have to iron.

Gandalf Costume PatternI decided to go very simple. I only made two paper patterns. One was for half of the arm and another for the back, which doubled as the front sides. Only two pieces of paper! Simple Pimple. Ok, there were also two piece of paper for the hat. The advantage of working at home was I could actually size the thing to Pioneer’s body instead of snagging a shirt/pants and sizing from that.

Gandalf Costume PinnedI cut, pinned, sewed, and hemmed like crazy. The only things I put on the cloak above the bare minimum were some belt loops, a sword loop, and an extra layer across the back in the shoulder blades area. I’m not even sure what that’s called on a cloak. I should have double-checked the sword loop height because that ended up being a bit low, and the sword was going to be dragging its tip. Thankfully, the belt loop was big enough to double as the sword loop and the dragging sword crisis was averted.

Gandalf HatI had designed the hat with two intersecting cones of paper. Making the inner cone was trivial, but attaching the brim cone piece at just the right position so it wouldn’t kink the inner cone ended up taking three attempts. This was complicated by the fact that I was also pinning in a hat band, so the actual pinning was stupidly time consuming. Finally I got it just right. Before I sewed the hat together, I took one last look and realized that I had pinned the inner cone in inside out! Horror! I was going to have to pin it again, or the seam allowance would be on the outside of the hat. Not …. enough ….. time. I made an executive decision. I sewed it up the way it was, trimmed the seam allowance very close to the seam, re-inverted the hat and did another seam. That way it looked nice both on the inside and the outside, and the only evidence of my mistake was a little bit of cloth sticking out in the hat band area. Later someone told me this was called a “French Seam.” Funny that I made that up as a time-saving measure.  I really should take some kind of sewing class.

Pioneer looked good in his costume.  Perhaps the hat could have been a bit bigger and stiffer, and the sword loop should have been higher, but basically it came out fine.  Mission accomplished.

PioneerAsGandalf  gandalfDrawsHisSword

GandalfShowsOffGlamdring  GandalfNoHat

Pioneer insisted that I take a photo of him falling into the pit with the Balrog.   Here is the photo after massive amounts of photoshop fiddling to make it really look like he is falling.   Maybe I should have tried a bit harder…  I also avoided mentioning that Gandalf the Gray was the one who actually said “You cannot pass!”  It’s best not to contradict the  wielder of the flame of Anor.

GandalfFallingIntoThePit