
 Pioneer wanted to be Gandalf the White for Halloween this year. Personally, I wouldn’t have chosen white for a costume that was sure to be grubby three minutes after it was put on, but Gandalf the White still had a long and difficult journey ahead of him so a few wrinkles and stains would fit right in. Pioneer had already selected a staff, but I wanted to try laser-cutting his sword. I’d been working hard finishing the iPad version of our app, so I was getting started on Halloween a bit late. The sword seemed like any easy first piece, so I snagged some plywood and a scrap piece of wooden molding and went to work. I got out the bag of leather scraps that I’d gotten from a coworker in trade for one of my wooden puppy dogs. I figured maybe I could cut a leather spiral or strips to form the grip on the hilt of the sword.
I had reserved the latest possible slot on the laser from 10:30pm to 11:30pm, and my plan was to design the sword in the time between getting out of work and the start of my laser time. We’d been getting the final cut of our iPad app ready to send to Apple, and I ended up working until 7, but finally I shifted gears and started frantic work on the sword. I did a quick sketch that I liked, and I started designing the sword in Illustrator. I noticed that the leather scraps I had were all pretty small, so a big spiral of leather wasn’t going to be possible. I decided instead to cut out a lot of oval leather pieces and stack them to form the handle.
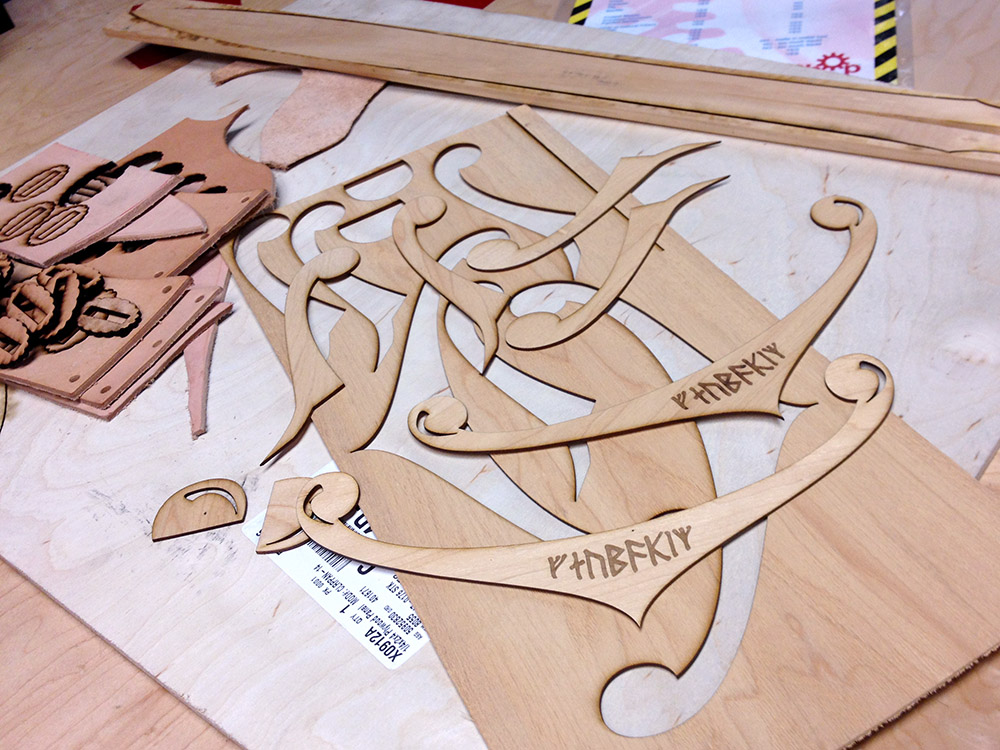
The laser bed is 24″x18″, so I had the choice of making a really stubby sword or doing something tricky. I decided to cut the blade of the sword on the diagonal in the machine for maximum length, and then make the handle/blade guard out of another piece. I had some really thin pieces of wood that I sandwiched on either side of the joint to give it strength, and add the runes for Glamdring to the sword. This was going to be a one-night build, so I had to abandon any ideas of making the sword glow, etc.
 The big problem with putting material in the laser on the diagonal is alignment. I cut the outline of my piece of wood molding out of a scrap of cardboard, and used that as an alignment jig. It worked fine for the basic cutting, but when I had to flip the wood over and etch the central fuller on the other side of the blade, the blade was off by a few degrees and the detail was clearly not super centered. If I had it to do again, I’d have the blade oriented the other way around so being off by a few degrees would hardly be noticeable.
I used shape interpolation in illustrator to make the 35 pieces I wanted to cut out of the leather. It was fiddly and time consuming to position the pieces on my various leather scraps. I used a pencil to number the pieces so I could stack them from large to small without mixing them up. Then I cut the parts for the hilt out of my piece of plywood. In the half hour between the end of my laser slot and TechShop’s midnight closing time, I went and used the big belt sander to sand some profiles onto the blade. Kind of a freehand grid to shape. I didn’t want the thing to actually be sharp, but it gave the blade a more realistic shape, and kept it from just being a flat cutout.
Then I went home and glued it up. I wanted to be able to let the glue set up over night.
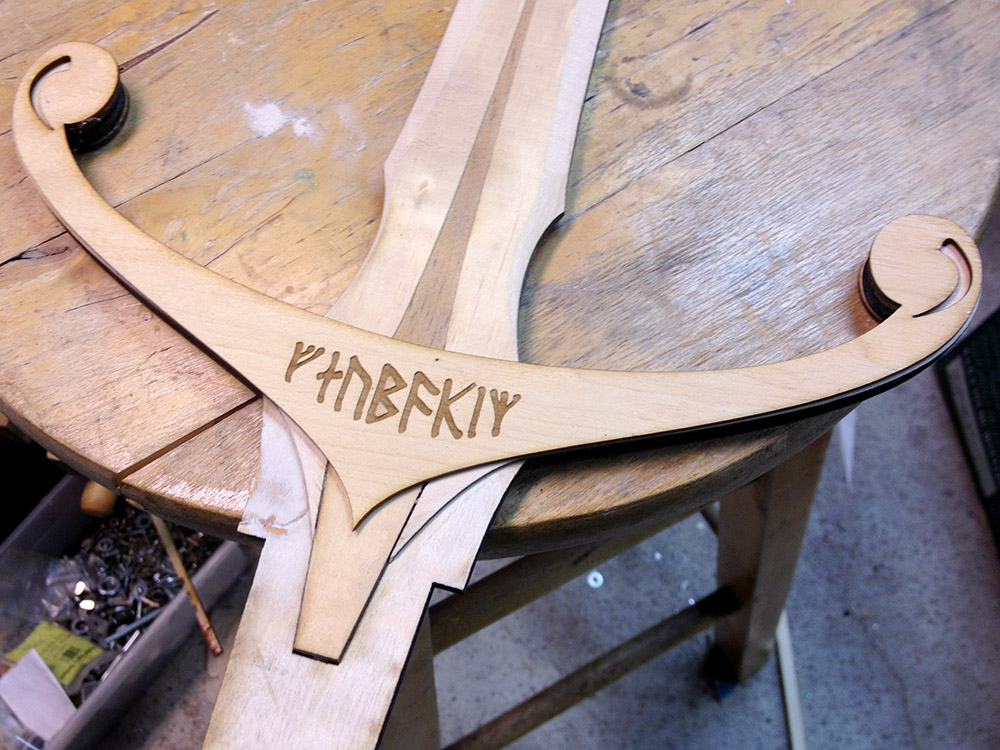

As I was assembling the blade, I realized that I liked the look of it much better without the piece that had the runes on it. Leaving it out makes the blade to hilt connection a lot weaker, but I just liked the look of the blade without that stuff on there. Also, the little cutouts on the ends of the cross guard looked kind of cheesy, so I just left the rune piece out entirely. The sword hasn’t broken yet, so I guess it was the right call.
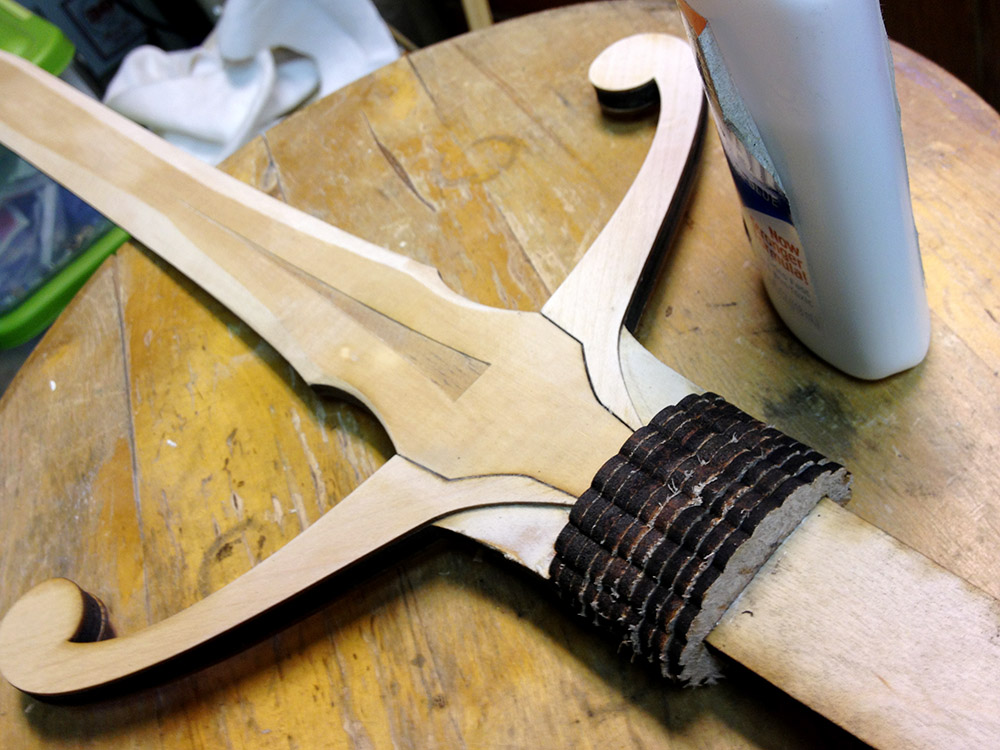 I woke up early the next morning and glued the 35 leather pieces together to make the hilt. Because I was using leather scrap of different thicknesses, not all of the pieces had been cut out cleanly by the laser, so I had to tear some of them free. They slid onto the hilt, and the locking mechanism I designed into the butt of the hilt clamped the discs in nicely. I probably didn’t even need the glue. One problem with the leather pieces I had torn free had a lot of wispy strands at the edges. This made the handle rather shaggy. What to do? I knew that trimming them would be a pain, so I simply assembled them as is, and used a propane torch to burn the little strands off when I was done.
 It worked great! The strands would get hot and burn off long before the surface itself got hot enough to burn, and it was super fast. I’ll have to remember that trick! You can see the crescent-shaped piece that locks all the discs into place. I had some laser-cut flats that could be clued over that.
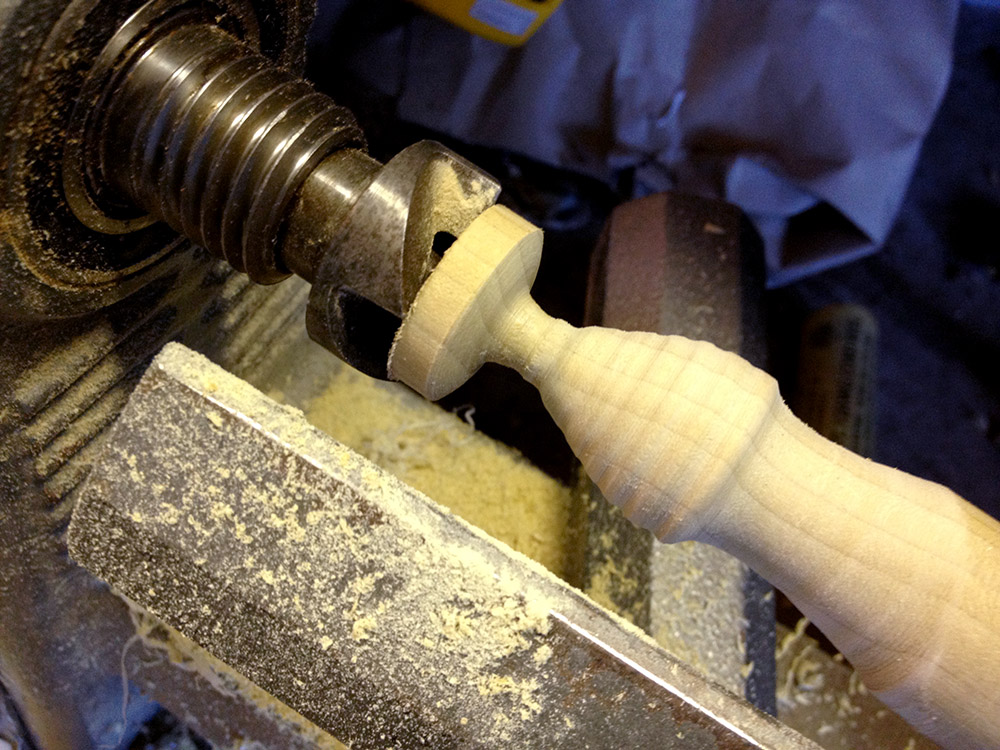 Having such a flat element at the end of the hilt seems kind of sad though, so I quickly turned a piece of wood, cut it in half on the band saw, and glued it in place covering that area. I put ridges on it to kind of echo the leather discs, but in retrospect it would have been nicer to use a smooth piece since the other lines of the blade/tang/cross guard are very clean.
 I think the final sword came out nice. Gandalf certainly was happy with it.


Pingback: Making the Gandalf Costume | Retro Tech Journal