When I was growing up, I did a some bike touring with my dad. My uncle joined us on some of those trips, including one summer the three of us spent biking around the British Isles. We slept at youth hostels and biked around England, Ireland, and Scotland. Sometimes when I lagged behind, my uncle came circling back and said something like “Oh no! A honey dipper truck turned over in the road. I had to turn back.” to jokingly explain why he was coming back to ride with me and keep me company. I really appreciated that.
When I heard he was seriously ill, I booked a flight to go visit him. With my flight 4 days away, I thought I would make something small to give him. I figured this might be the perfect chance to try my hand at making a pop-up card. I remembered one time in Scotland we zoomed down an hill and suddenly come across a lot of sheep in the road. None of us crashed, but there were several close calls. I guess a big dose of adrenaline helps make a lasting impression.
Making the card was going to be a race against the clock. If I could design and laser cut all the parts after work on Wednesday night (the night I have free to go to TechShop and use the laser cutter), I could spend some time Thursday night gluing the whole contraption together to have it ready to take on the plane with me Saturday morning.
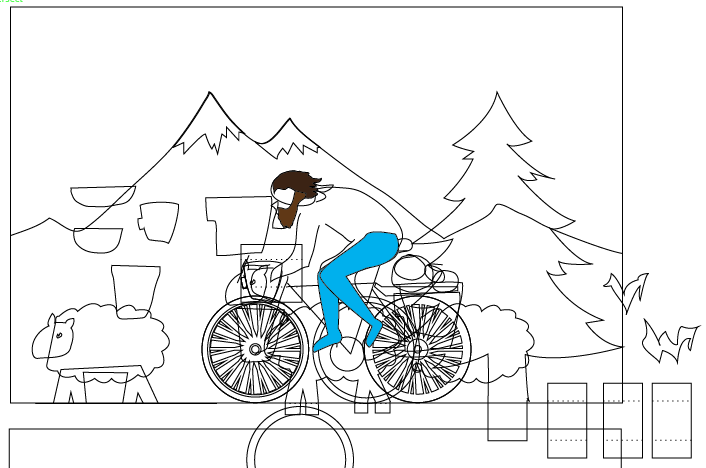
 The first thing I did was a quick sketch of the idea in my notebook. I put in a mountain, some foothills, a tree, my uncle on his bike, and a sheep. I figured that would be enough layers to give the final project some depth without having to design too much stuff. I also did a quick diagram of the various depths of the things and the road my uncle would be biking on.
I made a few notes about what colors of paper I’d need, and then I headed to the store. When I got there, the woman at the counter told me I had five minutes before they closed! Oh no! I rushed into the paper section and started grabbing sheets of colored card stock. In my mad rush to get paper, I ended up buying nearly $20 in paper sheets. It turned out to be a good thing that I didn’t spend too much time choosing paper because my laser reservation was at 10pm and still needed some design time before that. I snagged a quick dinner at Clark’s and headed back to work.

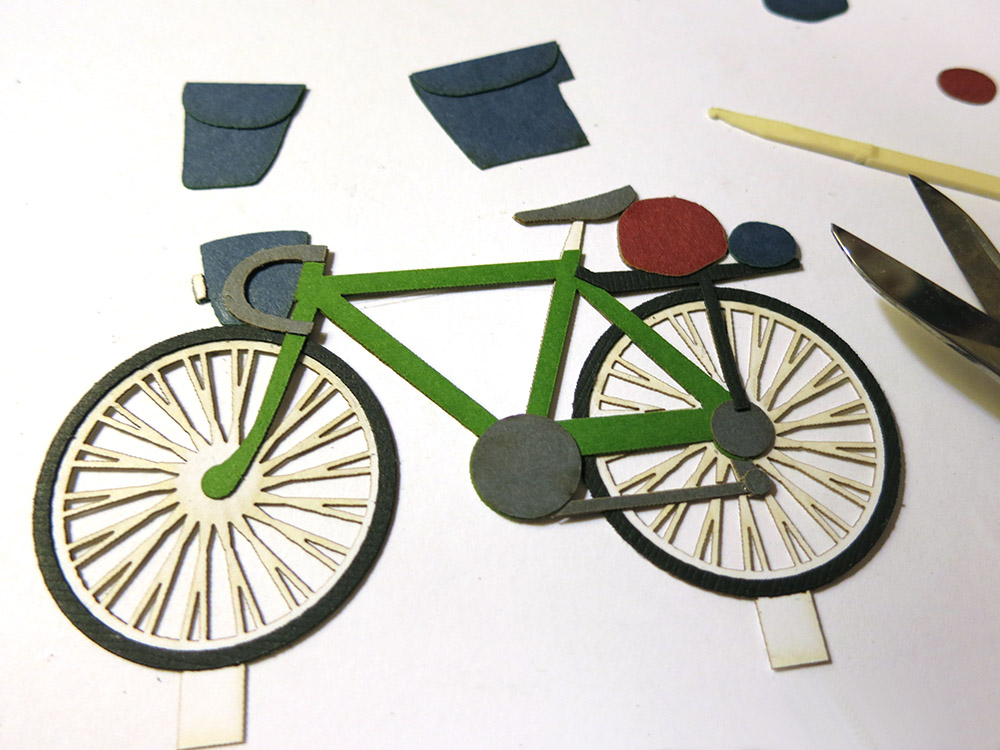
I went back to my desk and fired up Illustrator. I started with the bike wheels. I knew that with the laser I could cut all those impossibly delicate spokes without even breaking a sweat, something I’d never try to do with an razor knife. I also designed the spacers and hinge flaps that would anchor the parts and allow them to fold.
I used dotted lines to perforate the sheets where the paper needed to fold. At 9:30pm, I headed over to TechShop so I’d be there for my laser reservation, but I took my laptop along since I still wasn’t done with the design. I knew I could cut single sheets of paper at the machine’s maximum speed, but I had to do some test cuts to determine what power and pulse rate to use. I was able to get some settings that didn’t burn the edges of the paper much. With a low enough pulse rate you can even get the paper to be sort of microperfed, but not fully cut, in in some spots. This can be handy because the compressed air and blowers clearing the air in the laser can make your tiny pieces of paper get sucked into the exhaust system as soon as they are cut free.
 I spent the first hour of my reservation frantically finishing the design. The second hour I worked on the laser cutting, swapping sheets of paper into the machine to cut. I finished just at the stroke of midnight. I took my pile of laser-cut paper parts home tucked into my notebook for safe keeping.
At this point, I needed to make some decisions about glue. In the past, I’ve used 3M’s Super 77 spray glue for paper, which works well, but doesn’t give you much chance to position parts once they’re in contact. So that was out. I’d used decent quality glue sticks, but those were far too blunt an instrument for something like my super tiny bike tires. Strike two. I’ve used white glue for some fairly stiff card stock, and although it is very strong and has a decent working time, it causes wrinkling if you use it on a larger area. I had to figure out something else.

I did some reading online, and the next day at lunch, I bought two kinds of glue: Zip Dry and Tombo Mono Multi. Both where supposed to work well with paper. I ended up being glad I got both.
Zip Dry is like super-refined rubber cement. It even smells like rubber cement. It has enough working time to fine tune the part positions. And cleanup is super easy. You can rub excess away cleanly and all you’re left is a pile of rubbery crumbs that can be brushed away.
 The Mono Multi is white but supposedly dries clear. It gave me enough working time to position parts and set up fairly quickly with a strong bond. The big down side is that it’s far worse in terms of cleanup. Excess glue has to be skimmed away immediately or you get an ugly, sticky patch which can not be cleaned away without damaging the paper. It doesn’t much matter that it’s “clear” at that point.
An overnight test of the two glues showed that Zip Dry is not as strong as Tombo Mono Multi. When I peeled apart the pieces of paper I’d glued, the Zip Dry parted at the glue line while the Tombo Mono Multi delaminated the paper.
This turned out to be just the right combination of glues. The Zip Dry worked for things like delicate tires on spoked wheels, and the Mono Multi held together the flaps and hinge pieces that needed extra strength.
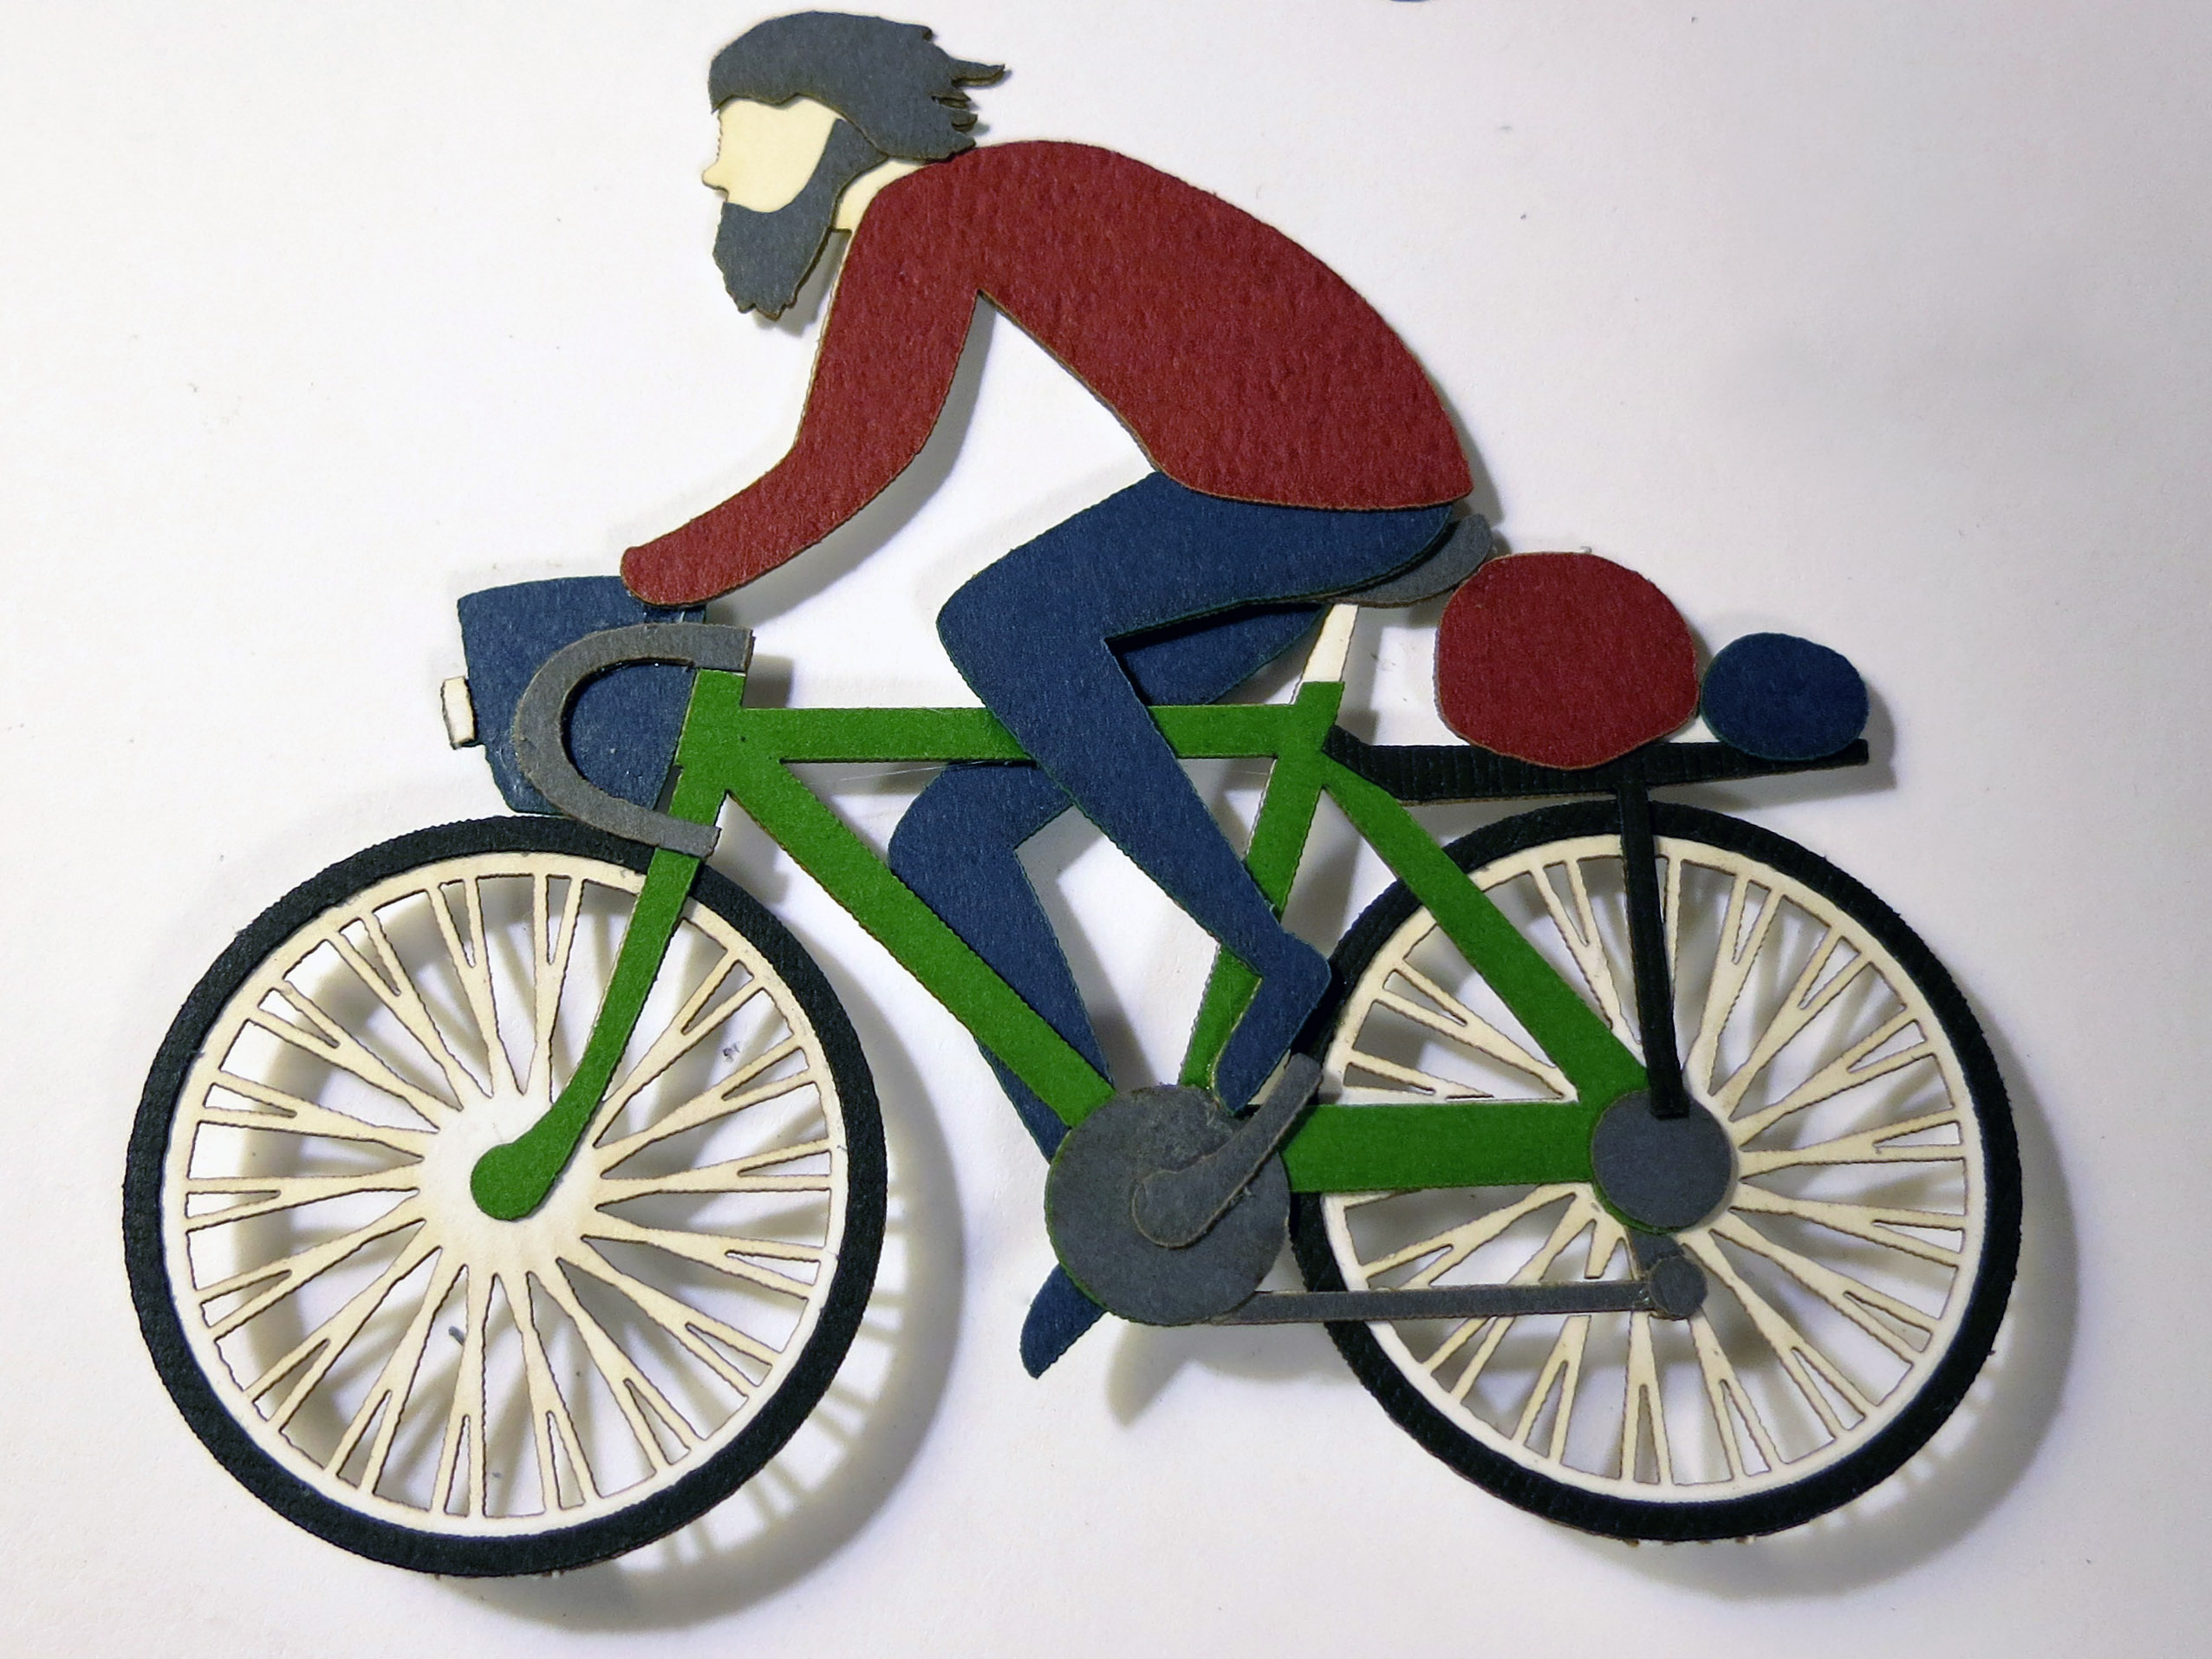
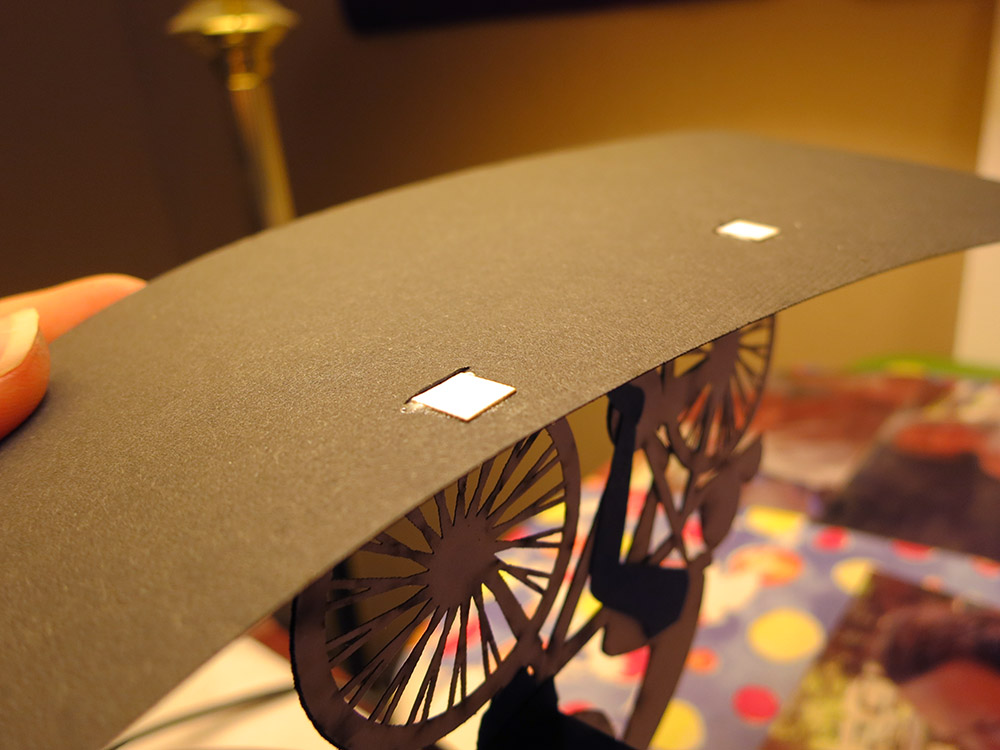
 Here is my uncle on the bike fully assembled. I also completed the sheep and glued up the tree and the mountains. It was time to start assembling the card proper. My main concern when laying out the card was that the objects must be at least as far from the front edge as they are tall so nothing would poke out from inside the card when it was folded up.
I also wanted to add some struts behind each object, forming a parallelogram between back of the object and floor of the card. This parallelogram is what lets the object fold down flat and pop up when the card is opened. I know real popups use other kinds of tricks to make things unfold, but I didn’t have time to do any research into it. Just the basics!
 One thing I did do right was to pass the bike’s white hinge tabs down through small slits I made in the road surface, and then gluing the tabs to the under side of the road. The white tabs from the wheels would have stuck out like soar thumbs if they were visible. It made the bike look like it was really standing up on the road surface. I wish I’d also done that for the sheep’s feet, the tree trunk, where the struts glued to the foothills, etc. That would have looked a lot nicer.
I started assembling the final card. My layers were mountains, foothills, tree, bike, and sheep. Each object had tabs at the bottom and struts that push/pull the object when the card opens and closes. The object and the sky on back of the card had to be parallel, and the struts had to be parallel with the road surface bottom of the card.
 I glued on the mountains, then the foot hills. I discovered that the strut for the sheep was impractically long. I thought it would bow when pushing, so I improvised a little vertical leg half-way along to help it stay even.
The exact positioning was somewhat improvised since I had had to rush the design and wasn’t able to spare much time for the actual mechanism. If I’d had another 30 minutes, I could have laid out slits in the road/background that would have hidden the various glue tabs and made the positioning exact. I would definitely do that next time.
The loosy goosey by-hand approach made me use a somewhat tricky system where I would glue the object down, glue the strut to the back of the object, and then put a dab of glue on the other end of the strut and fold the card shut. This method forced the tab to be glued in the correct position and ensures that the card can close fully.
 However, if I put too much glue and there was glue squeeze out, the card would glue itself shut. Not good! I carefully worked through gluing the mountains. Fine. The foot hills. Great. The sheep. No problem. Then I put the last two dabs of glue on the bike and the tree. The card was almost finished!
Disaster! On the very last action of making the card, I accidentally folded the struts up instead of down when I was closing up the card. The two struts glued themselves to the sky! NO! The Tombo Mono Multi sets up fast, and I wasn’t able to detach the two sheets without tearing some ugly rents in the sky. Oops.
At that point, I was too exhausted to quickly design some clouds, birds, or UFO’s to cover the mistakes. Thankfully, I still had some more of the blue- lined paper, and I was able to hand cut a patch. The horizontal lines do a good job of hiding the fix, and for the most part no one can see it unless I point it out. *Phew!* The card was done.
I shot a quick video of the card opening and closing. There’s also some footage of the bike being laser cut.
Sadly, my uncle died before I could give him the card. I don’t regret making the card though. It was nice to have spent that time thinking about him and our trips together, certainly much better than spending that time waiting and worrying. I did give the card to his son. Now I’m the only one who remembers that wonderful summer. I wish I were a better keeper of the past.


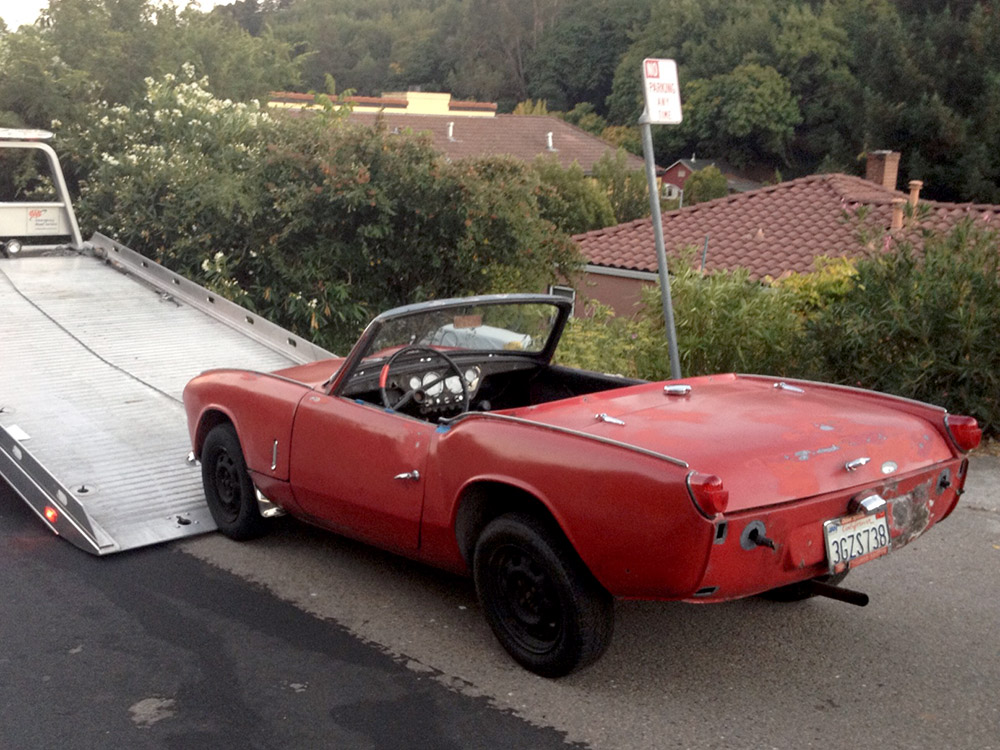 Grandpa Stan bought this 1962 Triumph Spitfire and has been restoring it. It had two brackets that hold the stabilizer bars, but his were horribly bent and broken. I guess those brackets are hard to get because he asked me if I could make some replacements.
 He gave me the the less destroyed of the two plates. I was able to get some rough measurements. I had sheet of metal with the same thickness, so the first thing I tried was cutting a piece out with the bandsaw and bending it into shape cold.
 Here’s the plate on the vice, and you can see the metal bar in the background. I put the vice on the anvil so it would be able to take some pounding. The plan was to heat the plate in the furnace, fish it out with tongs, and position it on the vice. My wife would then place the rod into position, and I’d hammer it down. We practiced it cold, and then gave it a try. We were a bit slow, so I ended up having to do 2 heats to form the channel, and then another heat to fine tune the transition back to flat.
 We banged channels into two of the plates, and it was time to put all this stuff away. At least we put on an interesting show for the kiddos. It was kind of a big production for two little curves.
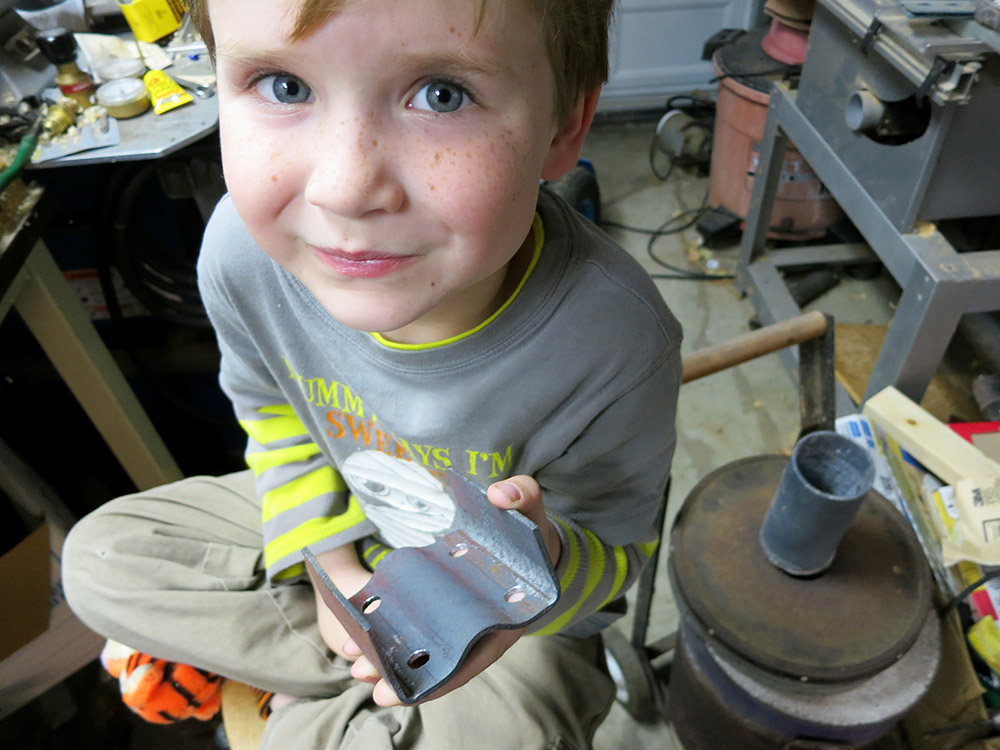
 We talked about drill press safety, like how it’s good to clamp the work down. We also discussed how to position the piece so if the bit catches, the part spins into something solid that is not the operator. He did a good job helping. I like his safety gear.
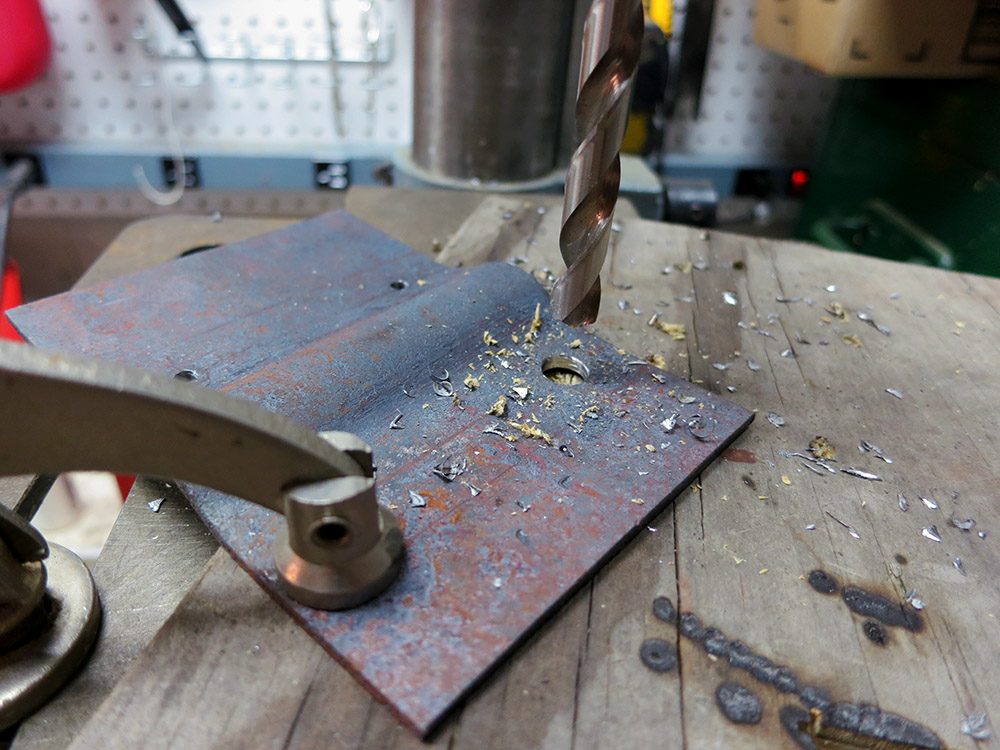 Once we had all eight holes drilled, it was time to bend up the wings at the edges. I just did that cold in the vice. One tricky part was that in order to not squash the center channel area, I had to extend the jaws of the vice a bit with some square stock.