In this project I only had two disasters. I often keep my projects in sewing boxes because they’re cheap, stack well, have semi clear sides (so you can see what’s in them), and have nice rubber handles. The down side is that they do not have locking lids. That used to worry me, but in all the years I’ve been using them it had never bitten me. Until this year. I was hauling the box out of the trunk of my car when one of the latches caught on my jacket pocket, and dumped everything out into my driveway. In the dark. In the pouring rain. Trying to find tiny clear plastic Moomin facial features in that torrent was no fun.
The other disaster was more burocratic. I have Wednesday nights to do these kinds of projects. It’s my night off from being a Dad and I often spend it at TechShop. Normally booking the laser is pretty easy, but in the run up to Christmas the schedule gets filled up by busy Christmas Elves. This year I forgot to make one of the weekly reservations and was suddenly looking at doing much of the lasering on the day before Christmas Eve. That put a big kink in my gluing schedule.
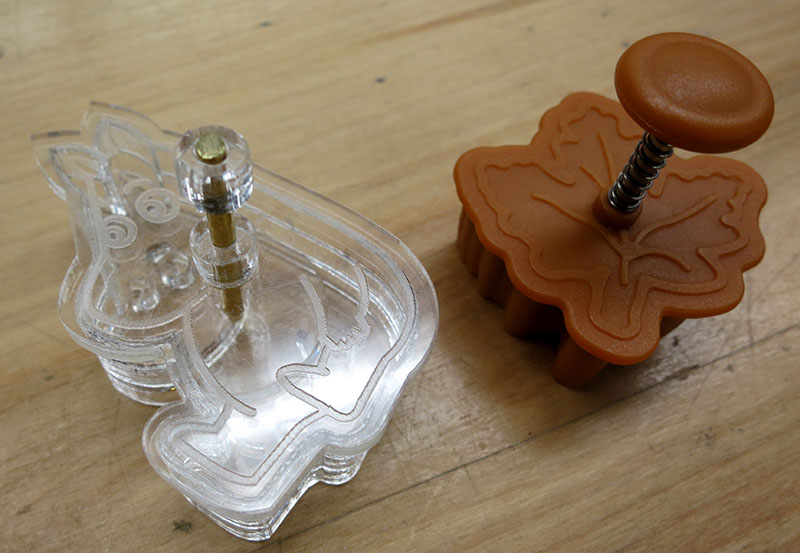
 I used two kinds of glue in this project. Most of the parts are bonded using acrylic solvent welding, and the bond between the metal push rod and the plastic cap/base was done with J-B Weld’s Kwik. I knew that aligning and solvent welding the thin “outline” parts that form the cutter would be a pain, so I laser cut a wooden form that could be placed inside the sections and force them to stay alighted while I applied solvent around the edge with a syringe. Not being plastic I wouldn’t have to worry about them getting glued in place. I also made the alignment pieces have some “cutouts” so those sections would be easier to get in/out and wouldn’t pull solvent away from the plastic pieces via capillary action. The only downside was that these forms left a small amount of black charred-wood-crud on the insides of the cutters, but most of that could be removed by the light sanding I needed to do anyway.
 I made Moomintroll’s face out of a lot of tiny separate pieces. I figured that way each Moomin face would be slightly different and that would be nice. What was less nice was the large amount of time spent positioning every eye and eyebrow with tweezers, and the addition time needed for swearing every time my syringe full of solvent knocked one of those tiny little pieces out of place. On the other designs I grouped the pieces together. Snufkin only has his face, pipe, and hat feather. MUCH easier to position and glue. When I suddenly was faced with a week less time to do this gluing I decided to build something to make the gluing go faster. I thought “what if I build some sort of vacuum clamping setup?”
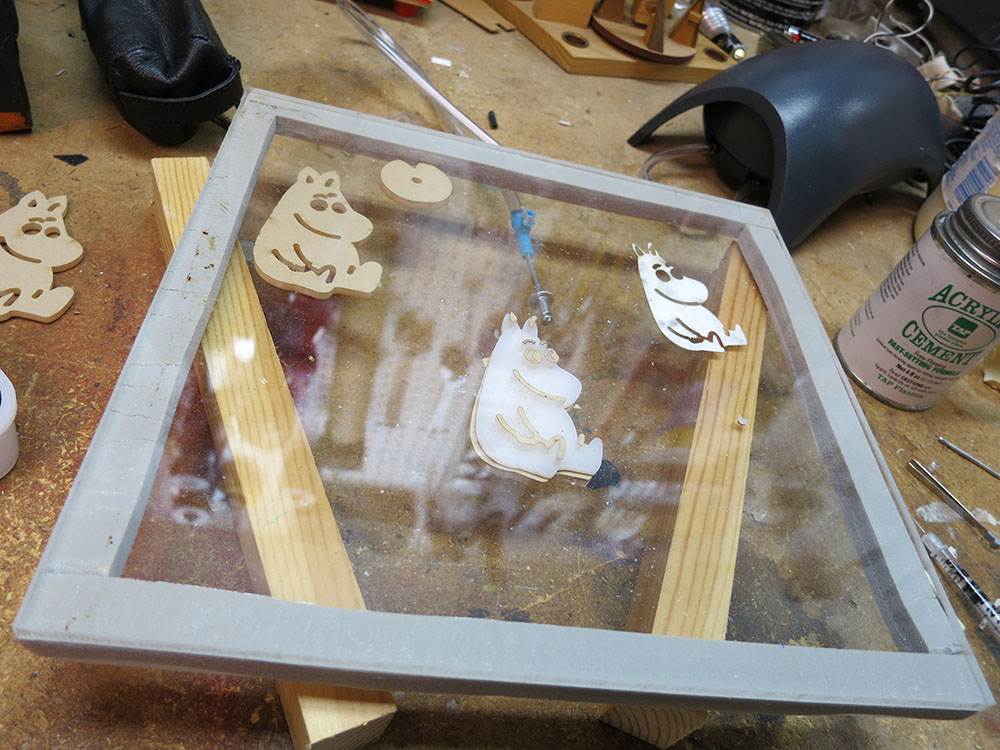
 I wanted something that would hold the parts in place as the solvent did its work, and also let me see what was going on in case something got knocked askew. I got a fish tank air pump, reversed the valves so it was sucking instead of blowing, and used that in conjunction with two 1/4″ acrylic sheets and some weather stripping to make a vacuum clamping area. I thought “I can apply the solvent, put the cover on, turn on the pump, and I’ll be able to see everything. This is the sort of desperation that comes from suddenly loosing a week of gluing.
Was the vacuum clamp a success? As it turns out the weather stripping leaked enough to make the clamping action very slight, but it did make a nice clear box with just enough clamping action to hold the facial features in place while I then piled a big heavy chunk of metal on top to provide the final clamping pressure. So all in all I judge the vacuum clamping chamber to have been a “modest success” instead of a complete waste of time.
 Gluing and painting. To make the images of the characters on the tops of the cutters I laser etched the designs though the acrylic’s protective paper. Then I used a piece of rubber to squeegee the paint down into the etched areas. Finally once the paint has dried some I peal the paper way. It’s best to do that before the paint has fully dried because the fully cured paint is stronger and pulling the paper away can pull bits of paint out of the design. When the paint is still weak it comes away clean.

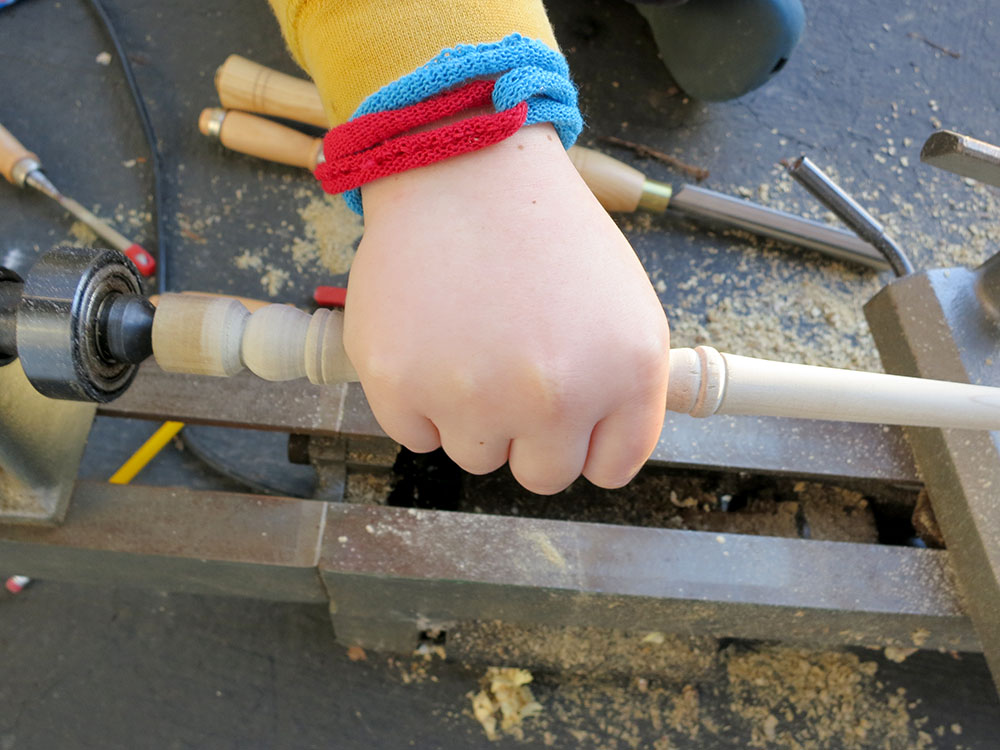
 In the run up to Christmas our family went to Dickens Faire, and my son really wanted to buy a wand at the wand shop. I told him we could make one at home. Now that the Christmas rush has passed we’ve finally gotten around to making one.