

I can remember looking through the classifieds in the back of Popular Mechanics. There were plans for go-carts, personal helicopter, making your own solid fuel rocket motors, and melting metal in your back yard. Maybe I’m not commuting to work in my personal helicopter but my House-mate Mark and I have gone pretty far setting up and operating our own backyard foundry.
What we did first
Well the first thing we did was to do a lot of reading (and mooning) on the subject. Probably the most influential books we read were the Dave Gingery books on how to make a machine shop from scrap. Our current setup is based quite closely on what Dave describes in his books.
Building the Furnace
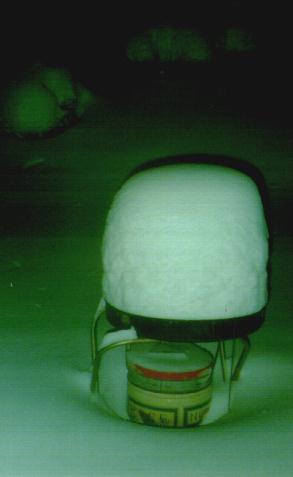
We were living in Pittsburgh at the time, so we called around and found a ceramics supply store that sold silica sand and fire clay. That was fairly easy, but then we had to find a steel bucket that was the right size for our purposes. (That didn’t cost an arm and a leg, or come complete with 5 gallons of tar.) We ended up using a large metal canister that a friend of ours had. It had been used as the packaging for a whole mess of caramel corn (which washed out nicely) and came decorated with Santa Clauses. So our foundry is both functional and festive. We rammed up the lining inside the bucket around a cylindrical form made from two plywood disks and a piece of sheet metal. It was quite the laborious/exciting evening sitting in our basement ramming up the lining and the lid. Finally we were past the reading stage, and getting on to the doing!
Mark devised a tuyere formed from a rectangular piece of sheet metal that screwed onto the side of our Santa can, and lead to a squirrel cage blower that we’d scrounged from some equipment. After pre-baking the lid in the kitchen oven we went to the backyard and filled the furnace with charcoal. A little lighter fluid and we were on our way to curing the lining. Once the steaming had mostly subsided we turned on the blower we got a very satisfying roar and a tall flame began to issue from the hole in the top of the lid. (Along with the occasional shower of sparks as the coals settled.) The next morning we inspected the lining and it hadn’t spall’d and there were only a few cracks in the lid. So we were just about ready to try and melt some metal.
The Crucible
During this time Mark and I had also been on the lookout for a crucible. Gingery had suggested a cast iron pot, but we hadn’t been able to find one that was narrow enough to fit the furnace. Everywhere we looked we were judging things in terms of their suitability as a crucible. We were watching a movie and we both reacted to a scene in which a lovely stainless steal container was visible in the back of the operating theater. We had a bad case of crucible fever. Trips to the local diner became increasingly painful. (lots of steel containers) Eventually I found a cute steel cream dispenser at a Good Will. It was made of reasonably thick metal, and had a little hinged lid. It became our first crucible.
Other Miscellany
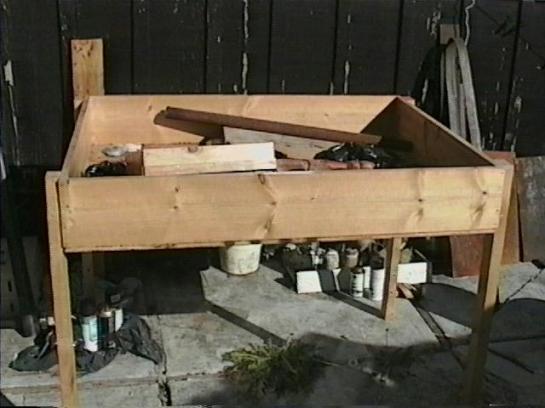
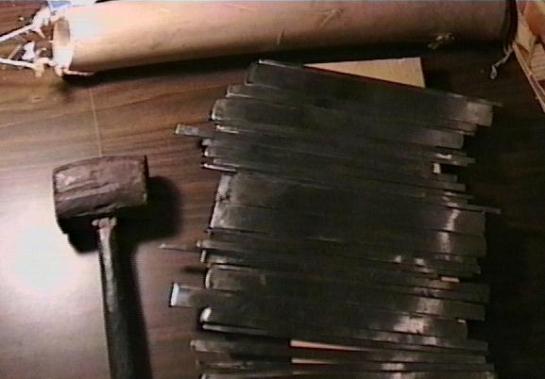
Well a lot of the start up time for a foundry is just all the little odds and ends. So here’s a quick list of other things we made for the foundry: Molding sand made from silica sand, fire-clay and water; A big sand bin made from a piece of plywood, some planks that we found in the car port, and two sets of fancy chromed legs that someone was throwing out on a Big Trash pickup night on Beachwood Blvd; A cheese-ie flask made from scrap wood; Parting dust (graphite) sack made from an old sock.; A rammer that was just a hefty turned table leg.; We made a riddle out of 1/4″ screen and scrap wood.;Venting wire made from an unbent paper clip; A bottom board made from …. a board; Mark managed to get some metal tongs from CMU’s physics stock room; We also bought:Face shields, large leather welding gloves, the list goes on…
The First Pour
We decided to do our first pour in an open sand mold. We scoured the house for something that would make a decent impression on the sand. A dinosaur shaped shampoo bottle (bubsaurous) was rejected. My attention was drawn by a box of salt dough figures that various friends of ours had molded during a previous soiree. (With the theme of baking salt dough denizens for a model village we had constructed in the living room out of cardboard, construction paper, and string.) So our first cast was done in the imprint of a salt dough gargoyle.
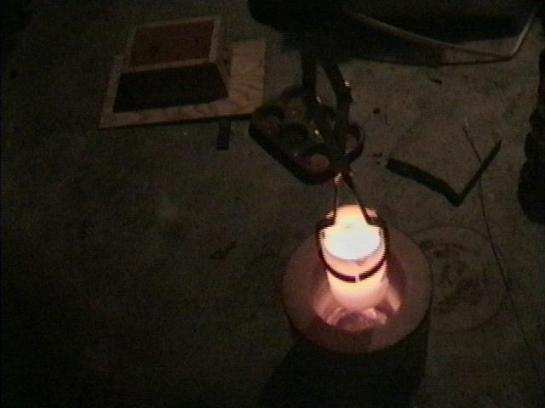
We put the creamer (loaded with scrap aluminum) into the furnace, and packed a load of charcoal around it. I had been somewhat worried that handle of the creamer was located right at the point where it would be optimal to grip the rim of the creamer with the tongs for pouring, but as the blower blew, and the roaring coals began to heat the crucible my worries vanished. The handle had apparently been hard soldered on and it simply fell away as the crucible came up to temp. The hinge for the lid was spot welded on, so it stayed on nicely. We got the crucible up to a bright orange glow, and then we poured the charge. There’s something very primal about the roaring fire and the liquid metal. One of my favorite sites is when the molten aluminum is cooling in the air, and it reaches the stage where it is glowing a very deep red, and a very thin layer at the surface has cooled enough to become silvery. This effect is pretty much only visible in low lighting. The casting came out very rough with sand inclusion, and very low detail, but that’s about all I’d expect from an open mold. I think we still have it around in a box somewhere.
The First Pattern
The first pattern I made was one of the feet for the Dave Gingery Lathe project, and the first time I tried to cast it I think I made every mistake in the book. The flask that we had was a lot bigger then was needed for the foot pattern. We’d made it that size thinking it would give us more flexibility in the size of the patterns we could cast. Not a good idea! I spent most of my time ramming sand into all the extra space in the flask. The filled flask must have been about as heavy as 3 cinderblocks. We had trouble flipping it, we had trouble opening it up to remove the pattern. The foot is roughly the shape of a rectangular top hat, with the sand in the drag going up inside the hat to form a green sand core. When we separated the flask that core broke off, but rather then try and re-ram all the sand I just stuck it back on. The flask didn’t have any alignment pins, so putting the flask back together was ticklish work. Especially considering how heavy it was. It seemed like every thing had gone wrong, but in the end the casting came out ok. The best thing about the foot was that it was a completely non critical casting, so with enough filing it ended up looking ok.
What Were We Casting?: Caution to the Wind
Well from there we started learning a lot about pattern making, molding sand maintenance, casting, and metal working in general. I eventually bought little delta disk/belt sander with a tilting table. That was most useful for making patterns with uniform draft. Bondo is very useful for filleting. You can mix some up, and then squeegee it onto place using a piece of plastic cut to just the shape of fillet that you need. It dries quickly and sands very smooth.
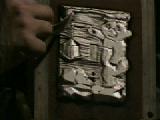
We quickly discovered that if you had the blast up to high on the furnace you’ll burn a hole right through your crucible, and your charge of aluminum will flow out into the bottom of the furnace. After this had happened a few times our tuyere became too blocked with aluminum to allow enough air through. I pried open the sheet metal tuyere to discover that we had cast our first art piece. The flows of aluminum made a beautiful puzzle which could be disassembled into the individual flows, or re-assembled to form the inside shape of the tuyere.
Problems? You bet! We had sand inclusion, porosity, cold flows, shrinkage, and one time when we had the sand too moist we poured in the metal, and the sprue hole blew a number of aluminum foil bubbles. Yes. We were learning.
Rain Nor Snow Nor Dark of Night…
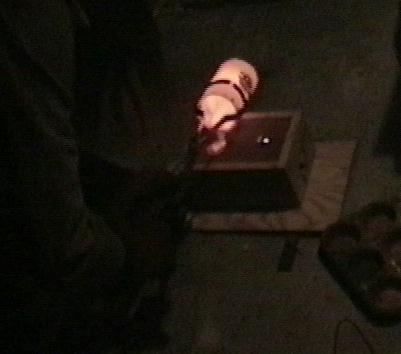
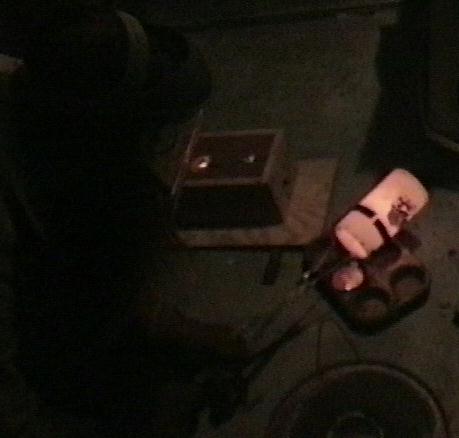
We continued casting even after winter had come. We moved the bin of sand into the unused basement bathroom, and shoved out the two feet of snow in our back yard. Every book warns about the dangers of casting in a wet environment, but we did it anyway, and with a lot of care (and luck) we never had a miss-hap. There we would stand in the cold and dark of our back yard watching the fire, and toasting marshmallows over the exhaust hole. Here’s are some pictures of Mark and myself in our winter casting garb.


Where Are We Now?
Well Mark, Kate, Janice and I moved out to California, and brought most of our foundry with us. We left the bin, and the sand behind. “I’ll be damned if I’m going to drive 100lbs of sand across the country!” I wonder if the new tenants ever figured out what the HooverCraft in the car port was… Anyway leaving the sand behind was probably the best choice we could have made. Once we were settled in here I began the search for some actual foundry sand. I had heard that nothing is as good for casting as sand from an actual foundry. One of the hardest things for a book on foundry work to do is to describe the consistency of optimal foundry sand. How sticky? How porous? How fine? Do I want oatmeal? Concrete? So I began the search for an actual foundry’s “magic sand”. Well I never quite found actual foundry sand, but I did find a place in Oakland called Industrial Foundry Supply. Where (with a $100 minimum order) you can buy Petro-Bond sand. (A petroleum bonded molding sand designed specifically for foundry work.) Mark and I got up early and drove over there in Marks VW camper to pick up our sand. Cruise on down to the industrial part of town to fetch some drums of magic sand. Somewhere on the trip to California our blower got lost, but we managed to get another surplus blower, and I wangled together a natural gas burner for the furnace.
We haven’t done much casting with the new setup, but so far the results have been spectacular. You can take a look at our first casting with the new sand.

We had never gotten really nice surface finishes/detail out of our old sand, and the results that we were getting were highly varied. With the new sand we’ve managed to get an order of magnitude better detail, and since the sand is a petroleum bonded sand we don’t have to spend hours re-conditioning the sand before a cast. The new sand is a little messier, and less “natural” but I think it’s well worth it for the MUCH better results we’ve been getting. Also the natural gas burner is very nice. Melts take only about 15 mins, and we don’t have to scoop out loads of ash, or keep opening up the furnace to add more fuel.
Another good page about setting up a furnace is the Building an Inexpensive Small Scale Furnace page over on wuarchive.
Here is a quick walk through of an evening of casting:
- Here is our bin of sand
- I first carve a wooden pattern of the part that I want to cast. To do this I use the great carving tools that my sister Inge gave me

- Then I ram foundry sand around the pattern inside a flask. Then I can split the flask in two and remove the pattern leaving a cavity in the sand in the shape of what I’m trying to cast.

- After ramming up the sand it’s time to light the furnace and melt a charge of metal to be poured into the sand.

- After the charge has melted, and the dross is skimmed away I’m ready to take the crucible out of the furnace and pour the metal into the mold. I then pour any excess metal into one of our handy muffin tins.
- Once the metal has cooled we can knock away the sand and have a look at the results
- Here we can see both the original pattern, and the final casting


What’s Next?
- Mark and I have embarked on a new furnace that is somewhat bigger then the last one. There’s also an interesting book on building a cupola furnace that may contain the seeds of our next adventure.
The original page in the Internet Archive.
The original page was one of the very early backyard foundry pages on the net, and it got a moderate amount of traffic. I even parked backyardfoundry.com for a while, but never actually hosted a site on it. 4k Images! What was I thinking! lol
