
PhotoJoJo sent me an ad for a small camera slide. It was kind of a lot of money, and wasn’t even motorized. I’ve been taking videos of projects and thought that a little motorized camera slide might be a nice way to spice up those kinds of videos. I remembered we still had a dead inkjet printer left over from the kids’ “Take Stuff Apart Day” that we’d done a few months ago. Inkjets have a linear motion slide inside. I thought, “Wouldn’t it be cool if you could make a camera slide with basically just the parts from a printer?”
 I didn’t want to have complex control software, and I wanted it to be mostly made from the printer. In the end, I spent about 4 evenings hacking up something. There are lots of cheap motor controllers out there, so I squashed my initial instinct to hack up a speed controller out of bits from my junk drawer. I instead decided to act like an adult and order one of these. With free amazon prime shipping I could have it in two days for under $10. I’d probably end up spending more on perfboard and components building a home-brew driver. Plus, if this project was a bust, there would be plenty of other uses for the driver board since it could drive a much bigger motor than the one in the printer.
 I scrounged up some micro-switches and a wall wart to power the rig. I also ended up buying a switch and a project box from RadioShack. So the total bill for this project was about $20. I even (mostly) used wire that was taken from the printer. I really wanted this project to be simple to do in the hopes that other folks could build one. The interface was fun to design because it’s entirely electro-mechanical except for the speed controller.
 It was fun to design an interface that didn’t have any software but was still nice to use. I had a direction switch that you could push in the direction you wanted the slide to move, a launch button that would start the stage moving, and two end-of-travel microswitches. It was fairly complex behavior from a minimal amount of wiring. I was really satisfied with how that turned out.
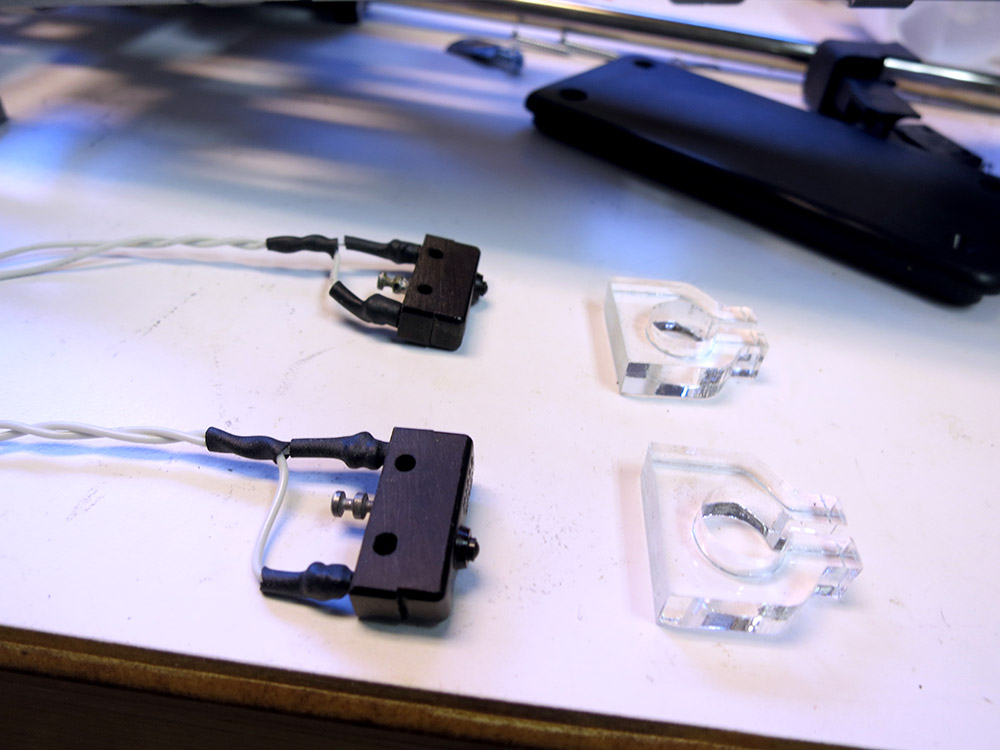
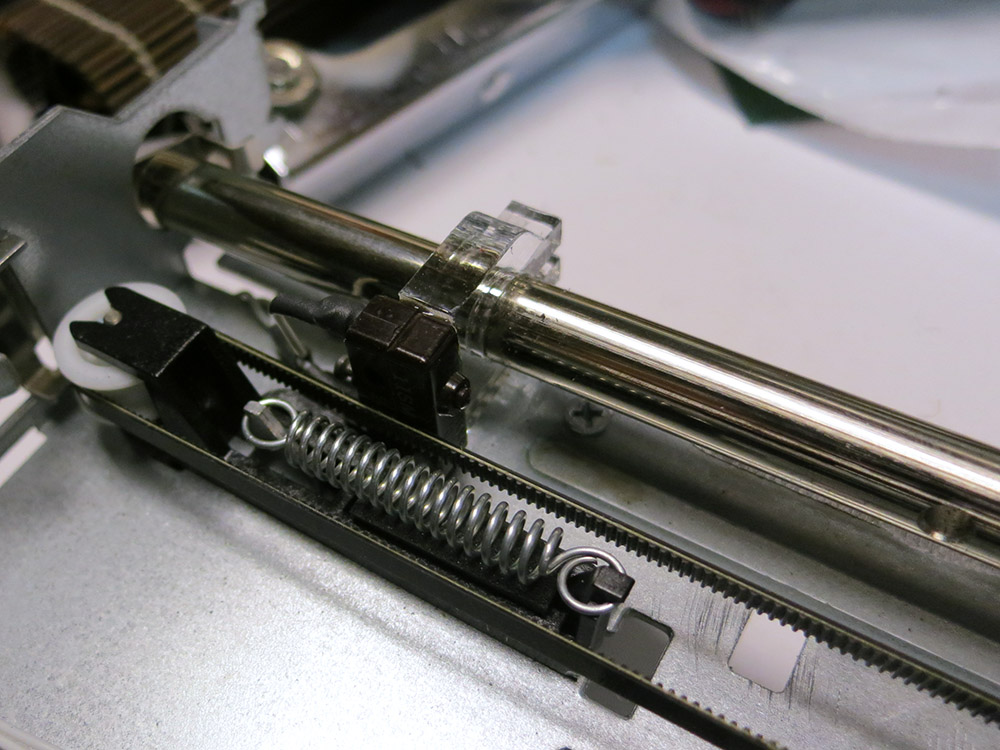 I laser-cut some mounts for the end-of-travel switches so they could be mounted right on the rod that the carriage travels along. The mounts allow the switches to slide along the rod to position where the camera motion should stop.
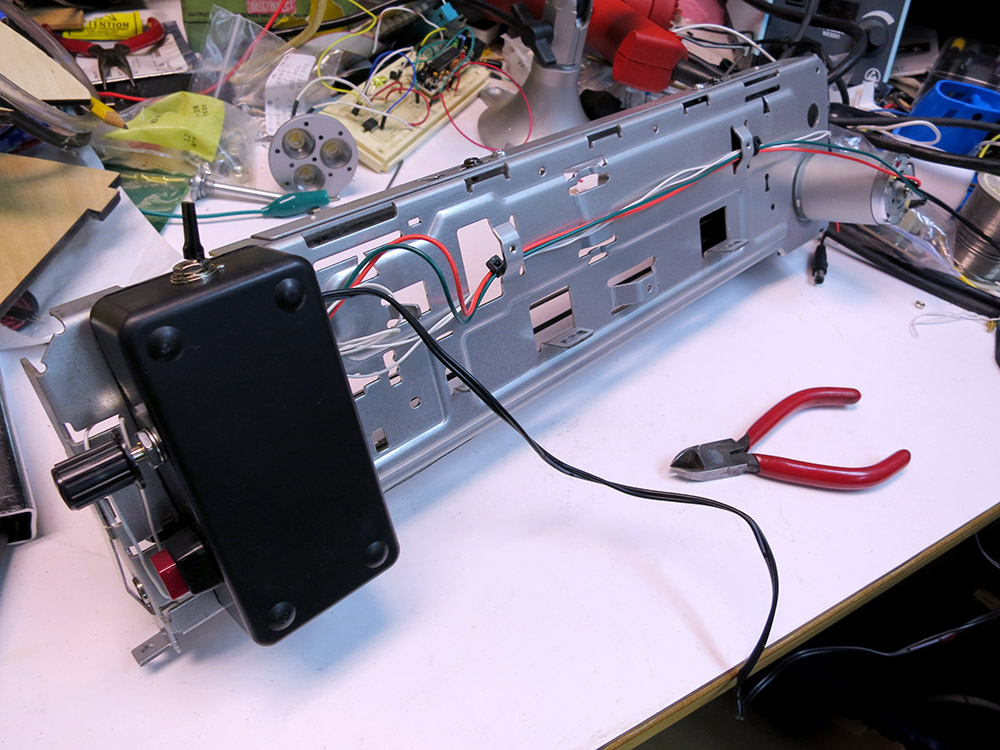
Probably the single most time-consuming thing was hacking down the carriage. I used a cutting disc on my mototool to hack the carriage down to a roughly flat area and then used some Bondo/black spray paint to make it look like a nice, flat surface. I also stuck a short 1/4-20 screw up though the center to mount the camera on.
I was planning on mounting my Cannon S100 to the slide. It’s light, so the whole rig didn’t have to be super strong. Luckily, I happened to have a ball-and-socket camera mount sitting around from an old project, so I hooked that up to the screw on the carriage.

At this point I realized that for a camera slide this small, most of the usable camera motion is VERY slow motion, and the printer’s motor was just not up to the task when running open loop. If I salvaged the position encoder and hooked up an Arduino as a controller, I probably could have managed to get very nice motion of of the rig, but since the goal was a one-evening super easy/cheap hack, it was a fail. Putting a gear-head motor in there would also have worked, but also violated the cheap and easy premise of the build. Here’s a video of the final result.

I wouldn’t be surprised if there’s another camera slider project in my future. This time with more motors and software. This was a great learning experience, and as the Lego Guy said, it’s time to “Keep Tinkering!”


