
 Here’s an cheap and easy way to accurately press metal thread inserts into 3D printed objects.
3D printing provides a wonderful way of making custom boxes for all your projects. Often these boxes are held together with self-tapping screws driven into plastic holes. That’s great if you are only opening and closing the boxes a few times, but eventually cross threading/stripping will make you sad. Think how much more awesome the boxes would be if they had integrated metal threaded holes!
 Thankfully, that’s pretty easy to do. You can get brass inserts specifically designed to be heated and pushed into plastic. McMaster Carr sells such inserts and the irons and tips used to push them. The inserts themselves are pretty cheap, but once you add an iron and a number of different tips, the price starts creeping up, leaving you having to push the inserts in by hand.
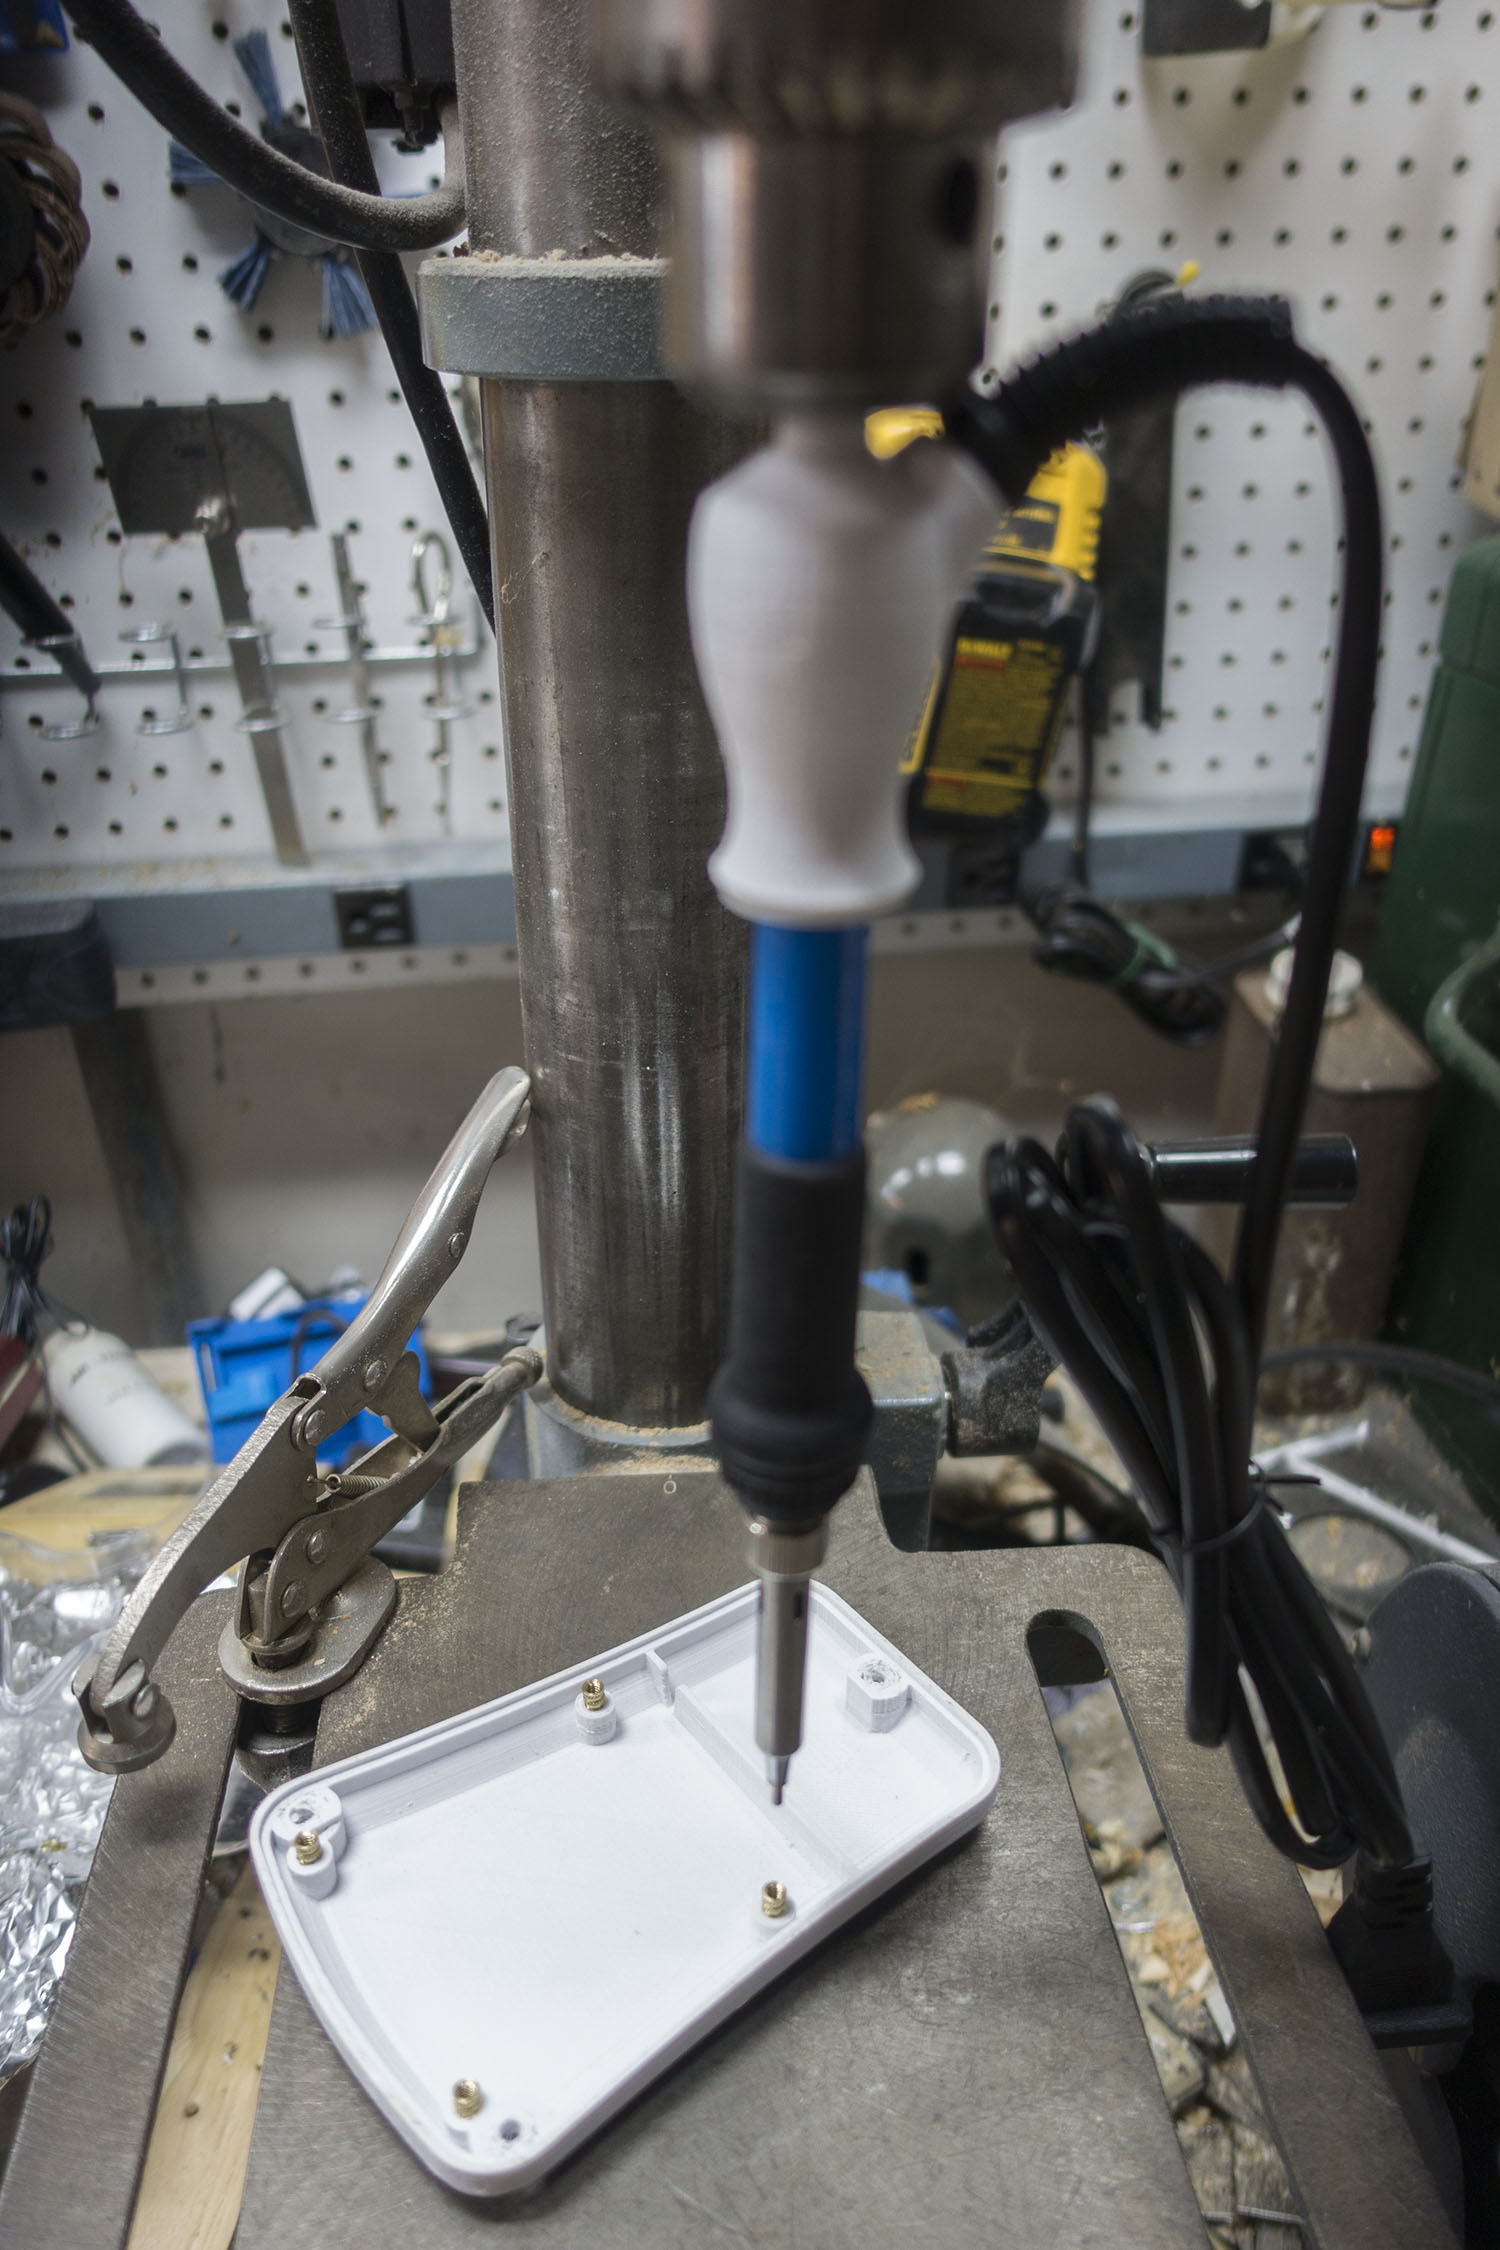
So I had the idea of making a little adaptor for mounting a soldering iron in a drill press. This process allows you to be sure you are pressing the insert in plumb to the surface, and you can set the drill press’s depth stop so you can press a number of inserts in to just the right depth. Easy peasy. Hey look this post was even featured on Hack-a-Day!
I used this soldering iron because it’s the cheapest iron I could find that came with a number of replaceable tips. You can convert some of the tips into thread-pushing tips and still have a couple left over if you’d like to use the soldering iron as a soldering iron. It also has a heat adjustment that should be cranked down to minimum for this project.
 Mounting the iron on the adaptor is simple. You just pull the rubbery strain-relief collar from the back of the iron, stick the iron into the hole at the bottom, thread the wire up through the slot, and re-mount the collar into the hole on the side of the adaptor. PRESTO! You have a soldering iron ready for the drill press!
Remember folks, never turn the drill press on while you’re doing this! Being whipped in the face by an electrical cord is bad news.
 Making the tips was easy. I have a lathe, so it was trivial to machine two of the soldering tips into 4-40 and 6-32 tips for pushing threaded inserts. The geometry of these things is pretty non-critical. Just a nub on the end that has to be smaller than the minor thread diameter and a square shoulder that does the actual pushing and heat transfer.
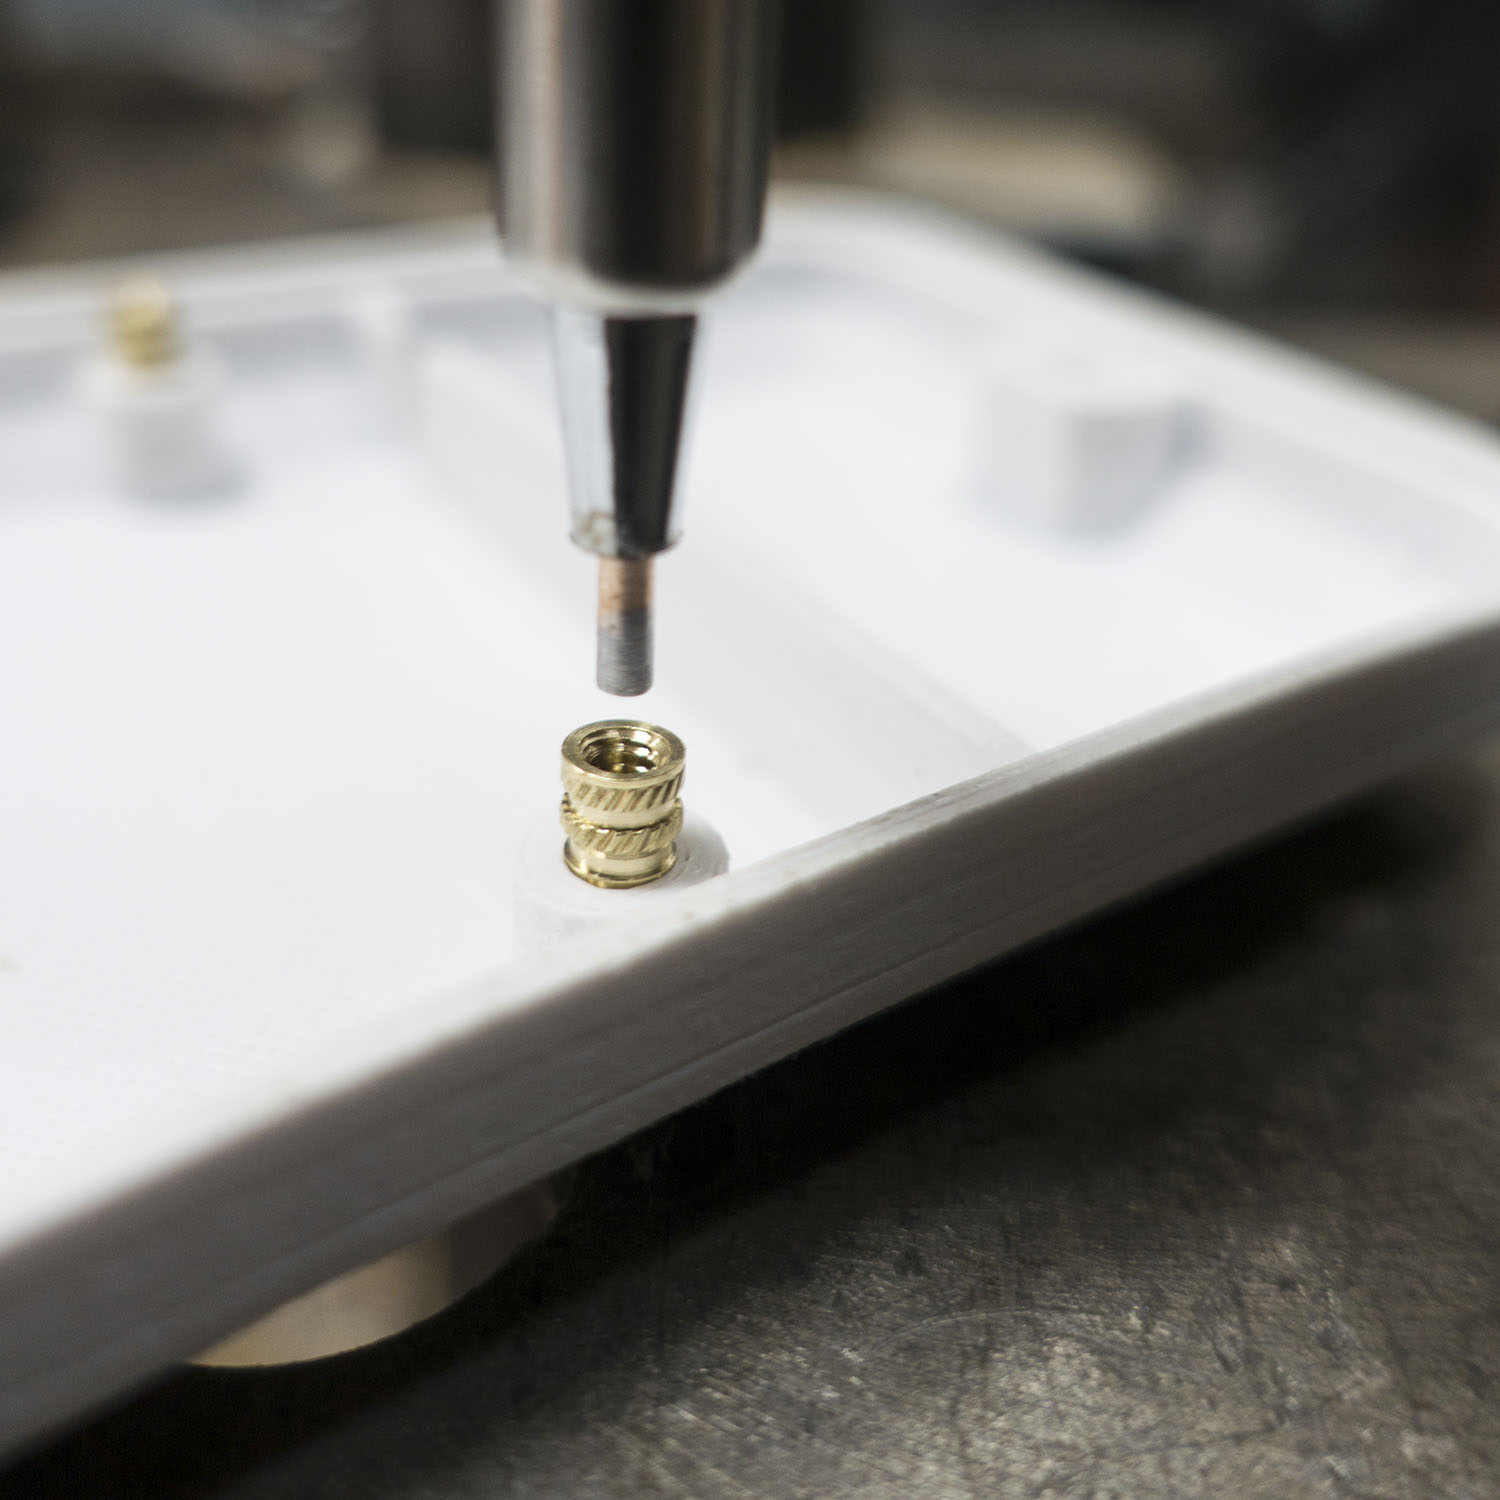
If all you have is a drill press, it’s probably still pretty easy make a serviceable tip by chucking the tip into the drill and turning it at your lowest RPM setting. Then you can use a metal file to cut a shoulder 2/3 of the way up the tip.
Heck, you can probably even just use a cone tip as it is, but with less good heat transfer and less of a guarantee that it will stay plumb. Thankfully, the inserts go into a tapered hole, so that should help them stay aligned as you sink them in.
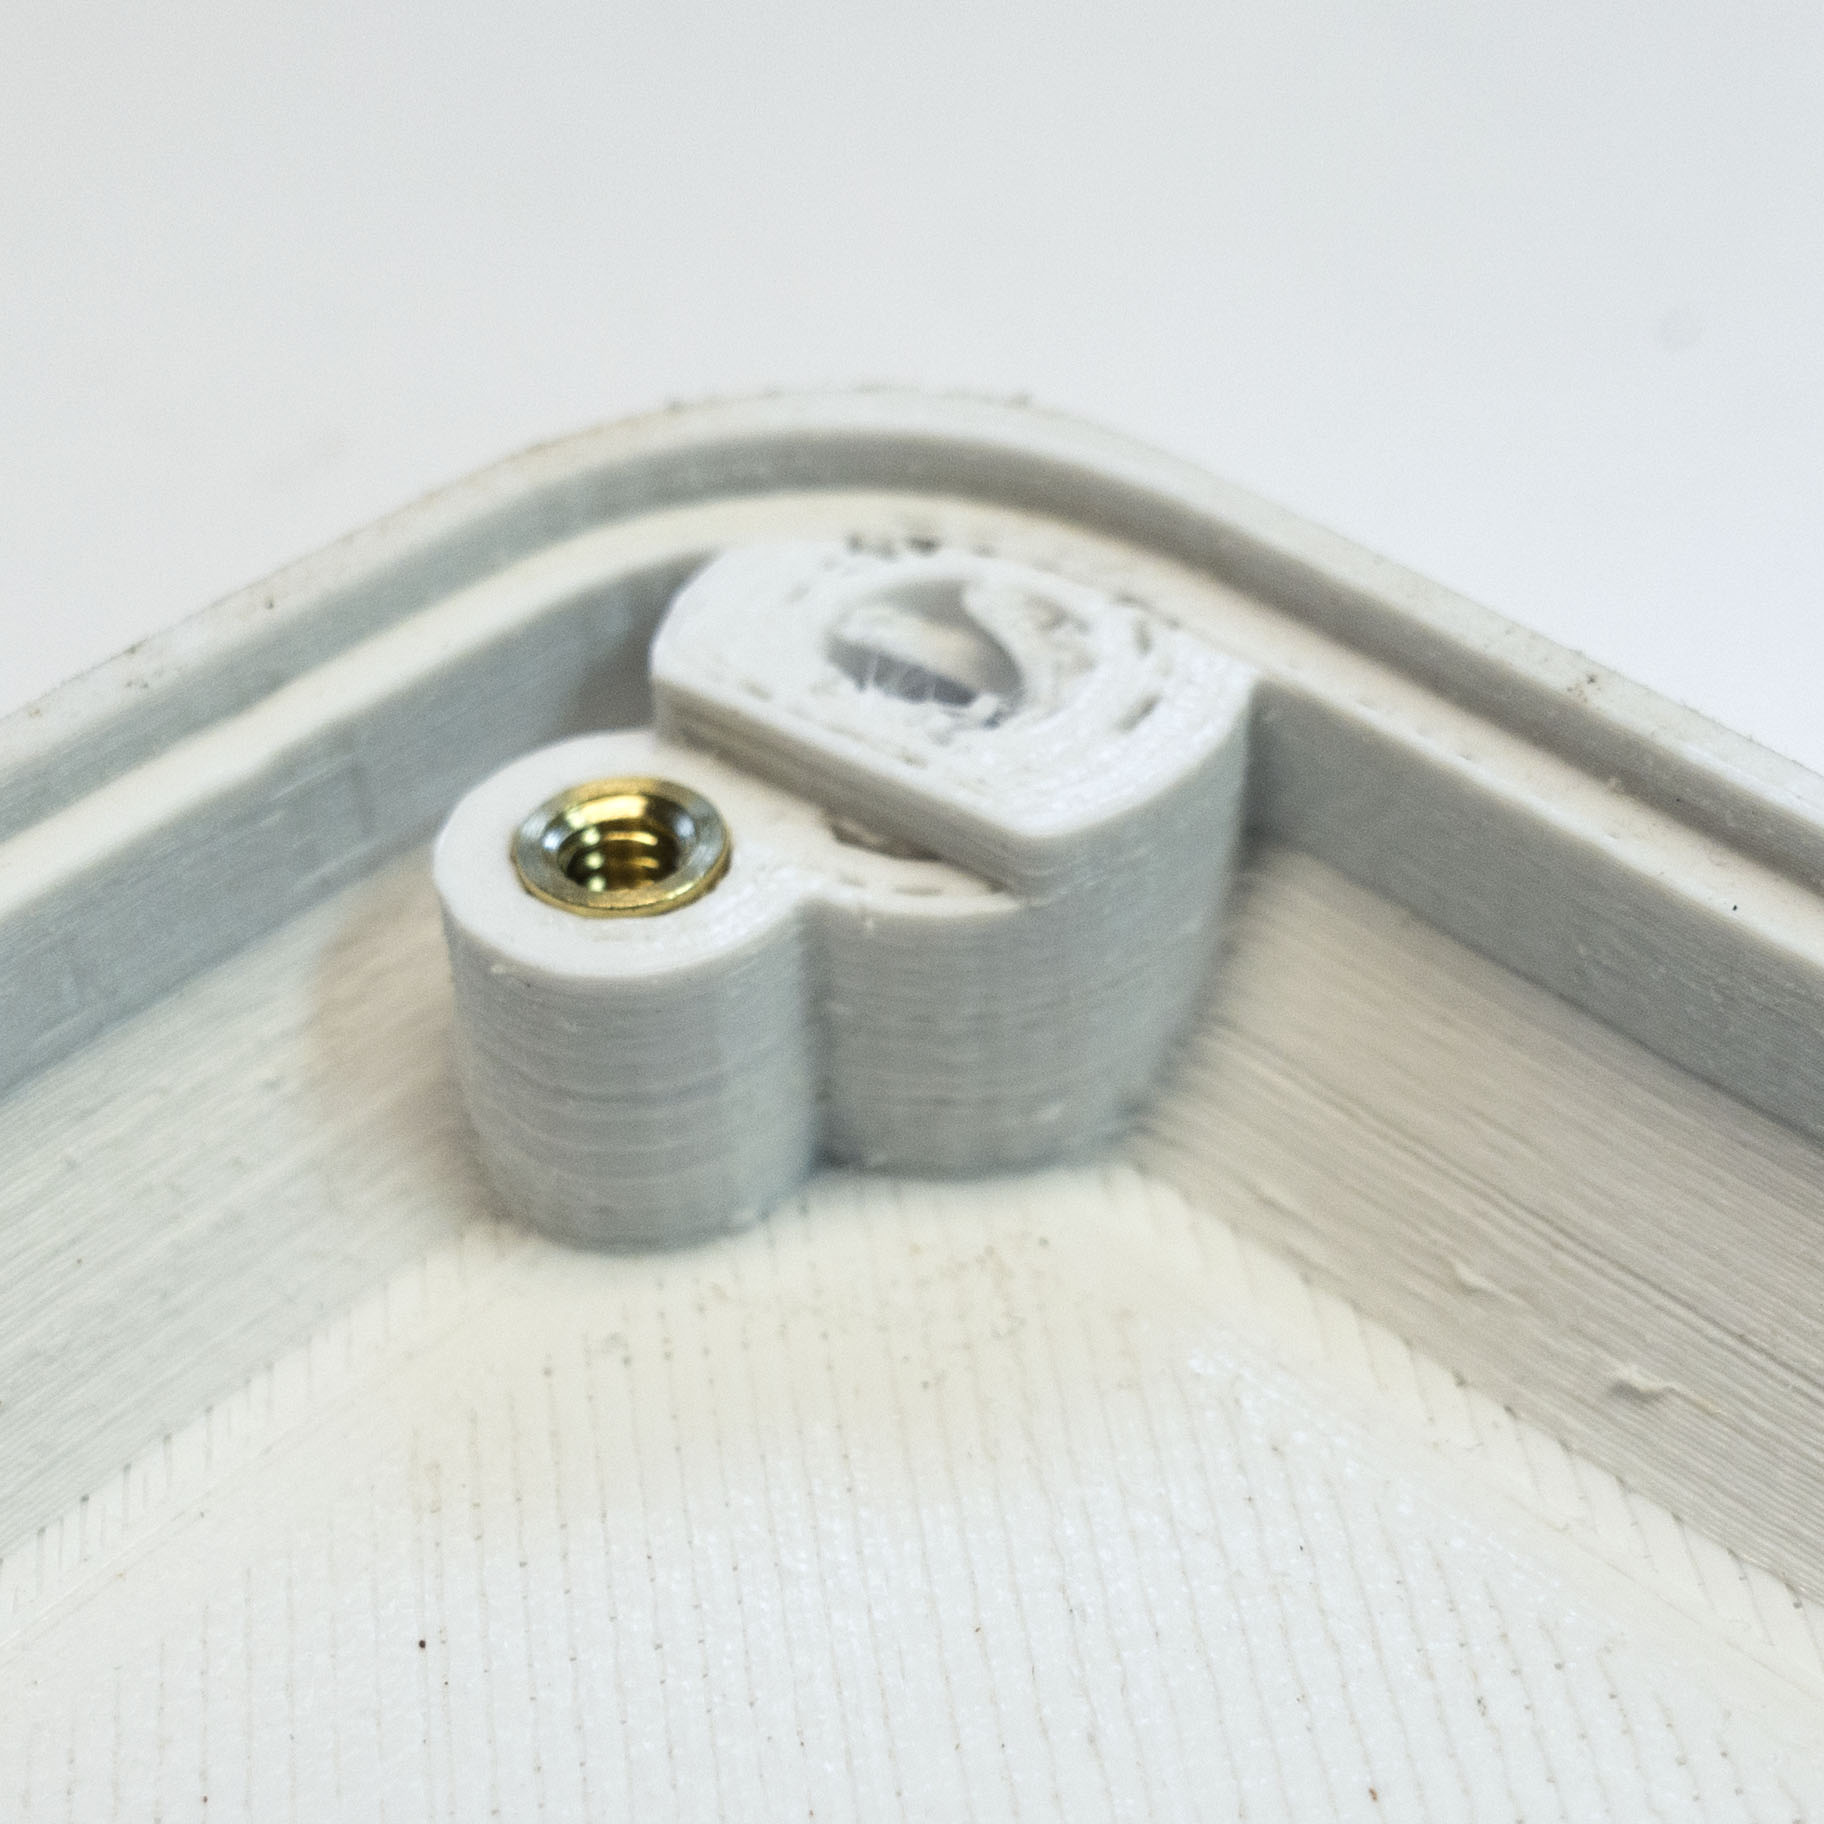 These tiny inserts will heat up super fast, so set your drill press stop so you can press them in and retract quickly. If you pause too long the whole area will get soft and your insert may end up like this.
So there it is: $16 and one 3D print between you and metal thread insertion nirvana.

Pingback: Heat-Set Insert Jig Grants Threads to 3D Prints | Hackaday
I use a soldering tip that I filed down on a drill press exactly like you said. Near enough is good enough because if it is too snug the little bits of corrosion that build up on a heated iron will dislodge the insert on the way out. If your design has room for it, leave a larger diameter empty cylinder on the opposite side from where you are pressing through from. This allows a bit of room for the pushed plastic to buldge up without having it roll into the thread. It also gives you extra room to feed a tapping screw through if you do need to retap the thread if you doing happen to drag a glob of hot plastic back through your thread. Which happens to me alot, using. Using inserts, and a nice countersuck hole to match a hex head screw visible on the outside looks beautifully professional no matter how messy your threaded insert looks. Also adding a very shallow countersunk hole with a bigger diameter than the insert means you can line it up better without guessing if you are aligned in the centre. And finally, those inserts heat up so much quicker than you would expect… use plyers instead of fingers.
I’ve definitely done the thing where I’m using a tap to clean out melted plastic from my threaded insert. Usually it happens when I’m putting inserts in someone else’s design and the holes aren’t the right size/shape. That’s a great tip about leaving some room under where the insert goes for melted plastic/possibly the end of a tap. Thanks for chiming in. I’m a big fan of these inserts.
Thank you for sharing how you did this and including the STL files at Thingiverse! You are giving me a great head start.
BTW, I tried to “leave a tip” for you at Thingiverse, but they said your account wasn’t set up to receive tips. I am buying the soldering iron via your link, so that may reward you a bit.
Where can I purchase the adapter?
I don’t think anyone sells such an adapter but I put the design files up at https://www.thingiverse.com/thing:1637284 so if you know someone with a 3D printer you can get one that way, or play to have someplace like Shapeways print one for you. I don’t really know how much that would cost since I print all my own things. Good luck!
Is there an STL of your holder available? and what iron did you end up using?
Thanks!
aluminium fabrications
I put the file up at https://www.thingiverse.com/thing:1637284 I think this is basically the same iron: https://www.amazon.com/Soldering-Iron-Kit-Temperature-Rarlight/dp/B07PDK3MX1 Mine didn’t have that in line on/off switch, but otherwise looks the same.
Thanks Kurt for what you do, I subbed to your YT channel. Need more videos. 🙂
Thanks! I’m working on one in the other window right now. :] They take a long time….