Every year is build a big Christmas project. Usually I get started on those projects right after Halloween, but this year I started way late. At Thanksgiving, I was sitting out on my sister’s porch and finally managed to sketch something that I liked enough to build. The problem with such a late start was that I kept thinking, “I need to keep it simple, and depend more on excellent design rather than absurd complexity.” This would have been great if I hadn’t eventually let the “keep it simple” part fall to the floor.
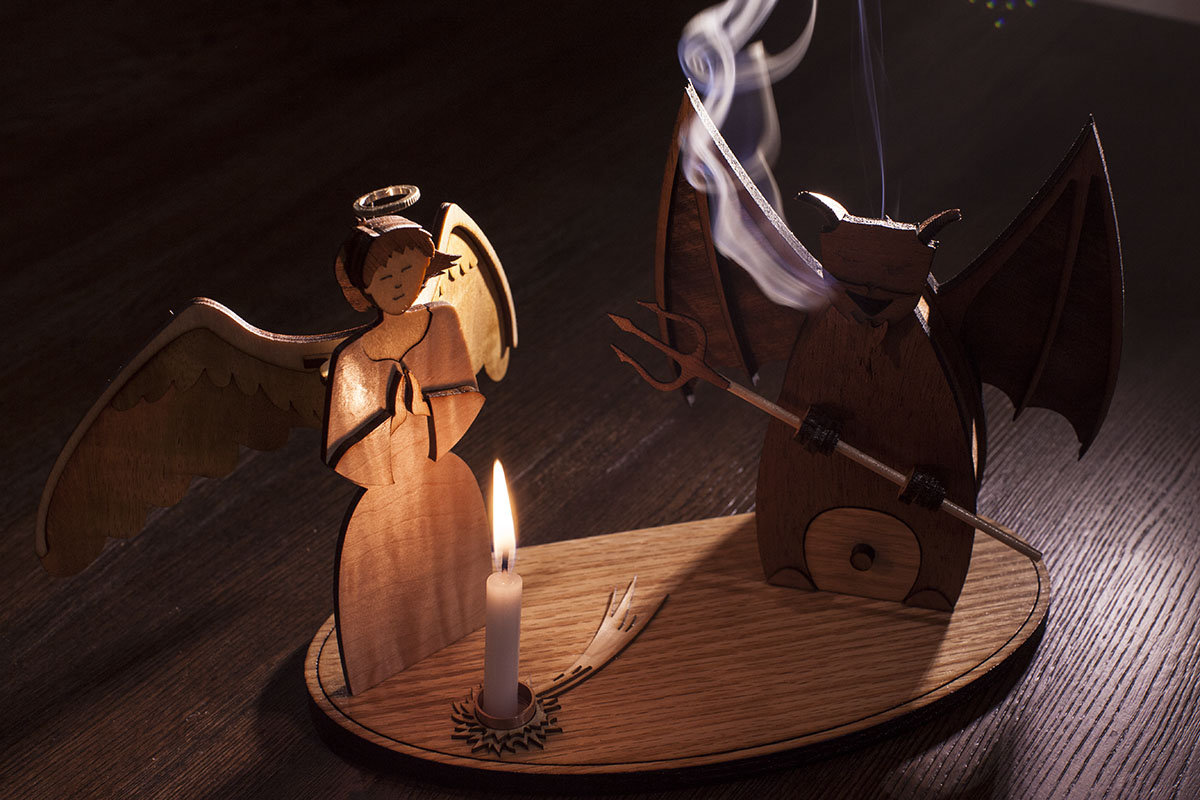
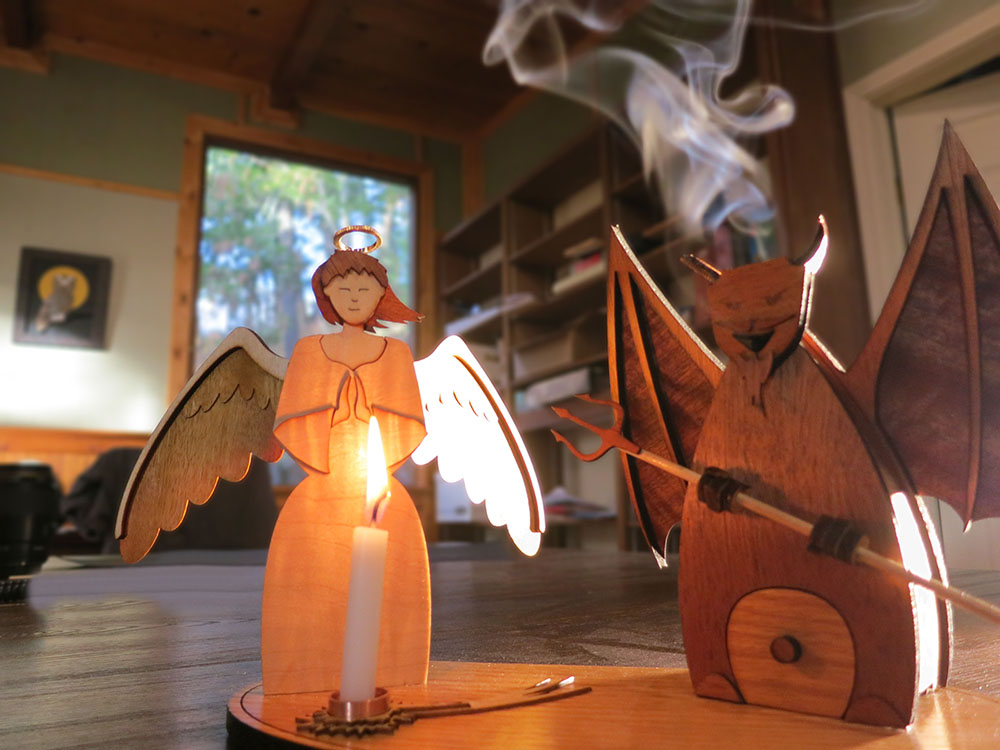
 In Germany, they have Räuchermänner (smoking men), which are little wooden figurines that have a small compartment to hold an incense cone. The burning incense smoke comes out of figure’s mouth. I’ve always wanted to make one. I considered traditional figures like a hunter, and wackier ones like a dragon, but eventually I decided it might be fun to make a devil with smoke coming out of his mouth. A lot of German Christmas decorations have angels on them, so I thought a candle-holding angel and a smoking devil would make a nice contrasting pair. I started some sketches and paper cut-outs, and I finally started designing the thing in earnest on Dec. 5th. That was an epically late start.
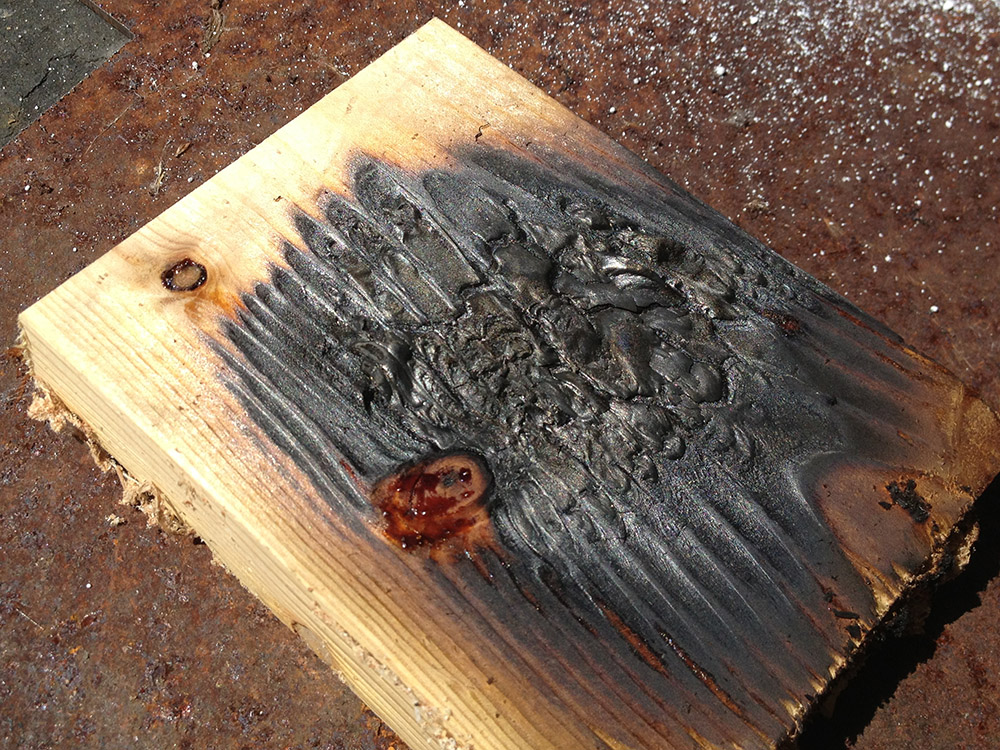
I still had some 1/4″ mahogany plywood left over from the Egyptian labyrinth project, so I decided to use that for the devil. This turned out to be a big mistake. The devil wing design had very thin spars that would have been trivial to cut out of 1/8″ plywood. If I had used 1/8″, the laser could’ve been cutting quickly enough that I wouldn’t have problems with the wood heating and catching fire. Since I had committed to 1/4″, I had to develop an entirely new technique where I cut the devils in three passes, using a syringe to put water into the cuts at each wing tip and pointy corners that would otherwise smolder during the subsequent laser passes.
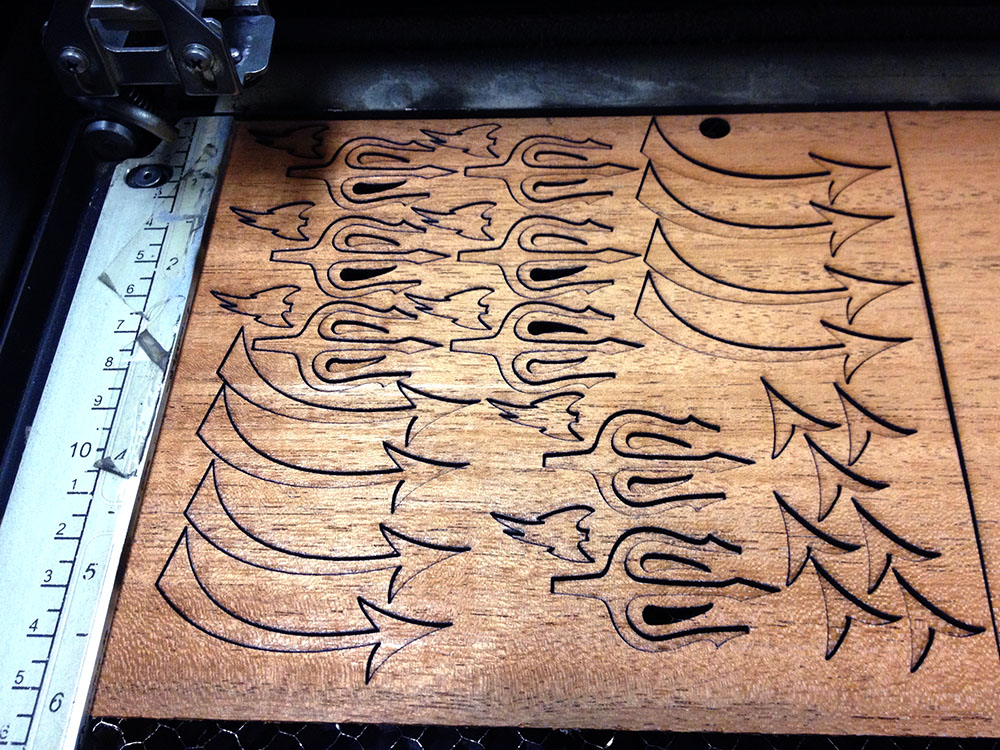 This worked, and it gave the devil an interesting burned look, but having to develop this technique burned a lot of my laser time. Christmas was fast approaching, and every minute on the laser was precious. I found myself sprinting back and forth to the bathroom with syringes of water. Not good. I also discovered that if you’re cutting multiple passes in wood, it’s best to orient the cuts so they are perpendicular to the direction of the compressed air blast at the cutting head. Otherwise the compressed air can blow along the cut and fan any sort of smoldering wood you may have left in your wake.
 I really do not like multi-pass cutting. The wooden bases for the project were thicker than the devil wood, and I was able to cut them very, very cleanly in a single pass. It’s oak, and the tiny holes you see are vessels that form in the spring. You can see how they’re not blocked by sawdust and the radial rays are clearly visible radiating out from the center of the tree like spokes on a wheel. I cut this at 300 pulses per second, and you can see the tiny grooves left by the pulses. There is no charring or need to sand the edges. It’s lovely, but I was careful not to have any thin sections or sharp points in the outline of the base.
 The devil was hard to cut, and he turned out to be somewhat tricky to assemble as well. I had to hand miter the top edge of the curved side pieces. I also had to glue a paper smoke dam into his neck since the top of the devil’s body had to be airtight to prevent leakage of incense smoke from his neck. The first two devils that I assembled still leaked a thin stream of smoke from that seam. In later versions, I suspended the assembled devils upside down and dabbed white glue down into the peak with a long stick to make sure the seam was sealed.
 Another way that the devil was much harder to assemble than the angel was the slanted back. The angle forced me to hand sand a bevel on the base. The curved sides made it tricky to attach the front since I needed to push the sides out to get them into the curved groove on the front face, but without disturbing the anchor pieces, and without knocking the bottom plate out of whack. So it was an exercise in white glue octopus wrestling. If I applied too much clamping force, the slanted back would cause the base to come squirting out and whole process would begin again.
 By the sixth devil, I was quite adept at this, but the first few had some unenviable gaps, which thankfully were not visible from the outside. I like the way the devil’s beards came out. They’re the hidden shape of a swooshing bat. I did some hand wood burning on the horn segments to make them a bit more interesting. The biggest disappointment with the devils was that when I finally applied the clear coat, the contrast between their faces and the facial hair dropped unexpectedly, and by then it was far too late to switch to black walnut or something else.
 I like the way their gnarled little fists came out. Complete with thumbs! They’re made from three stacked segments glued together and then glued to the devil’s front. Here you can see the pieces ready for some dabs of glue.
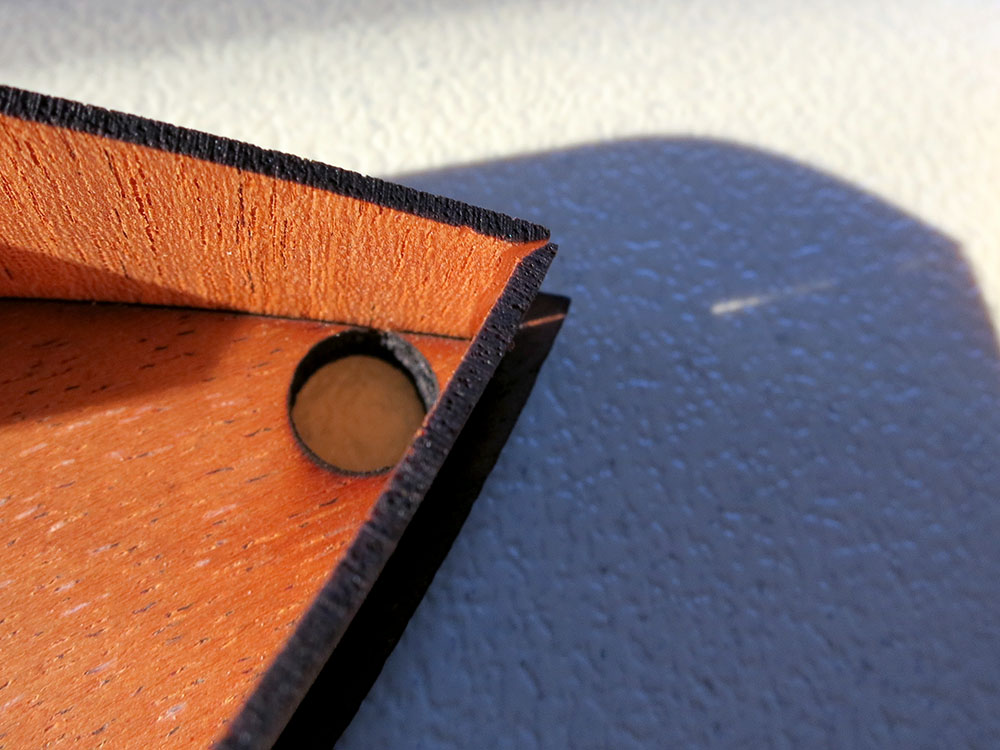
The first two devils I cut had some burning on the inside corners of the belly door. This was because I hadn’t realized those corners also needed some water injection. Later devils didn’t have that problem, but to cover the first two I hastily designed some little feet I could glue on over that area. This design change is why you don’t see any feet in my original sketches.
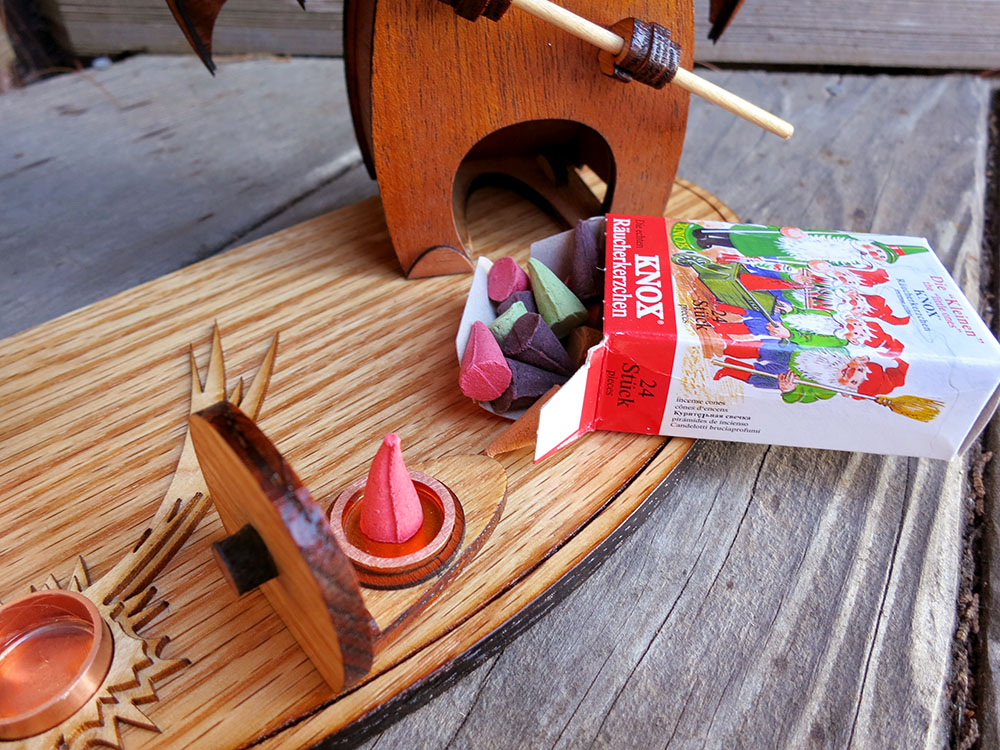
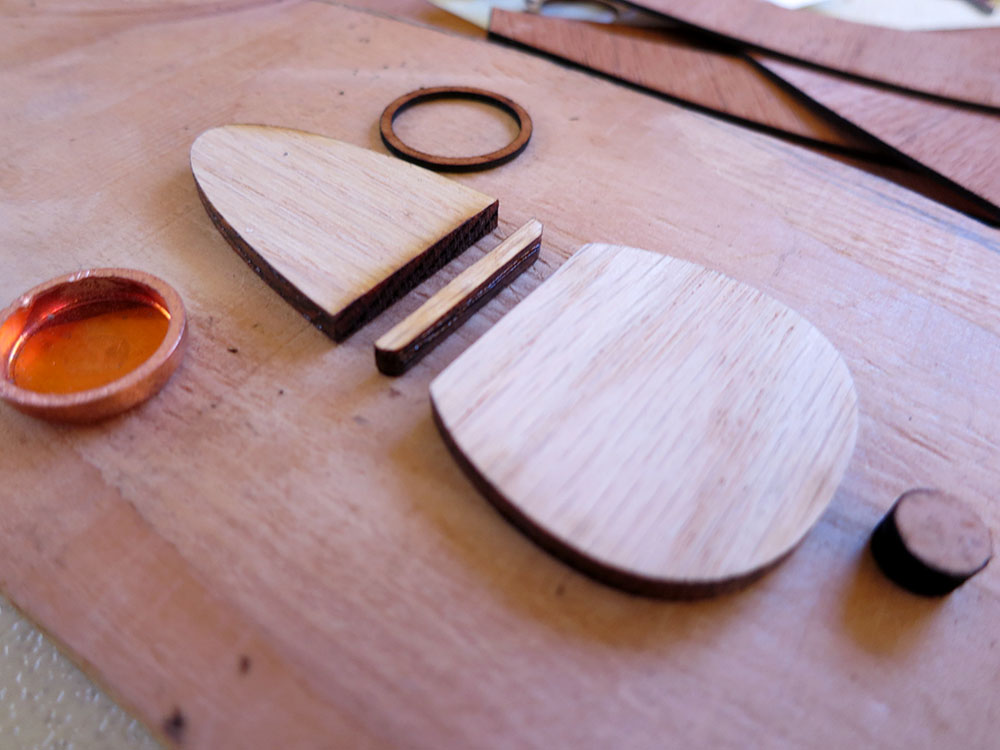 I also had to punt on having a tiny flame theme around the incense holder because there simply wasn’t enough room, so I switched to a simple ring. The copper pan that the incense sits in was cut from a 1/2″ copper tube cap. I used these both for the incense cup and the candle holder.
I chucked a piece of 1/2″ copper pipe in the lathe and used that to hold the end caps so I could cut them off at two different depths with a parting tool. The only annoyance was that removing the remaining ring of metal from the 1/2″ was hard to do. The parting operation squeezed the copper rings so they were hanging onto that pipe for dear life, and I had to pry them loose with a giant flat-head screwdriver and a lot of elbow grease. Good thing I only had to do that twelve times.
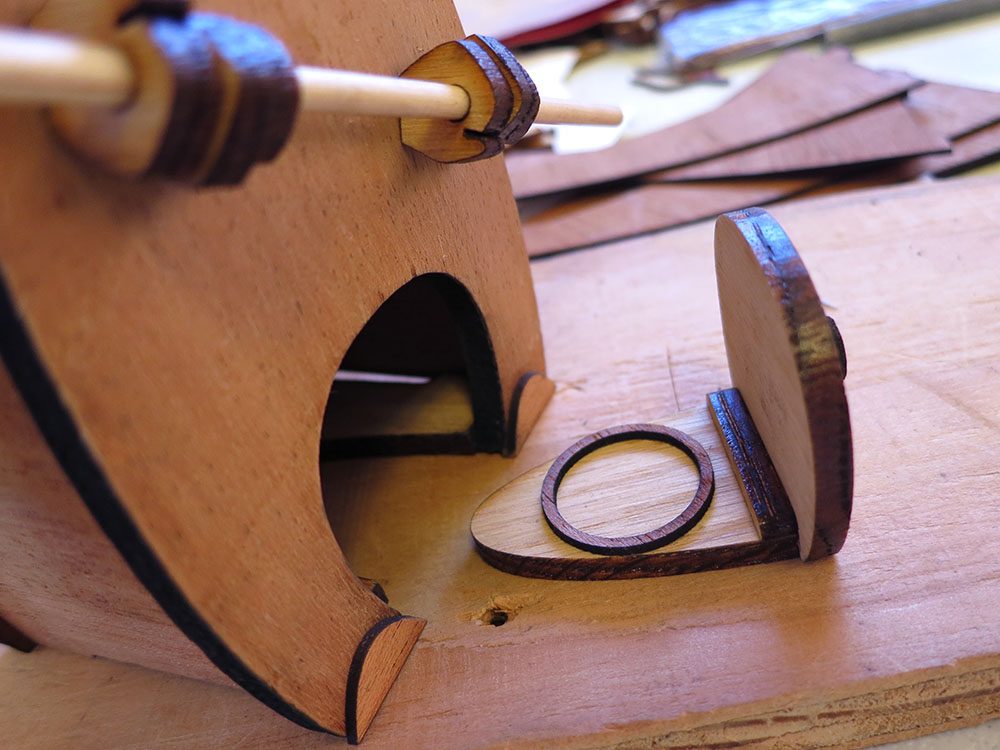 Once the feet were on and the door was done, the only thing left to glue on the devil was the head of the pitchfork. I always glued that on last because it’s cut from thin sheet, and there’s no way to orient the grain of the wood to make them strong along their whole length, so they’re quite fragile between the tines where the grain cuts directly across those narrow sections.
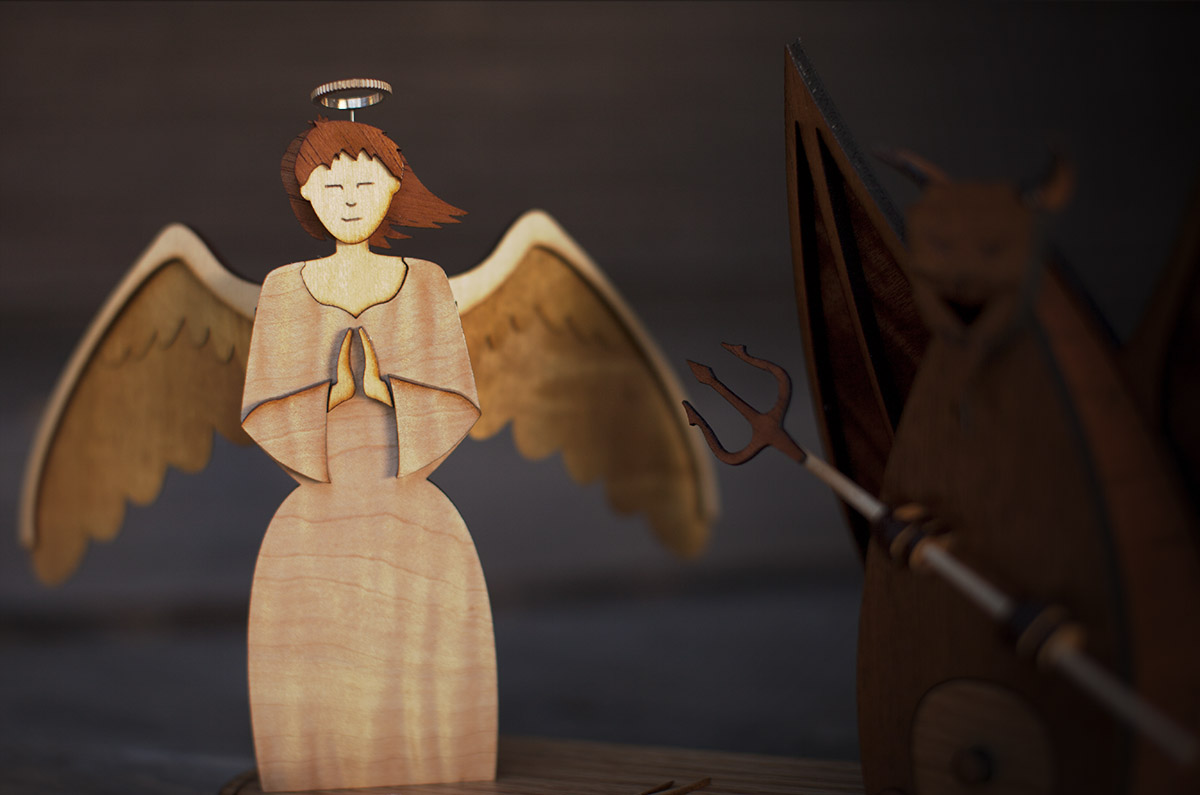
 The angels were comparatively simple to assemble. I carefully positioned them on the maple board so the maple’s figure would form the folds of her skirt and sleeves. I used different wood for her face, neck, and hands. I used a layering effect with the hair to try and keep her head from looking too much like 2D extrusion. I was going to try layering the area with her ear back one layer to make it even more 3D, but that would have required some more hair fragments, and a bit of iterating on the laser to get the ear size just right. Eventually I punted on that plan. So her head is a bit more of an extrusion than I would have liked. Oh, well.
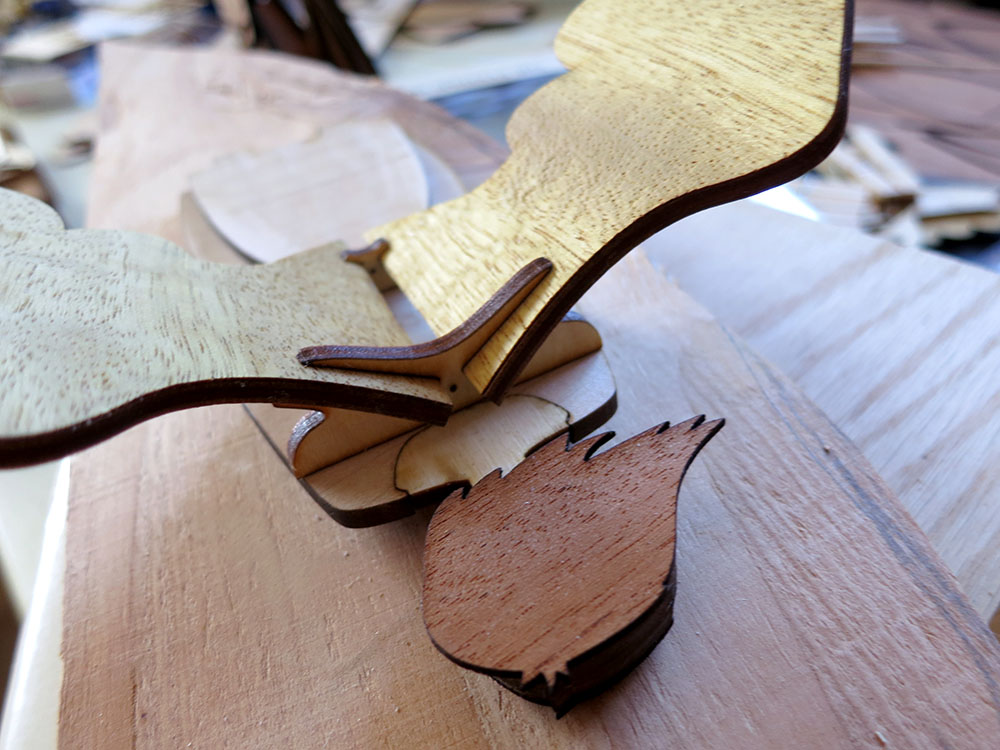
 I did have to have a slightly tricky clamping rig to glue on the top wing mounting bracket. I used a laser-cut scrap to match the shape of the bracket and make the clamping possible. Then I used some clothes pins to keep the scrap aligned while I tightened up the other clamps.
The only materials disaster I had with the angels was that the 1/8″ plywood I used to make the wing spars was defective, and some of the spars had their topmost layer of wood just fall off. I had to re-cut a bunch of them. I’d never had that happen before. I used clothes pins to provide even clamping force when gluing the spar to the feather veneer.
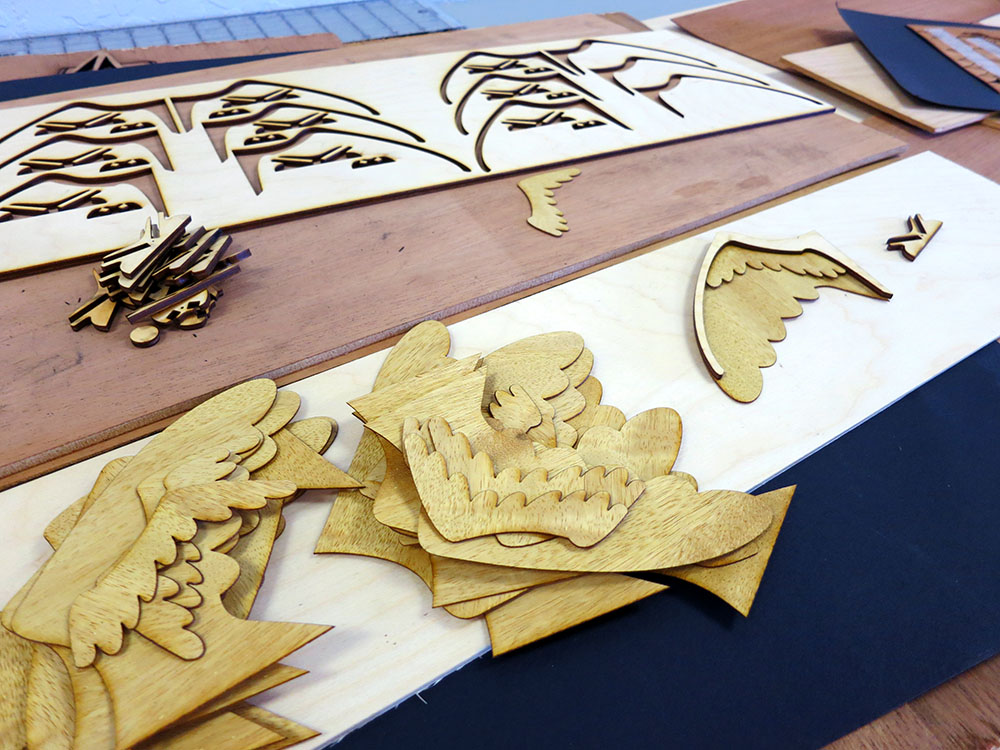

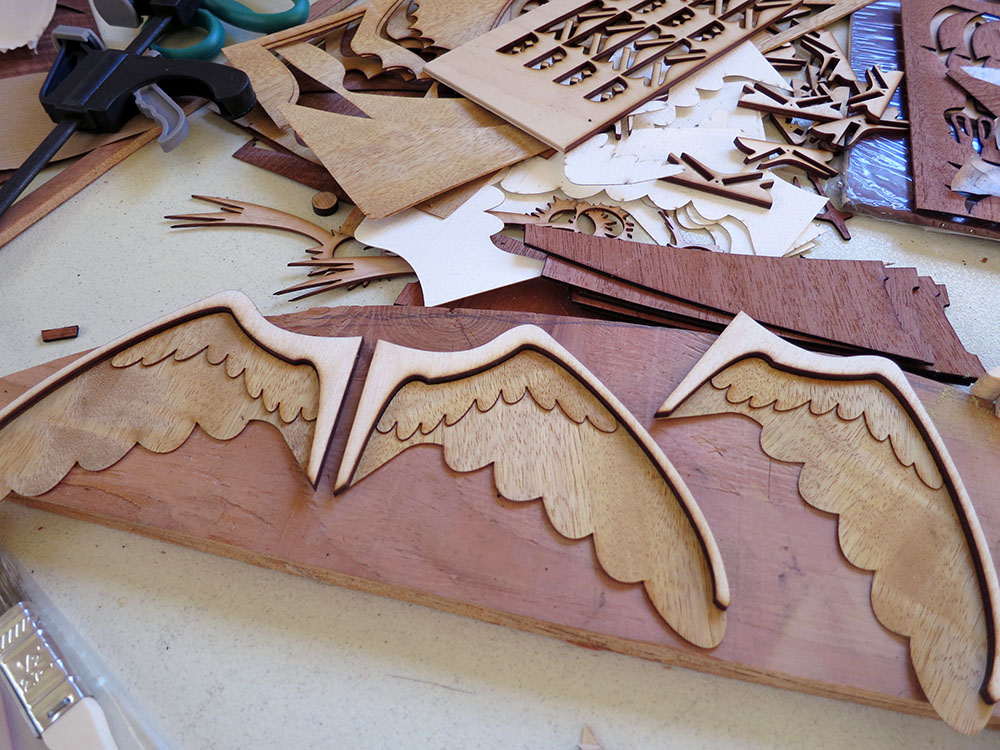 I had originally thought about using white paper angel wing feathers and black paper wing membranes for the devils, but when I was shopping for the figured maple board I used for the angels, I found some lovely dark figured veneer. I realized it would look SO much better than black paper on the devil. I already had the veneer I needed for the angels, so after I’d sprung for the devil veneer, I switched the angel over and never looked back. I’m glad I did.
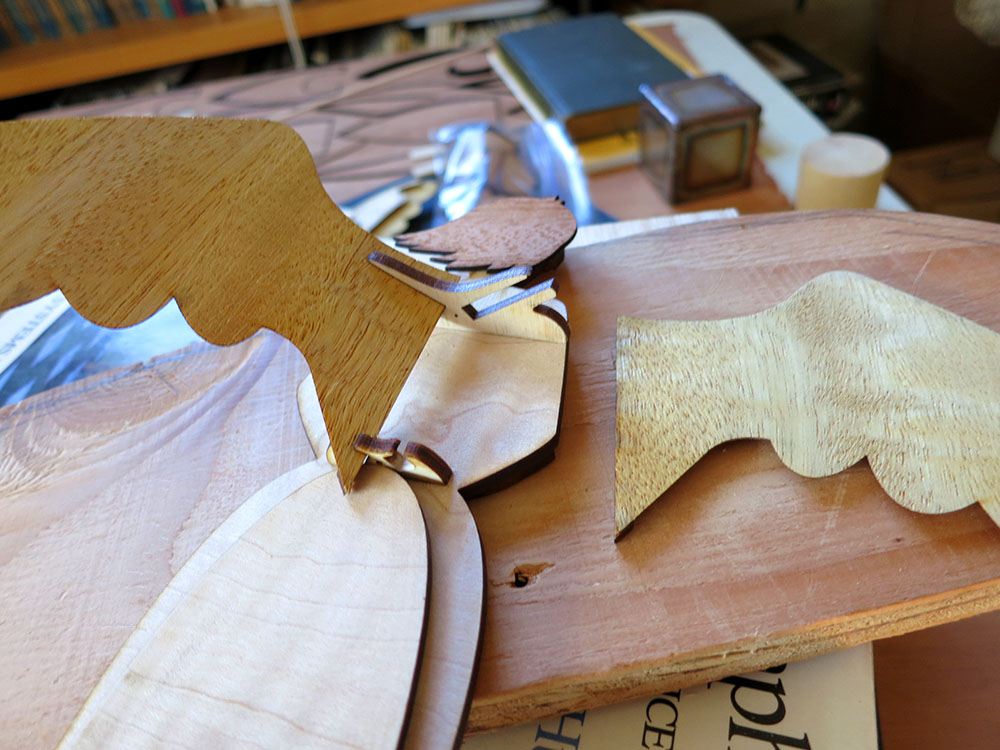 I did end up having to sand a slight bevel onto the very bottom point of the wings to keep them from clonking into the angels bustle, but other than that they were really easy to put together. The wings are glued to the top bracket, but they are just slid into the bottom bracket. That keeps them from getting pried off by differential wood expansion of the body and wings.
The only serious annoyance I had with the angels were their faces. A face is so important, and I’d really sweated the design. I ended up trying to keep it super simple. Just a few lines. However, as I was assembling the angels, I realized that from a lot of angles the laser-etched faces were very hard to see.
 Faceless angels are a bit creepy, so I knew I had to do something. For the first two, I used black acrylic and a fine paint brush to darken the lines after the clear coat had been applied. That was a pretty ticklish operation to do on otherwise finished pieces. It was no fun at all. After that, I simply highlighted the face details with a mechanical pencil. That was nice and easy, but when I used a brushed on clear coat the graphite ran and gave their expressions a somewhat haunted look. I spray coated the last two angels, and their faces came out the best. Nice clear details from any angle.
 One of the design details I’m proud of is that I wanted a little cleavage V in the front aligned with her hands, but I knew that would look weird on the back. So I positioned the wing mounting bracket so it neatly trims that off, making it look more like a normal dress back.
I wanted to make halos for the angels. I went wandering through the hardware store to see what kind of rings or loops I could find. I purchased a few different kinds, but eventually settled on some straight knurled brass lock nuts. As the giant monolith of Christmas rolled inexorably toward me across my calendar, I decided to punt on the halos. No one would miss them.
 However, during the Christmas break, I had a change of heart (and a bit more time), so I decided to make the halos even though that meant giving out a few “halo retrofit” kits. The alignment holes for the halos were in the original design, so adding them was just an insertion and a dab of E6000. Simple pimple. To make the halos, I used a boring bar on the lathe to machine the threads out. No self-respecting angel goes out in public with a halo that looks like it screws on. I then had to drill a tiny hole part way through the halo to mount a piece of piano wire.
 Luckily, I already had the tiny center drill for the job, and I set up a depth stop on the drill press. Then it was just a matter of clamping and drilling the six golden rings. Four calling birds, Three french hens, Two turtle doves… Wait where was I?

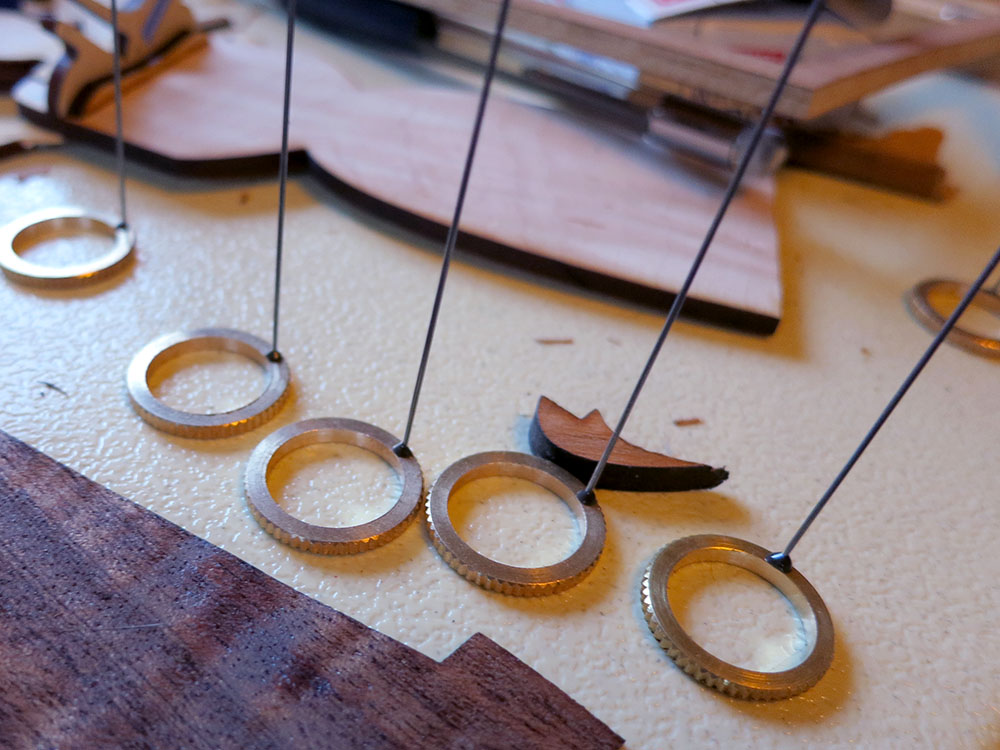
I used a bit of JB weld to glue lengths of piano wire into the holes. I glued each wire to the halo at a jaunty angle so the angel would not look like she was balancing a book on her head at Angel Finishing School.
 The piano wire feeds down through holes in both the upper and lower brackets on the back of the angel, and a dab of E6000 cements the wire to the bottom bracket in a slightly springy but tenacious way. Then it was just a matter of mounting each angel on a base, and adding a candle cup made from another 1/2″ copper pipe cap.
The devil is mounted using T-shaped pins that pass through his floor plate and into matching holes in the base. The angel is simpler. She just has two pins on her bustle that align with slots in the board.
I managed to have two sets completely done by Christmas Day, and I finished up the other four sets a bit into the new year. Overall I’m very happy with the way this year’s Big Christmas Project turned out, especially considering the late start. I’m marking it down as a success.