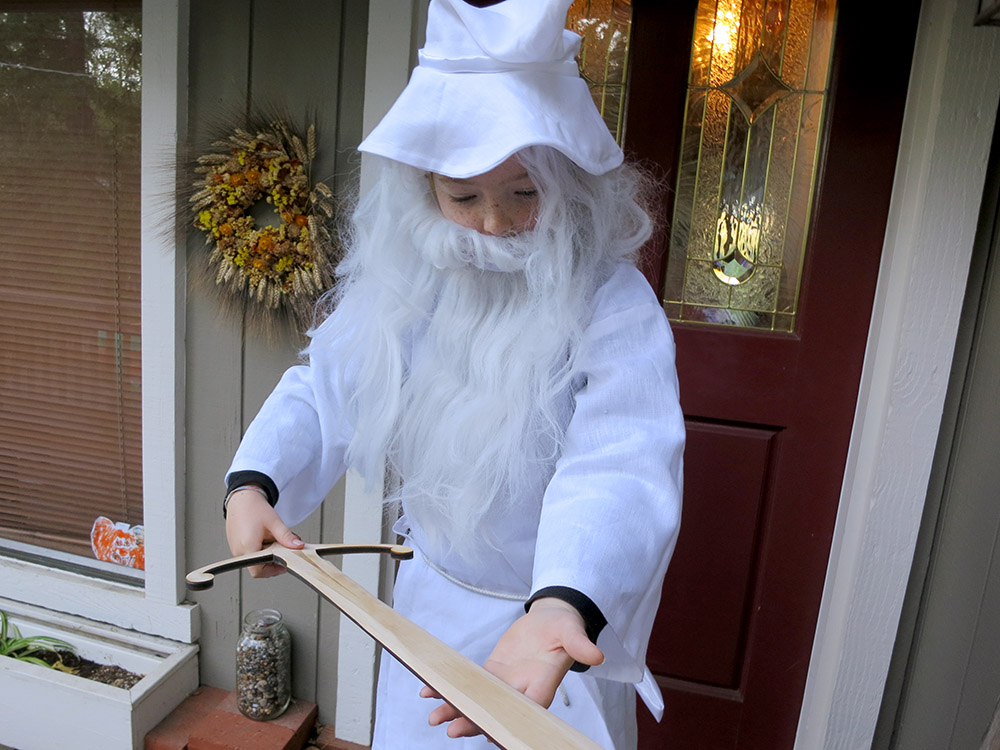
Pioneer wanted to be Gandalf The White for Halloween. I had made Gandalf’s sword, but I still needed to make his cloak and hat. In the run-up to Halloween, I’d spent most of my time working on Simon’s King Cobra costume, and then I got sick. In the end, I had to design and sew together Pioneer’s Gandalf hat and cloak in 4 hours on Halloween Eve. I couldn’t even work late into the night because I was still recovering. Thankfully, I’d already purchased the fabric to make the costume. So it was strictly an evening of Design & Build. I set up a folding table in the guest bedroom to act as my sewing room so I wouldn’t have to commute over the hill to TechShop. TechShop is awesome for sewing projects because I can spread out on three tables and there’s good lighting and an ironing board and iron. I still use my own sewing machine because that’s what I’m used to. So working upstairs wouldn’t be that much of a step down, and hopefully I wouldn’t have to iron.
 I decided to go very simple. I only made two paper patterns. One was for half of the arm and another for the back, which doubled as the front sides. Only two pieces of paper! Simple Pimple. Ok, there were also two piece of paper for the hat. The advantage of working at home was I could actually size the thing to Pioneer’s body instead of snagging a shirt/pants and sizing from that.
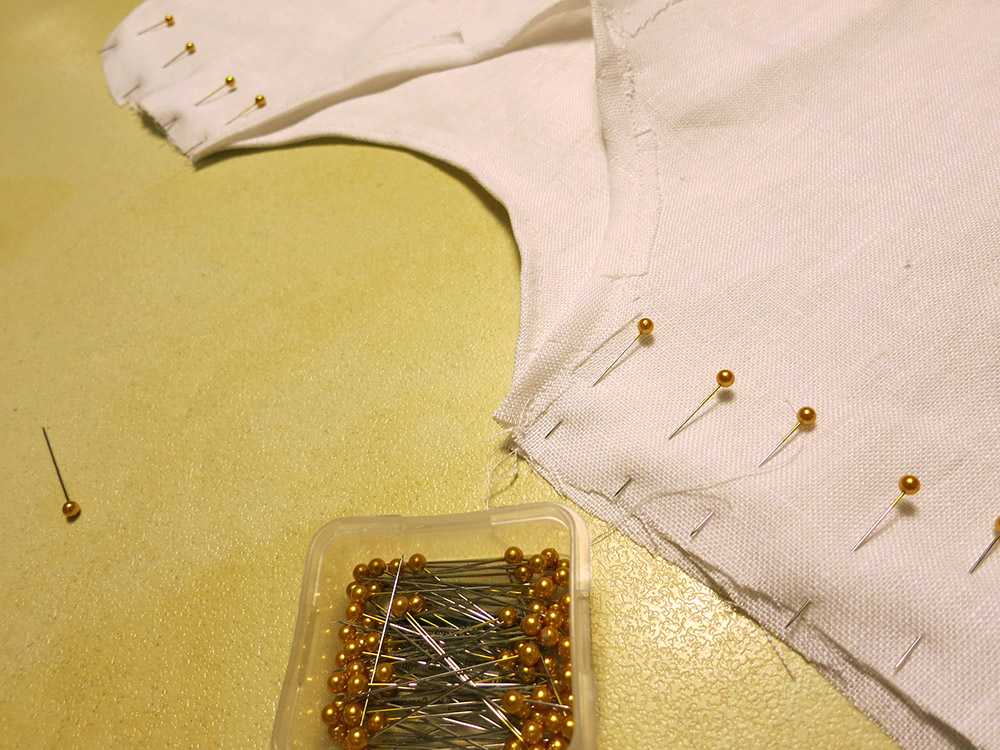 I cut, pinned, sewed, and hemmed like crazy. The only things I put on the cloak above the bare minimum were some belt loops, a sword loop, and an extra layer across the back in the shoulder blades area. I’m not even sure what that’s called on a cloak. I should have double-checked the sword loop height because that ended up being a bit low, and the sword was going to be dragging its tip. Thankfully, the belt loop was big enough to double as the sword loop and the dragging sword crisis was averted.
 I had designed the hat with two intersecting cones of paper. Making the inner cone was trivial, but attaching the brim cone piece at just the right position so it wouldn’t kink the inner cone ended up taking three attempts. This was complicated by the fact that I was also pinning in a hat band, so the actual pinning was stupidly time consuming. Finally I got it just right. Before I sewed the hat together, I took one last look and realized that I had pinned the inner cone in inside out! Horror! I was going to have to pin it again, or the seam allowance would be on the outside of the hat. Not …. enough ….. time. I made an executive decision. I sewed it up the way it was, trimmed the seam allowance very close to the seam, re-inverted the hat and did another seam. That way it looked nice both on the inside and the outside, and the only evidence of my mistake was a little bit of cloth sticking out in the hat band area. Later someone told me this was called a “French Seam.” Funny that I made that up as a time-saving measure. I really should take some kind of sewing class.
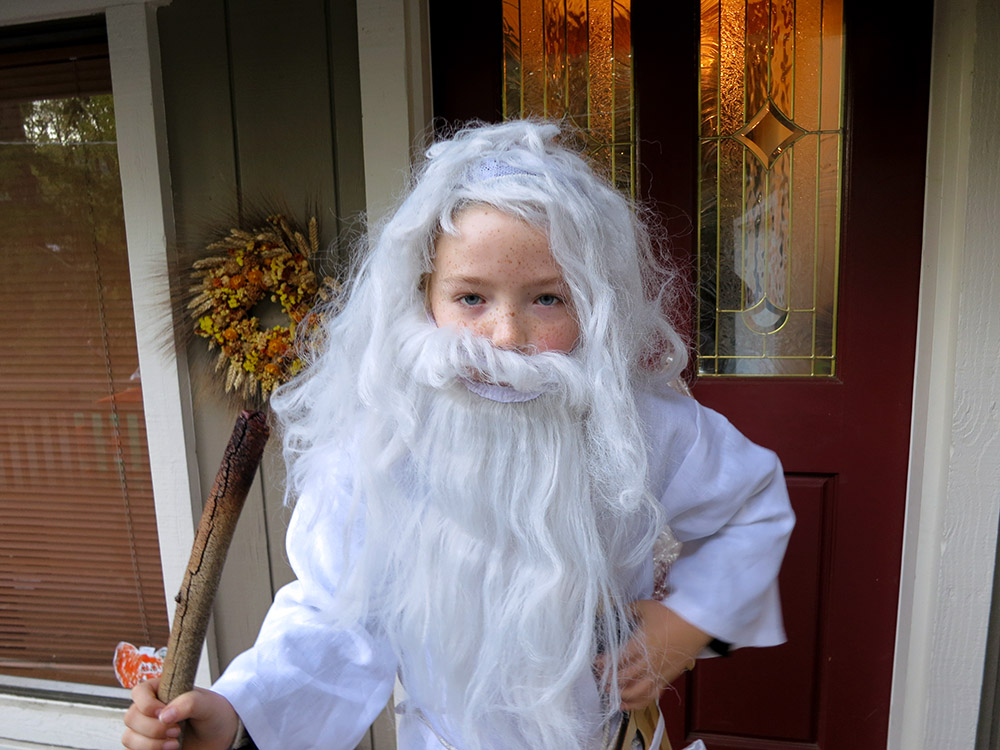
Pioneer looked good in his costume. Perhaps the hat could have been a bit bigger and stiffer, and the sword loop should have been higher, but basically it came out fine. Mission accomplished.


Pioneer insisted that I take a photo of him falling into the pit with the Balrog. Here is the photo after massive amounts of photoshop fiddling to make it really look like he is falling. Maybe I should have tried a bit harder… I also avoided mentioning that Gandalf the Gray was the one who actually said “You cannot pass!” It’s best not to contradict the wielder of the flame of Anor.