If you make a magic wand for one of your children, it is inevitable that your other children will want one too. Just as day follows night. No child wants to be out-waggled in a pointy stick magical arms race. So I set about making a wand for Simon. I wanted to make the wands a little bit more than just a pointed stick, so I decided to give them a secret compartment.
 When I turned the wands, I gave each a finial at the end of the grip. After turning and sanding the wands, I cut the finials off with the bandsaw. The idea was that I could then drill holes in both the body of the wand and the end cap and glue a dowel peg to the end cap. The deep hole in the body would form the secret compartment and the finial and dowel would form a removable cap.
 I hate turning wood on my metal lathe. Sawdust and sanding grit can get into everything. The sawdust wicks away oil and the grit can embed into precision mating surfaces causing them to wear quickly. To avoid this problem, I cover most of the dust-sensitive bits with aluminum foil. This makes clean up a lot easier.
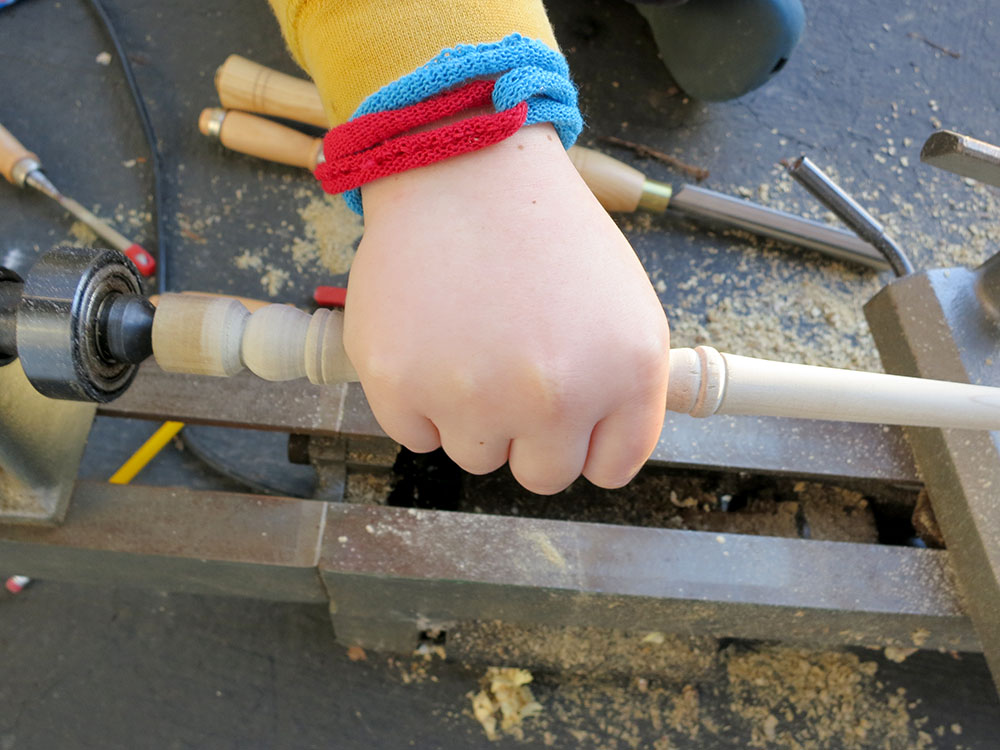
Holding the wand was a bit tricky because its uneven shape.
 I ended up wrapping it with electrical tape to help protect the wood, and sticking it all the way though the headstock. The wood is pretty soft, but I didn’t have to tighten the chuck down super tight since I’d be drilling it at high speed with a pretty slow feed. I used some bits of blue foam to shim the wand so it wouldn’t wiggle. When I drilled the finial, I used a collar to keep from drilling all the way though.

With the secret compartments completed, it was time to think about finishing. The kids were running around with the wands already, and I wanted a tough finish that could hold up to a lot of abuse but would look ok. I decided to go with a polyurethane finish. I use polyurethane a lot because it’s tough and dries quickly. I usually use clear semigloss because that’s the most forgiving. I’d never used colored polyurethanes, but I decided to give one a try for this project since I wanted a very distinct color and wanted to do it quickly. I got a a very small can of deep red and started brushing.
The next morning I went out to the garage to see how it looked, and I was shocked to see that the finish had formed a really dark band on the side of the wand that was down while it was drying. I can’t say I like the colored finishes because they really highlight unevenness like that. Luckily I was going to build up quite a bit of the stuff, so I just kept changing which bit was the underside each time I let a coat dry. It mostly evened out. No fun though.
 I used red finish on the handle and clear on the body of the wand. I wanted to make the wand look old. I thought I could do that by just dabbing some black acrylic paint on, but since I’d never done that before, it was a little bit intimidating. What if it looked awful? I took a deep breath grabbed a paper towel and started dabbing. I had to work fast because that stuff dries quick. I dabbed and dabbed and eventually got it to something I was happy with.
It really highlights some of my not-so-perfectly-sanded areas on the finial, but I guess making it look old and dinged was the goal. I’m pretty happy with the results. Simon wanted the wand to be all black, which I could have done but seemed kind of boring. He’s going to be upset if I make his brother’s all black. I’ll have to come up with some other finish for that one, or Simon will be snagging it faster than you can say “Expelliarmus!”


 In the run up to Christmas our family went to