
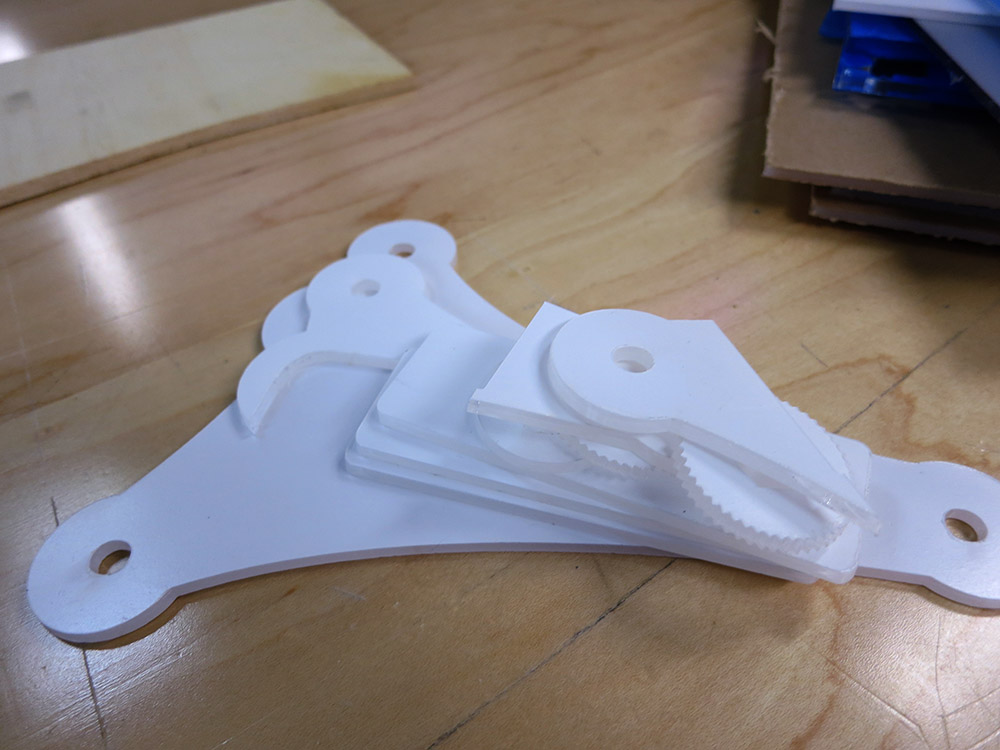
 The other day someone sent me a link to an instructable about using your smart phone as a microscope. It uses a laser pointer lens, and I knew I had one of those laser pointers at home in the junk drawer. Its batteries were dead, and its lens could be repurposed. I had plenty of scrap acrylic around, and I quickly illustratored up the parts for the microscope.
I have an iPhone 4s. I looked up the camera geometry and position of the lens because I wanted to make it super easy to flop my camera down and take some macro photos. The instructable uses wing nuts, but I thought it would be nicer to have large straight knurled dials to move the focusing stage up and down. I cut out a few dials that would go around the 1/4-20 nuts.
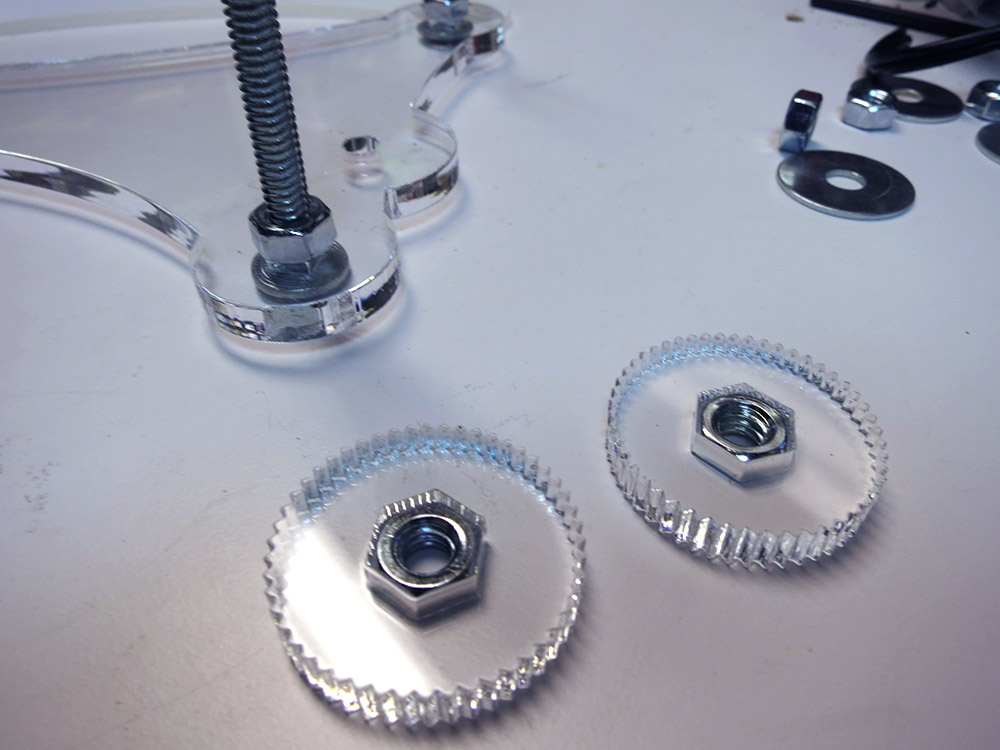
 I used JB-Quick to glue the nuts in, and I glued them using the lathe to ensure that the discs were fairly plumb with the bolt. After gluing, I peeled off the blue protective plastic. I wanted to make sure the specimen slide would be able to ride smoothly on the two nuts.
 That was pretty much it in terms of assembly trickiness; the rest is just bolted together. I originally had cut out some acrylic discs to put around the carriage bolt heads, but I decided it looked nicer to leave those out. I guess you could just put some stick-on rubber feet on the bolt heads if you were really worried about scratching up the table.
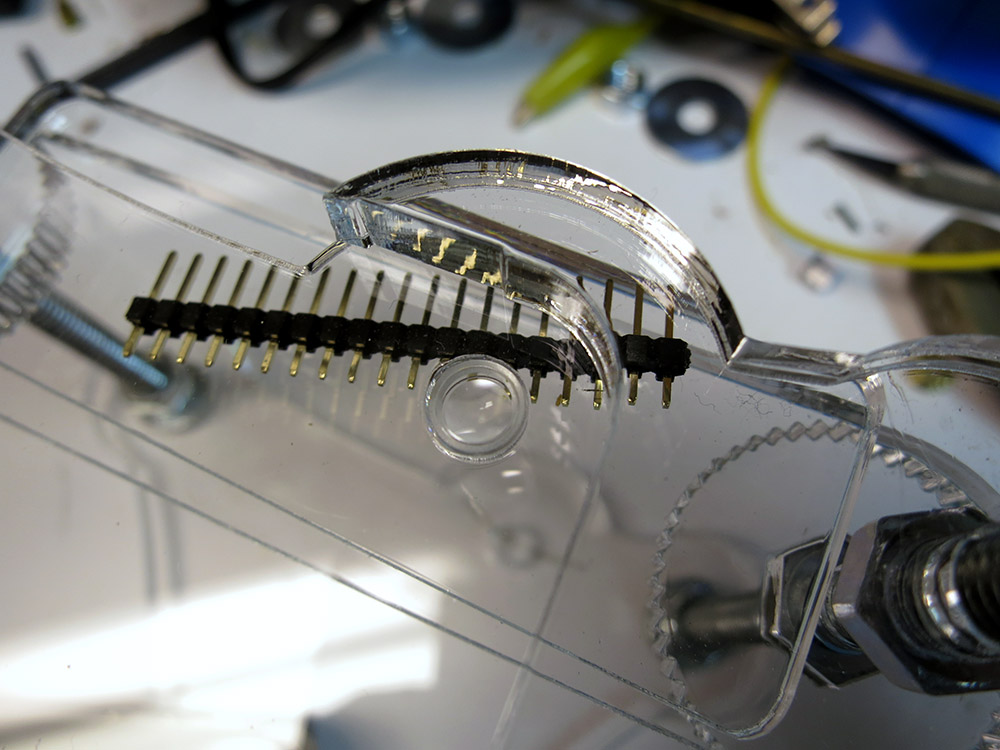
I did a couple of test cuts to get the exact diameter hole needed to hold the lens. The slightly cone-shaped laser-cut hole is perfect for pushing a lens down into. I have three pieces of plastic that align the camera. Right now they’re just bolted on. I guess if I wanted to I could make sure everything was in a really good position and then put a drip of solvent to glue the guides down. So far I haven’t bothered.

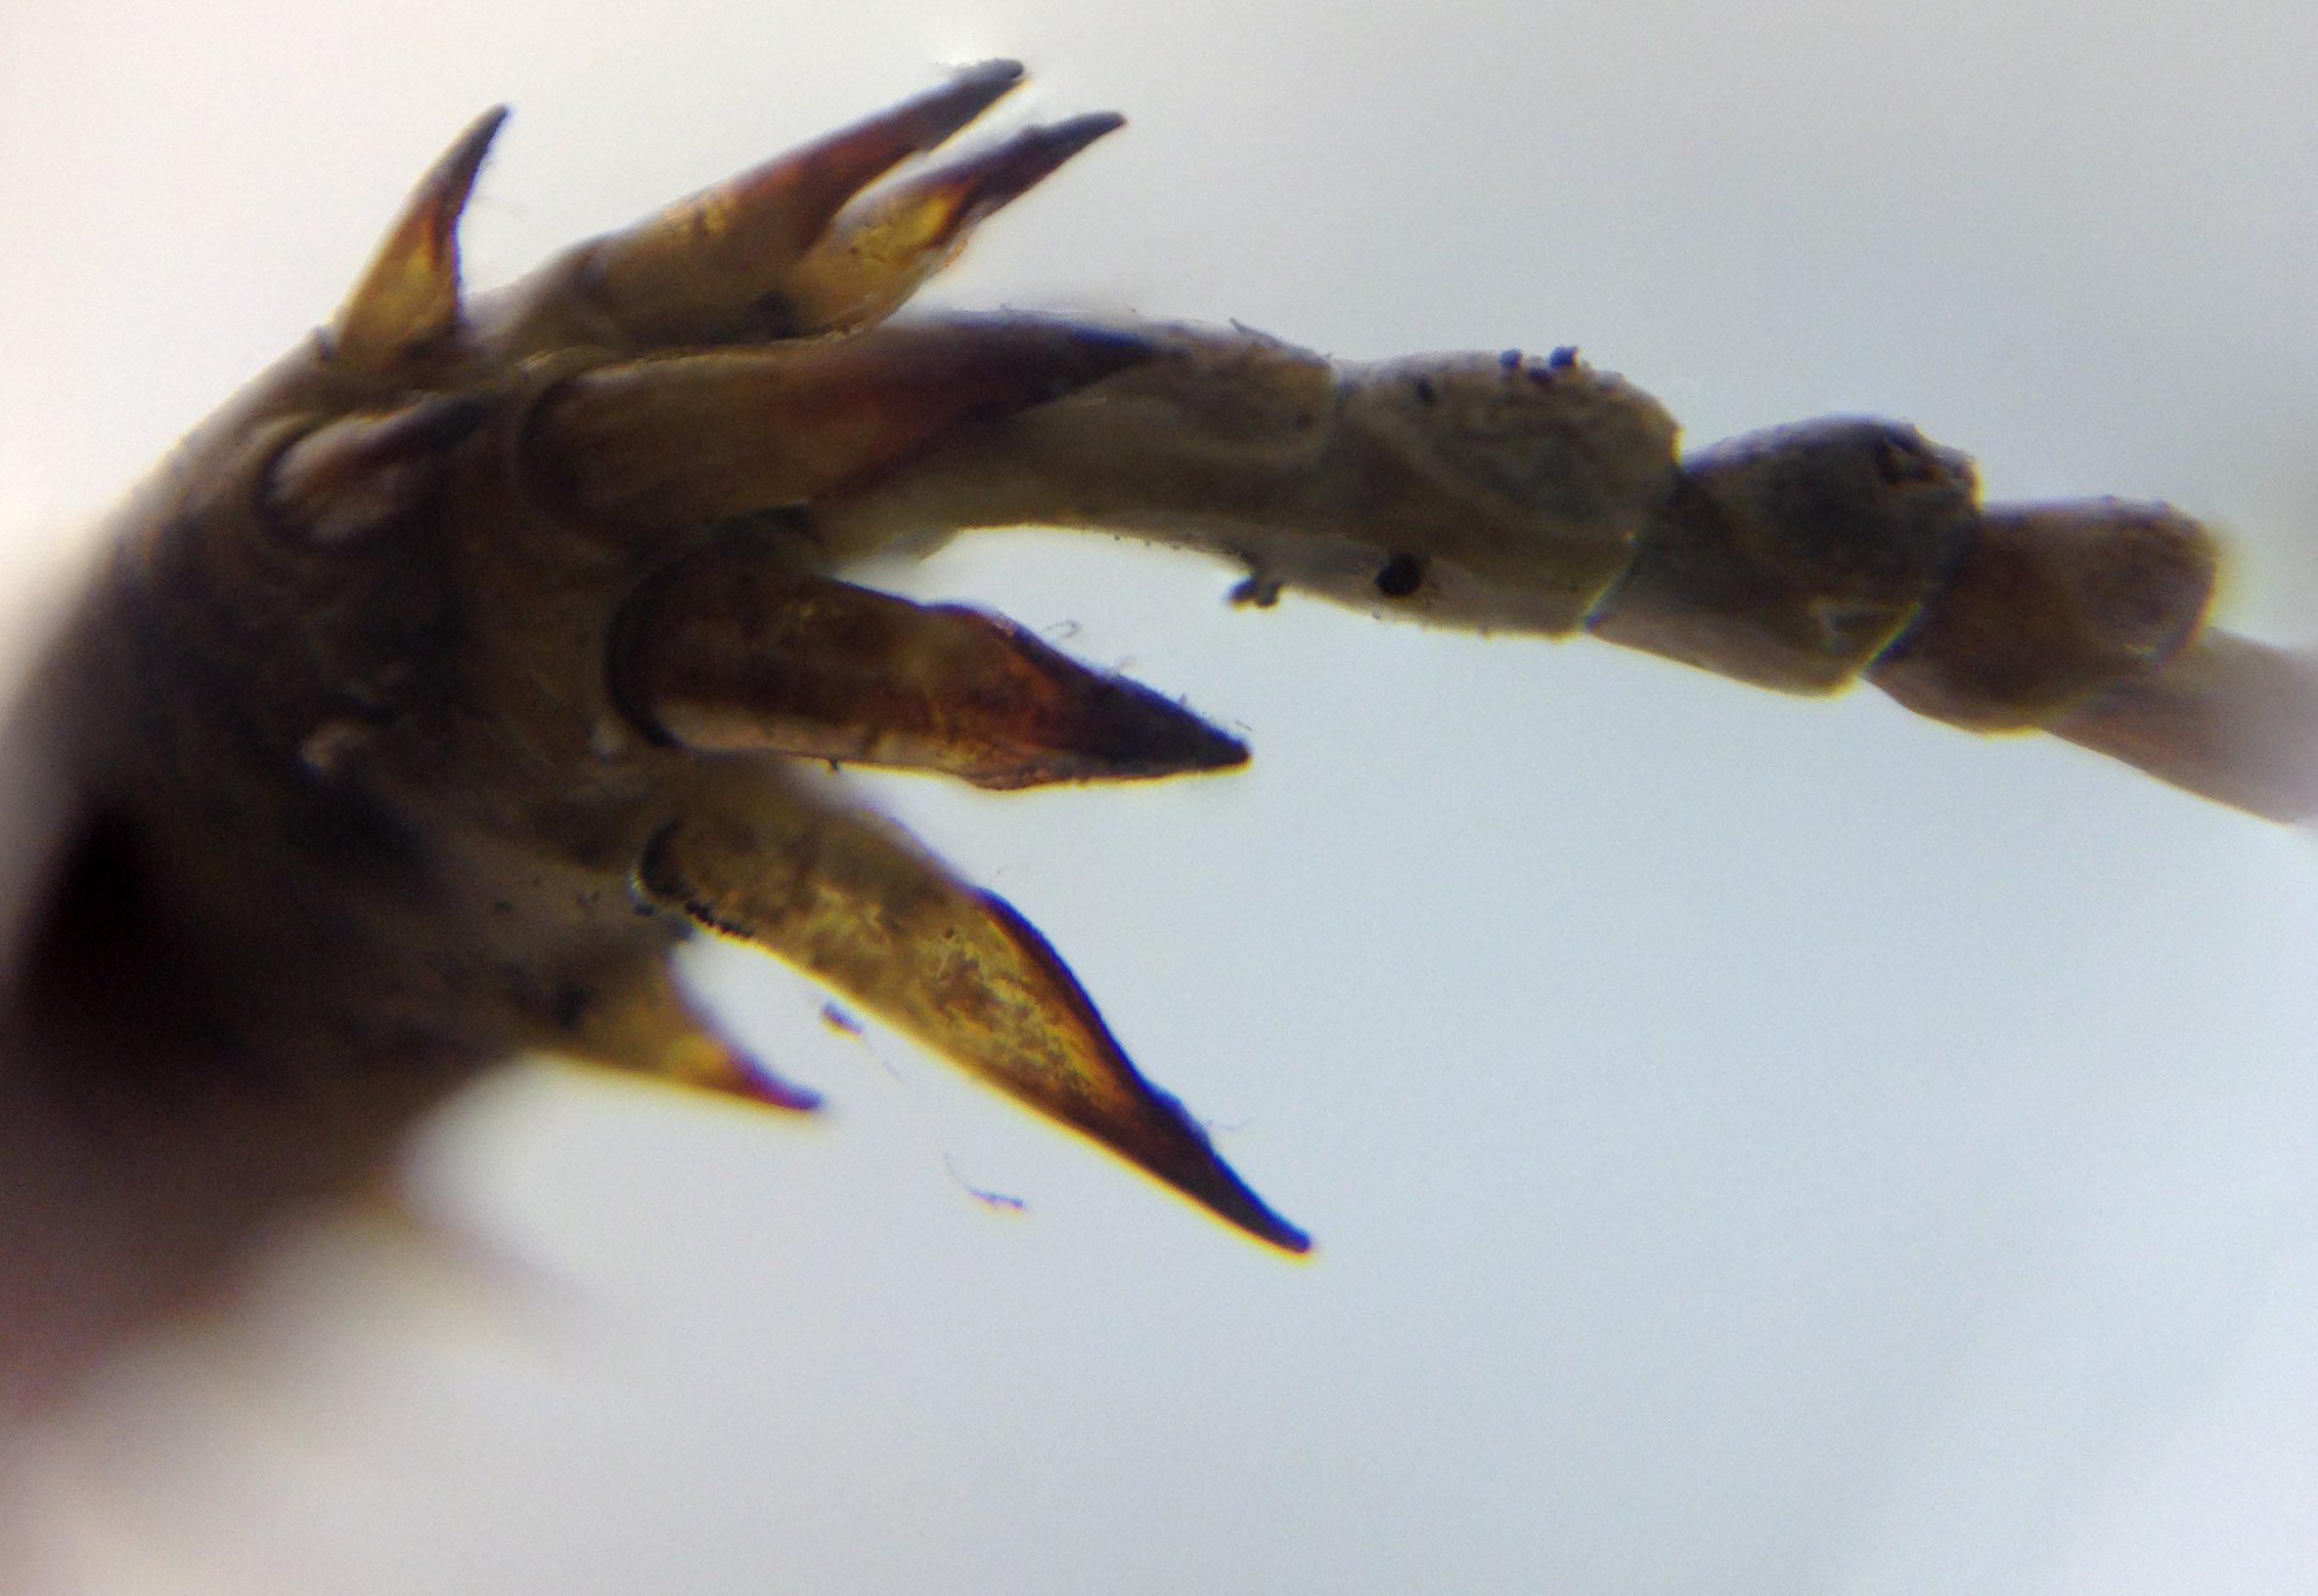
Then it was time to try it out! First I tried looking at a strip of pins. Not really very exiting. What else could I look at? I remembered earlier that day I’d seen the husk of a great big Jerusalem cricket in the the corner of the garage. I went and snagged it and had a look.

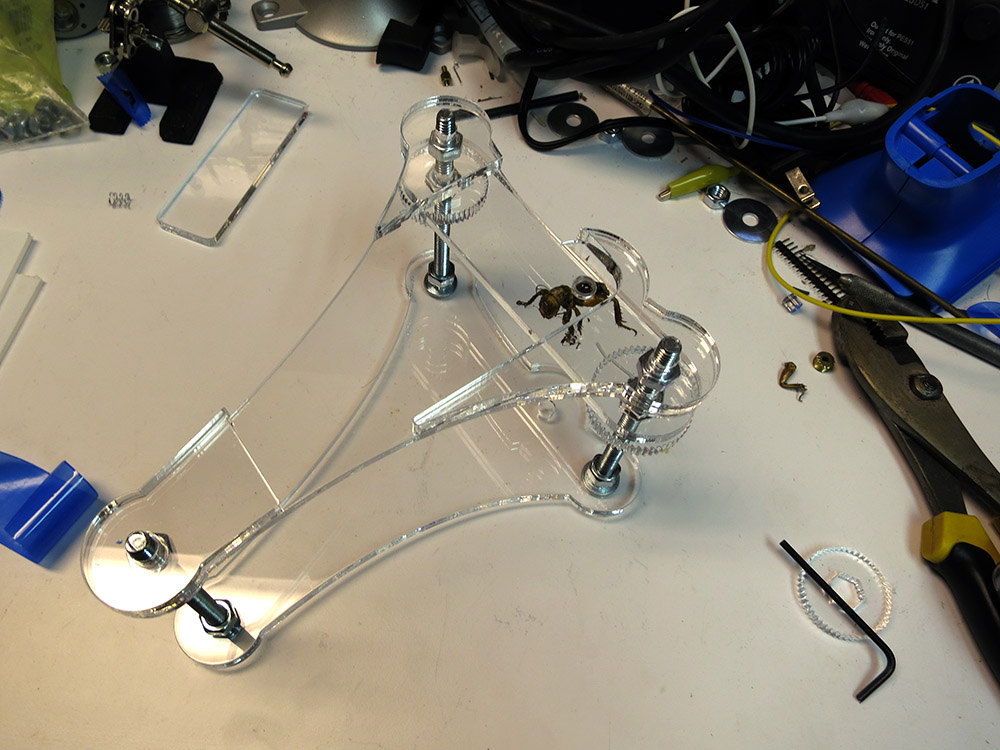
 The rig worked reasonably well. Lens alignment was quite good, and the stage was easy to slide up and down with the nuts. The bolts don’t make the best sliding surface, so moving the slide up is smooth, but sending it back down is a “spin the nuts down and then manually press the stage down” affair. Not optimal, but I was worried about making those stage holes too big and having problems with the stage moving around laterally, which would be worse for trying to do focus stacking. Frankly, I like the non-focus-stacked images a bit better, but with some practice I might get better results.
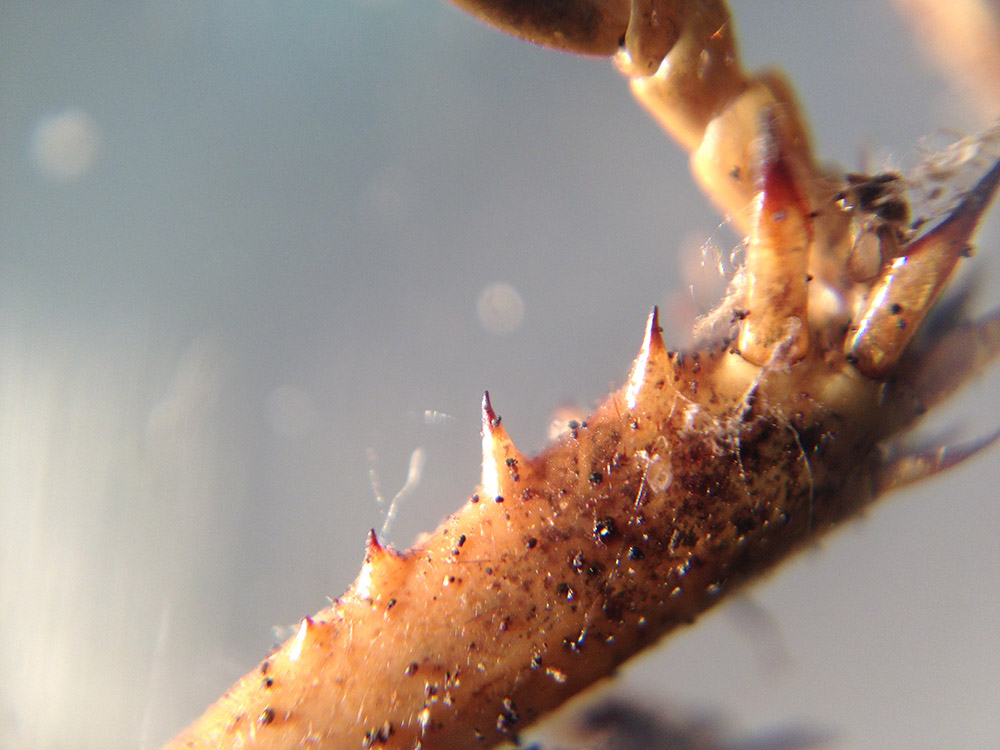
Is that a photo of delicious king crab? No. That’s a bug’s ankle. That first photo is just a photo. In the second one, I took a number of photos moving the stage up a little between photos. You can touch and hold your finger on the iPhone to lock focus and exposure so you can do this without the phone screwing things up. Then I imported all the photos into Photoshop, and I had it take a stab at merging the layers using the most detailed areas of each photo.
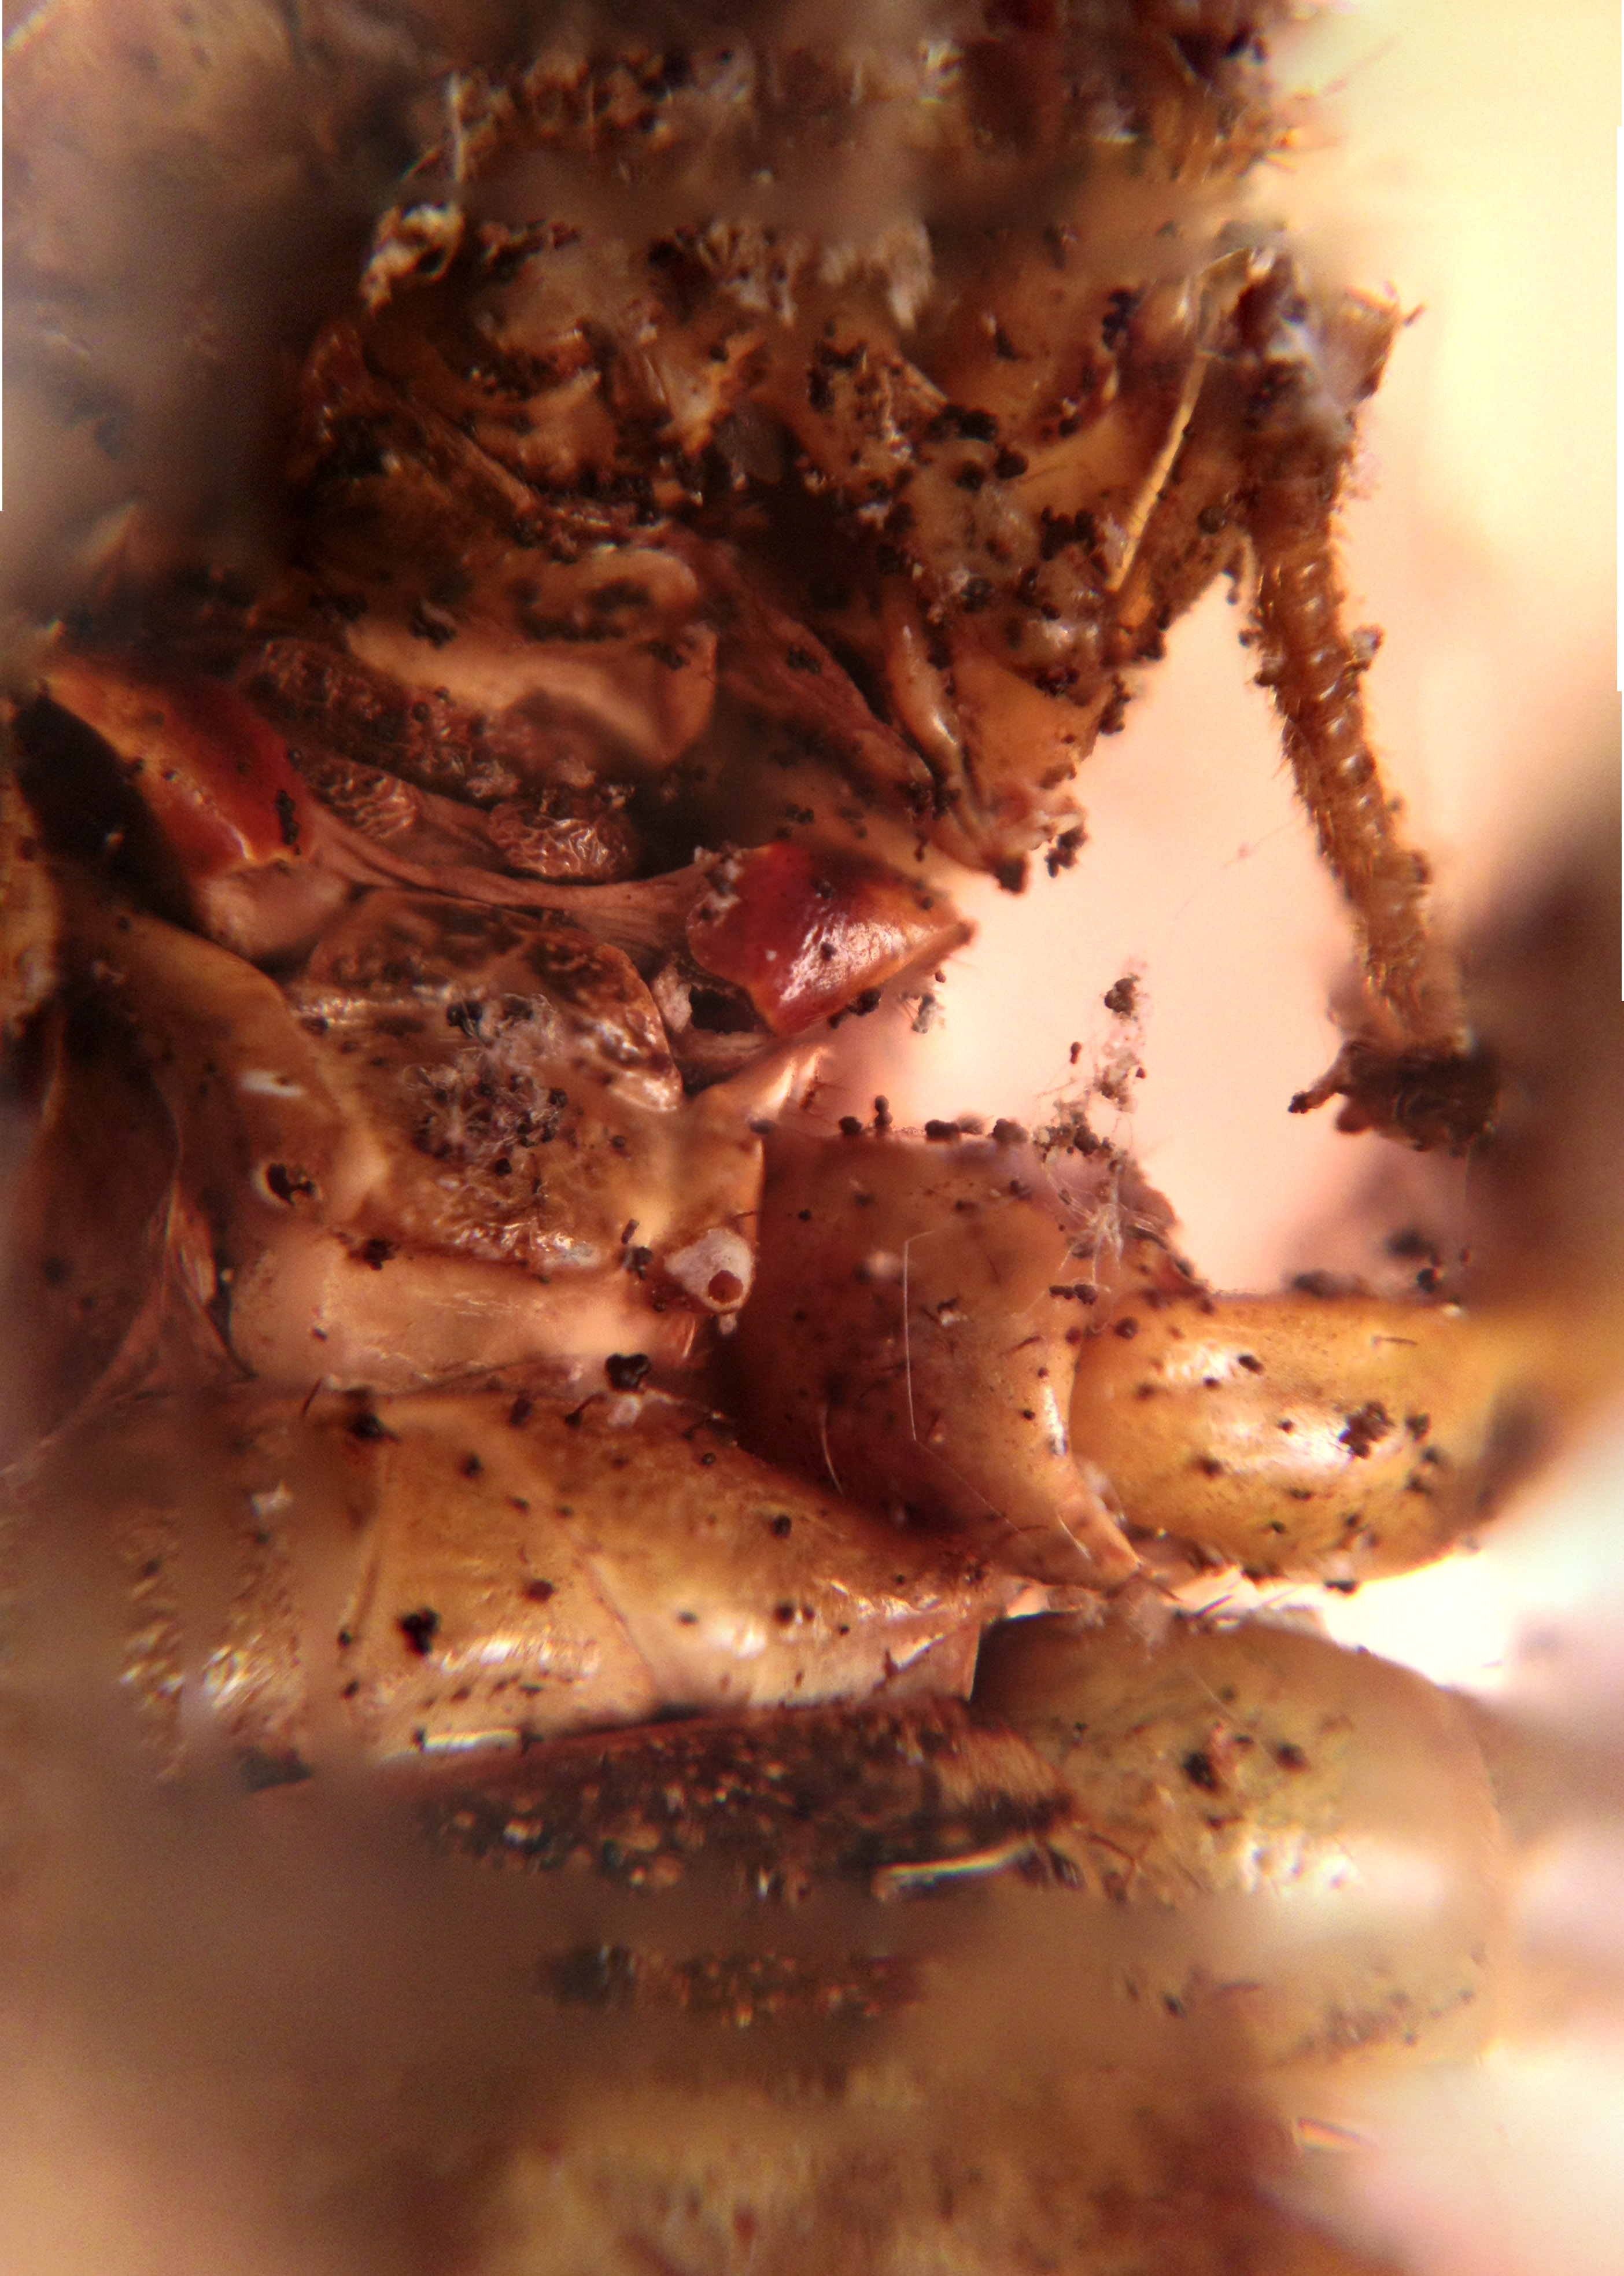 Here you can see a much deeper photo of the thorax. I have yet to get super great results with the stacking. Photoshop often screws up the alignment of the photos, and I have to turn off some of the layers. You can see some banding of sharp and blurry near the edges of the photo. Those were formed by layers that Photoshop failed to align, and I had to just turn those off. Sorry the photos are kind of gross. That bug was just the most interesting thing I happened to have on hand.
I also fished a quarter out of my pocket. I thought about trying to make a giant panorama of the quarter since it’s kind of flat and didn’t need any focus stacking tricks, but the shiny metal surface is very reflective and viewpoint-dependent, so it probably wouldn’t stitch together very well. There’s also a photo of a blown halogen bulb filament.


Here’s the final illustrator file. You’ll have to do the kerf compensation for your laser. Also you’ll have to adjust the lens hole to fit your lens. I cut a series of holes in the scrap parts of the 1/8″ sheet until I got a good match. Remember this design sized for an iPhone 4. I used 4″ carriage bolts just like in the instructable. If you make one of these, send me a picture!
