
 The other day my son Pioneer brought home a paper lantern from preschool. Around that time we also got some pastries in an interesting paper to-go box that had four sides and folded up into a nice curved shape. That got me thinking that I hadn’t done any paper projects in a very long time.
As a kid I had access to a few super useful project resources. There was scrap wood out in the shop, the pile of used twine loops in the neighbors barn, and a drawer that had a never ending supply of 8.5″x11″ paper. These were great resources because they could be used on a whim to make anything I wanted. I once even tried to stretch a piece of paper around the outside of the house buy cutting it into a very thin spiral strip. I only made it about 2/3 of the way. Paper cranes, paper palm trees, expanded paper mesh, paper chains, paper, paper, paper. It wasn’t until much later in life that I realized our miraculous bottomless “drawer of paper” was closely tied to the fact that that my dad was a high school teacher.
So early on I did a lot of paper projects. In high school I got into origami, and did a lot of book driven Origami projects. Probably the best book I built out of was John Montroll’s Animal Origami for the Enthusiast. Then my work with paper more or less ceased for a long long time. So suddenly seeing Pioneer making a paper lantern made me think back to all my early paper cutting/gluing days, and I realize that the laser cutter at TechShop would be an incredible paper cutting tool. I resolved to make some paper lanterns for my mom’s up coming birthday.
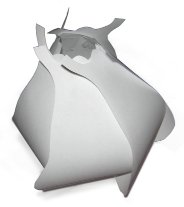
The first prototypes with a few sheets of legal paper and some scissors.
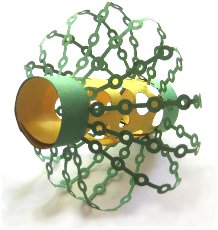 I initially thought I’d make a lantern a bit like the one Pioneer had made, but with much more detailed cut outs. I produced a few little prototypes out of construction paper. I didn’t get a picture of the better lighting bolt themed one, but I did take a picture of this green and yellow one, but wasn’t satisfied with the way they looked kind of spindly. So I thought maybe I’d make a more enclosed lantern a bit like the to-go box I’d seen, but with nice patterns formed by using two layers of paper with the pattern only cut into one of them. I experimented with various patterns, and also started looking for the right overall shape. With paper, scissors and tape I made a number of 4 sided prototypes, and then a 6 sided one. That seemed more pleasing, and I second 6 sided one that I eventually went with.
It’s a joy to do prototyping with paper. Want symmetry? Just fold it over before cutting. Want three exact copies? Just stack the paper up before cutting it out. Wrong position? Unstick the tape and try again. You can try out a lot of major design changes in a twinkling.
 I knew I didn’t want to deal with actual candles, and thought LED candles would be excellent replacements, without the risk of fire and design constraints that would impose. I found Pier 1 Imports selling 4 small LED Candles for $5, so that’s what I went with. When folding up the various paper lantern shapes I realized it was important to do that with a light inside the paper so you could see the patterns that the paper overlaps where forming. I eventually made a prototype where the overlaps formed a flower, but because I was later constrained to some fairly opaque paper for the colored layer of my lantern I didn’t take that prototype any further.
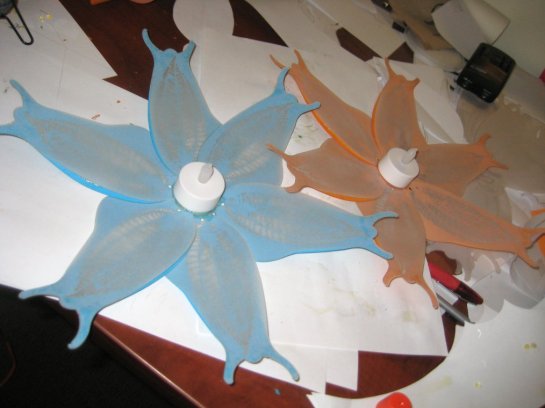
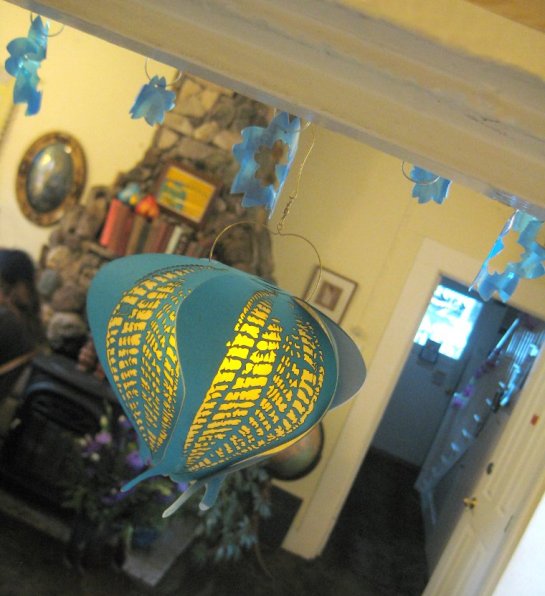
I did however decide on some nice flared fins on the outer edges both because they looked nice, and because I was starting to have fantasies about the lanterns spinning in the breeze.
Paper paper who’s got the paper?
I went to the local art store and found nice colored paper, but it was all very opaque. Not ideal for fairly dim LED Candles. I looked a bit on-line, but it’s nigh impossible to determine a papers opacity from a web page. The only paper listing opacity was Shoji paper (used for Japanese screens) but it didn’t seem to be available in bright colors. So eventually I just went with the art store paper even though it meant that the lanterns weren’t going to be as bright as I’d hoped. I did buy vellum for the inner layer of paper to at least maximize the amount of light getting out though that part of the lamp.
Multi Colored Laser Cut Confetti.
 Time was running out, so I did a quick pattern design based on a leaf, and thought I’d get cutting/gluing in no time. However I ran into a problem. The super detailed pattern took about 30 mins on the laser at it’s highest speed. (Enough pieces for two lamps) I thought I could avoid this bottle neck by stacking up a bunch of paper and cutting it all at the same time. However the massive amount of air flow in the laser chamber and the direct stream of compressed air at the cutting point made it so the paper would not all lay perfectly stacked up, they’d puff apart and chads would fly, and all this mayhem made it ineffective at cutting more then two sheets at a time. I ruined 3 extra sheets of paper on that first run because the lower sheets were somewhat cut, but not well enough cut that the chads would drop out. It was horribly time consuming to try and hand poke/trim out all these suck pieces, and so I decided I really could only cut two sheets at a time.
I had to reserve the laser for extra time to try and make up the difference. I’d originally wanted to do 20 lanterns, but only ended up making 14 because of these problems.
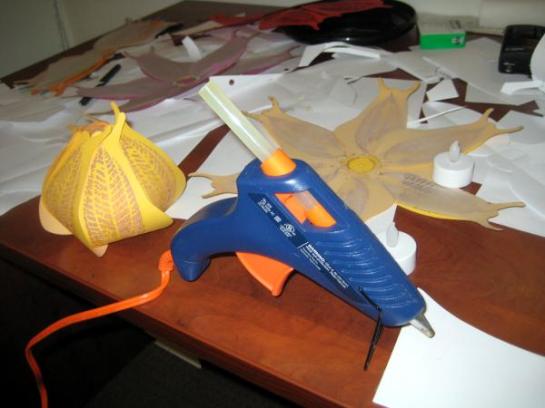
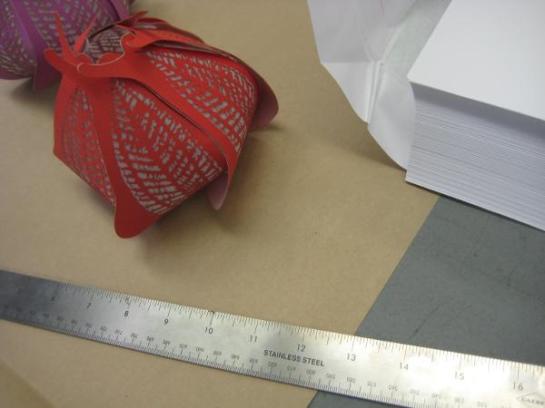
Two kinds of paper and three kinds of glue.
 Then I had to assemble things things. For each lantern there were 6 pieces. Three patterned colored outer pieces and three vellum inner pieces. I used a glue stick to attach the inner and outer pieces together in pairs (only gluing at the top/bottom). I did this because glue stick doesn’t cause the paper to wrinkle/warp the way Elmer’s glue does. Then when I had 3 pairs glued up, I’d glue the base rings of the 3 together with yellow Elmer’s wood glue. (for strength) I’d glue the LED Candle to the center of this stack with hot glue. (Quick, and with good gap filling.) Then after that had set up I did the final gluing of the upper sections. (again with Elmer’s) The final glue step was the most painstaking, but not too horrible.
Pivots at the last possible moment.
My friend Ken pointed out that the lamps would look nice either sitting up, or hanging upside down. And with them up-side down they could spin in the breeze. The trouble is that I was having trouble tracking down the fishing line pivots I’d imagined using for this, and I was running out of time. I had struck out at K-Mart. As luck would have it on the 4 hour drive to Cambria (where my mom’s birthday party was going to be) we pulled off the highway to get some coloring books for the kids, and I dashed into a sporting goods store, and finally managed to find the swivels I’d been looking for. I used some chain nose pliers and gold colored wire to bend up nice hangers for the lanterns as we drove down. We arrived in Cambria with the Lanterns done without a moment to spare, but they were totally untested.
Thankfully they spun easily in the light breeze in the yard. Success. *phew*
Here is a video of some of the lanterns spinning in the breeze about half an hour after we got down to Anne’s:
Here are some photos of the process:

And a few photos of the final results:

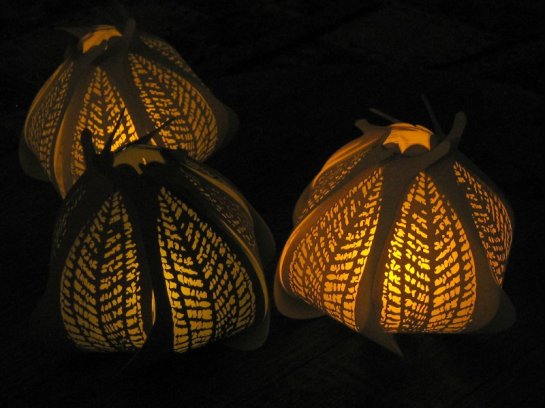
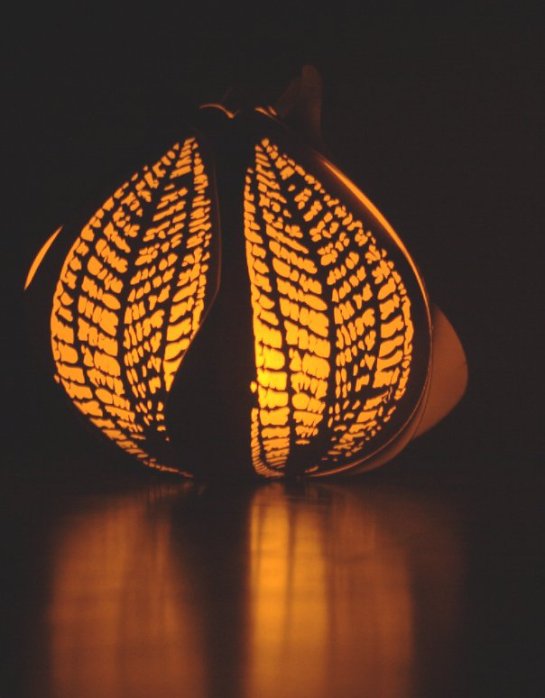
I ended up making quite a few of these lanterns in a short period of time and I was pleased with the results. This last photo isn’t mine, it’s one by Laura Mappin. I have a bunch of other shot-in-the-dark photos, in groups, and not, but this one seems to just have a nice glow. I’ve been toying with building a bigger led lamp based on this design using more powerful leds and and Arduino. My friend Lawrence and I have done some interesting software prototypes for a virtual candle based on info we’ve collected from actual candles. Hopefully I’ll get around to writing that up some day.
The original page in the Internet Archive.
